Beyond the Soak: A Professional Guide to Showerhead Longevity
As a Red Seal carpenter, I’ve spent my career looking at what’s behind the walls and under the finish. I’ve seen $500 rain showerheads tossed in the trash simply because the owner didn't know how to maintain the "guts" of the fixture. For a father of four, the shower isn't just a place to get clean, it's a high-use piece of infrastructure that needs to stand up to constant daily wear.
We’ve already covered the basics of how to clean your showerhead using the vinegar soak method. But a deep clean is only half the battle. If you want your bathroom fixtures to last a decade instead of a couple of years, you need to understand the mechanical side of things: the seals, the internal filters, and the friction points.
In this guide, we’re looking at showerhead health from a builder's perspective, helping you troubleshoot leaks, manage water pressure, and decide when a repair is worth it and when it’s time for a full replacement.

1. The "O-Ring" Check: Stopping the Silent Leak
Most people assume a dripping showerhead means the internal mechanism is broken. From my experience on job sites, 90% of the time, the culprit is a $1 rubber O-ring or washer that has simply become brittle over time.
If you see water spraying out of the connection point at the shower arm, it's a seal failure, not a clog.
The Pro Fix: Unscrew the head and inspect the rubber ring. If it’s flat, cracked, or hard, swap it out.
The Result: Preventing this leak protects your bathroom from the moisture issues we covered in Drying Out Your Bathroom: The Post-Soak Protocol.
2. When the Pivot Ball Gets "Sticky"
High-quality showerheads feature a pivot ball that allows you to adjust the angle of the spray. Over time, mineral deposits can seize this joint, making it hard to move or causing it to "squeal" when you adjust it.
While a surface clean helps the nozzles, it rarely reaches the interior pivot. Applying a small amount of waterproof silicone plumber's grease to the ball joint once a year can prevent mechanical wear. This is a common trade trick to keep moving parts smooth, much like how we maintain the moving parts of a vibrating bathroom fan.
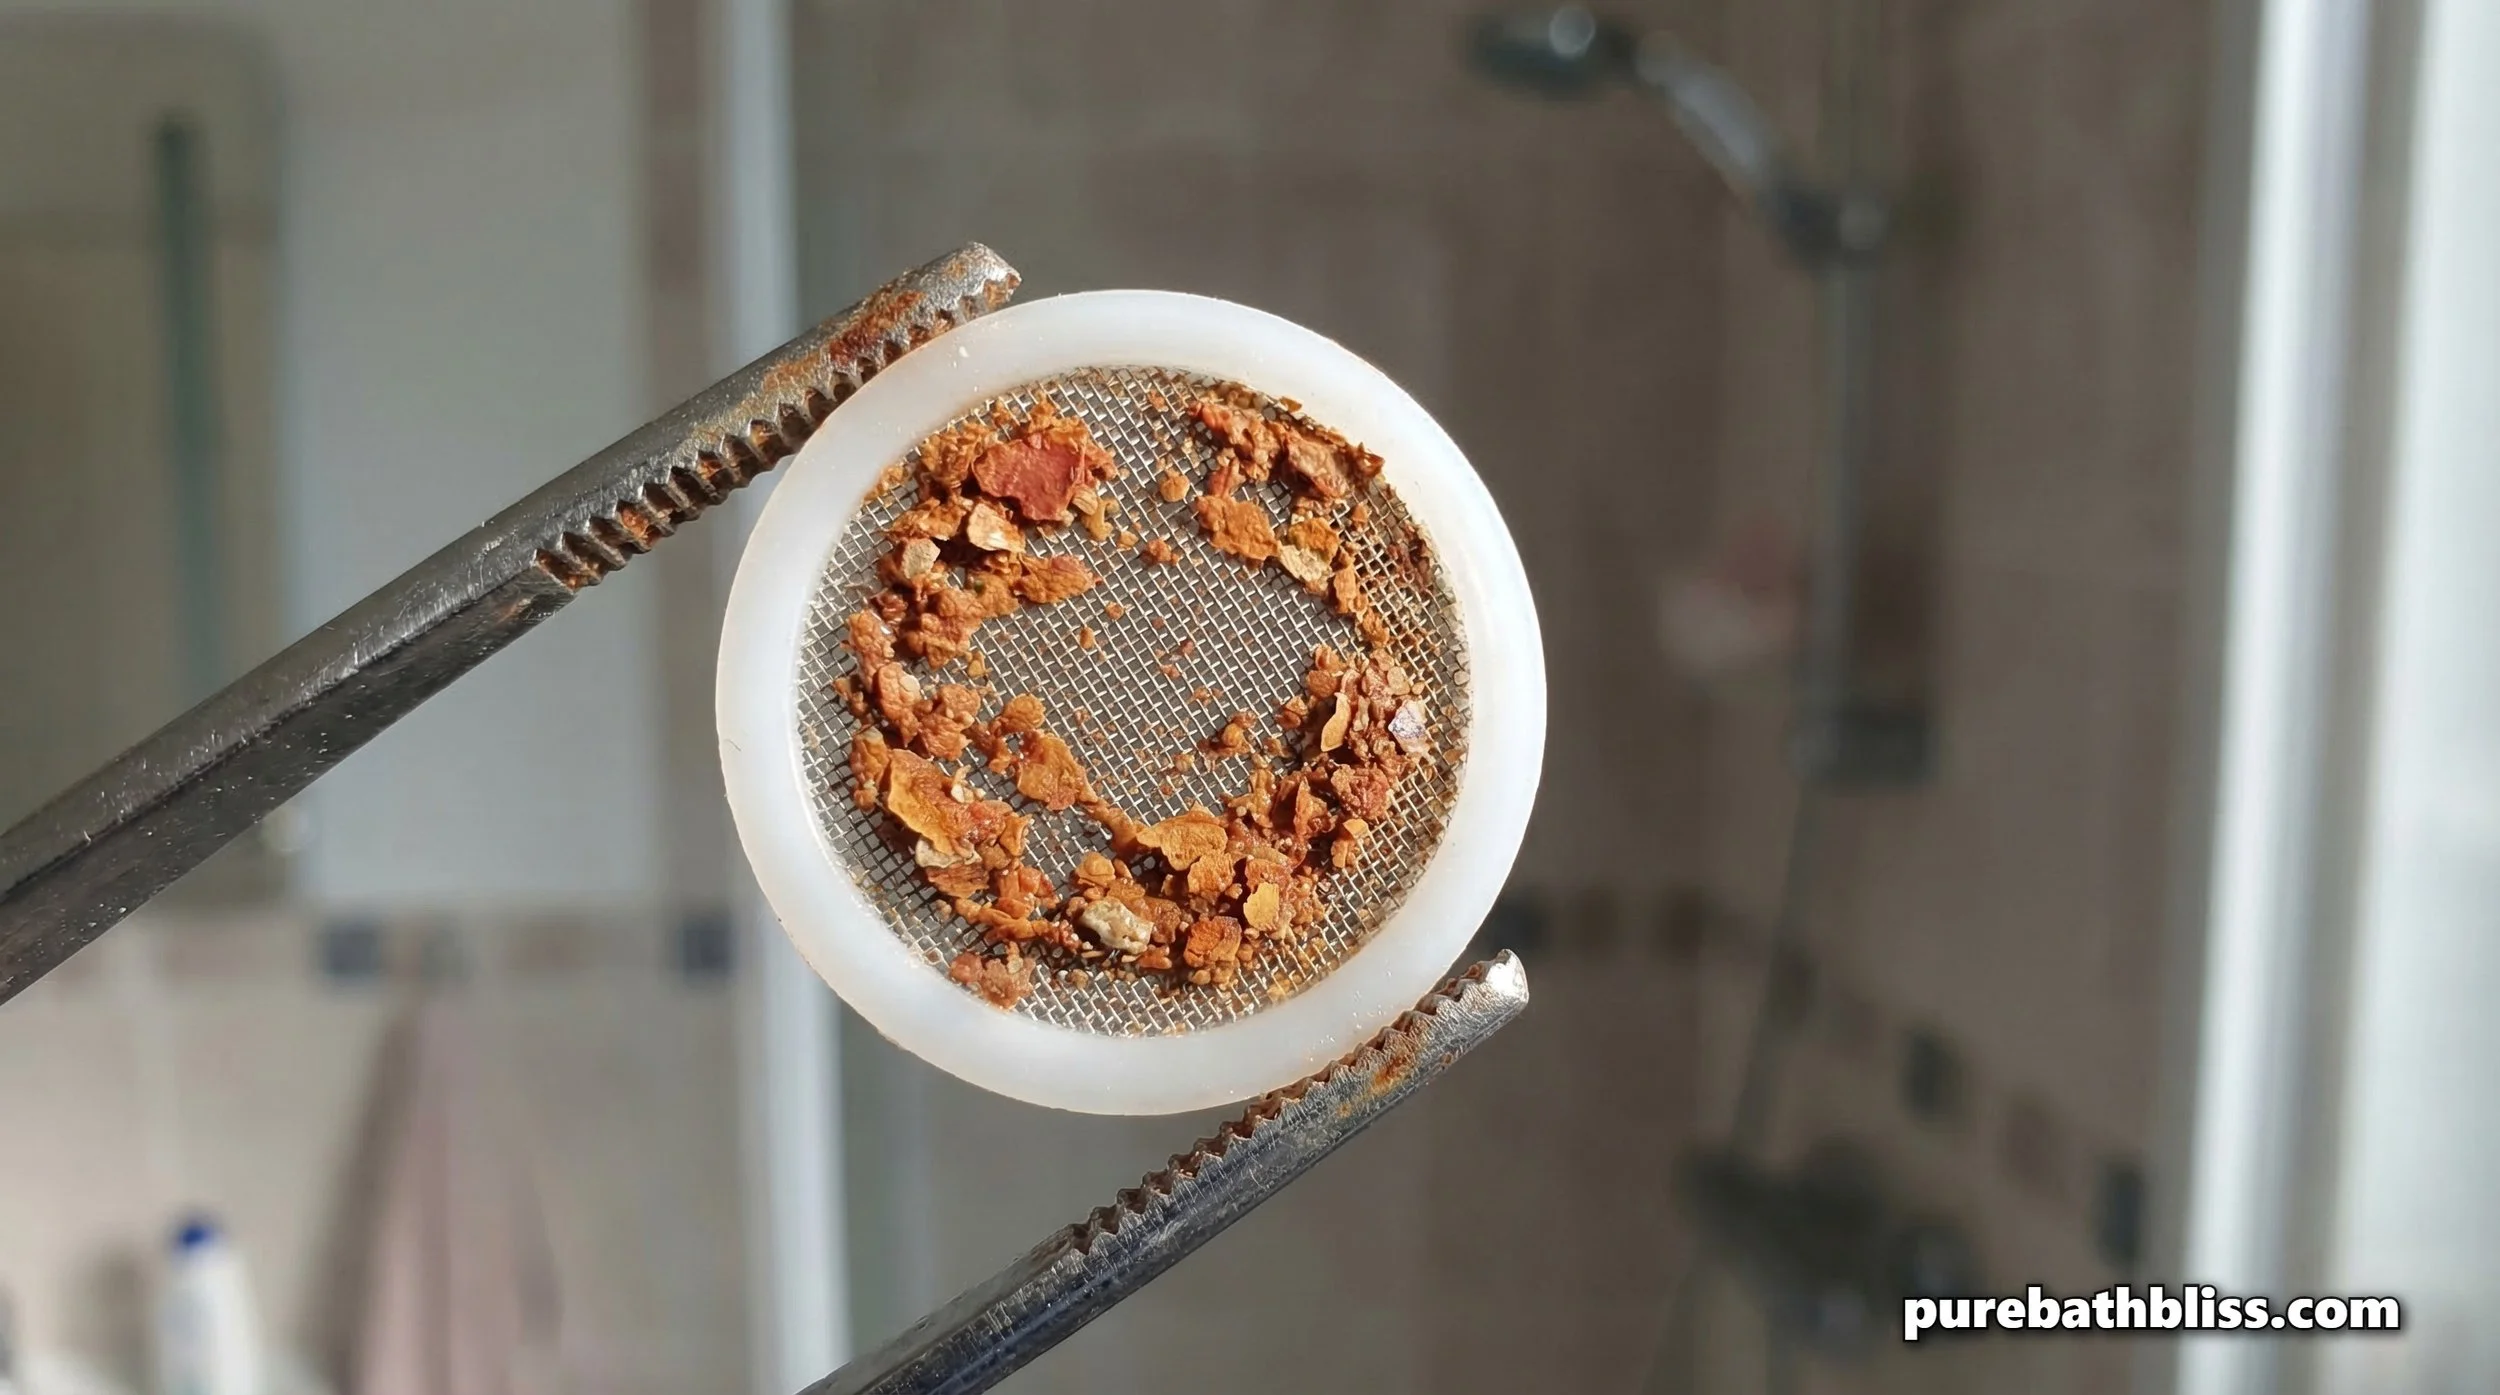
3. The "Internal Filter" Trap
Most modern, eco-friendly showerheads have a tiny mesh screen hidden inside the neck to catch grit and rust. If you live in an area with old pipes, this screen can fill up with "pipe scale" in months.
The Check: If your water pressure is low but the nozzles look clean, unscrew the head and look into the neck.
The Fix: Use a pair of tweezers to pull out the screen and rinse it under a different faucet.
Why it matters: This ensures your clean water isn't passing through a bed of sediment before it hits your skin, a vital step if you're aiming for a non-toxic bathroom.
4. Pressure vs. Volume: Troubleshooting the Valve
When my kids complain that the "shower isn't strong enough," my first instinct isn't to buy a new showerhead. Often, the issue is the Pressure Balancing Valve behind the wall.
If you notice your water pressure drops significantly when someone flushes a toilet or runs the laundry, the showerhead is just the messenger. This is a distinction I often make as a carpenter: is the problem the fixture or the infrastructure? If the pressure is low at every tap, you likely have a failing pressure regulator or a municipal issue, which we touched on in our guide on why bath towels take forever to dry (low pressure means less efficient rinsing).
5. When to Call it Quits: Signs for Replacement
Even with the best care, a showerhead eventually reaches its end-of-life. Here are the "Red Seal" signs that it’s time to stop repairing and start replacing:
Pitting and Corrosion: If the metal housing is starting to "pit" or show green corrosion that eats into the finish.
Cracked Housing: Plastic showerheads can develop hairline fractures that lead to massive pressure loss.
Mechanical Rattle: If you shake the head and it sounds like there are loose parts inside, the internal baffles have failed.
Visible Mold: If pink slime bacteria has moved inside the head where you can't reach it, it's safer for your family's health to replace it.
Summary: The Maintenance Schedule
Monthly: Give the silicone nozzles a quick "thumb rub" to dislodge minerals.
Yearly: Unscrew the head to check the filter screen and O-ring.
Post-Shower: Always run your fan to keep the exterior metal dry and prevent corrosion.
By treating your showerhead as a piece of mechanical infrastructure rather than a disposable plastic toy, you’ll save money, reduce waste, and ensure your morning "ritual" stays perfect.