How to Clean Your Showerhead: The Non-Toxic Vinegar and Peroxide Method That Actually Restores Pressure
Originally published Oct 11, 2025 · Updated July 22, 2026
Transparency Note: We independently select these products based on research and user reviews. If you buy something through our links, we may earn a commission.
Most showerhead pressure problems are not pressure problems. They are mineral buildup problems, and the distinction matters because the solutions are completely different. Calling a plumber about weak shower pressure when the actual cause is calcium deposits blocking eight of your twelve nozzles is an expensive way to avoid a thirty-minute cleaning job with white vinegar.
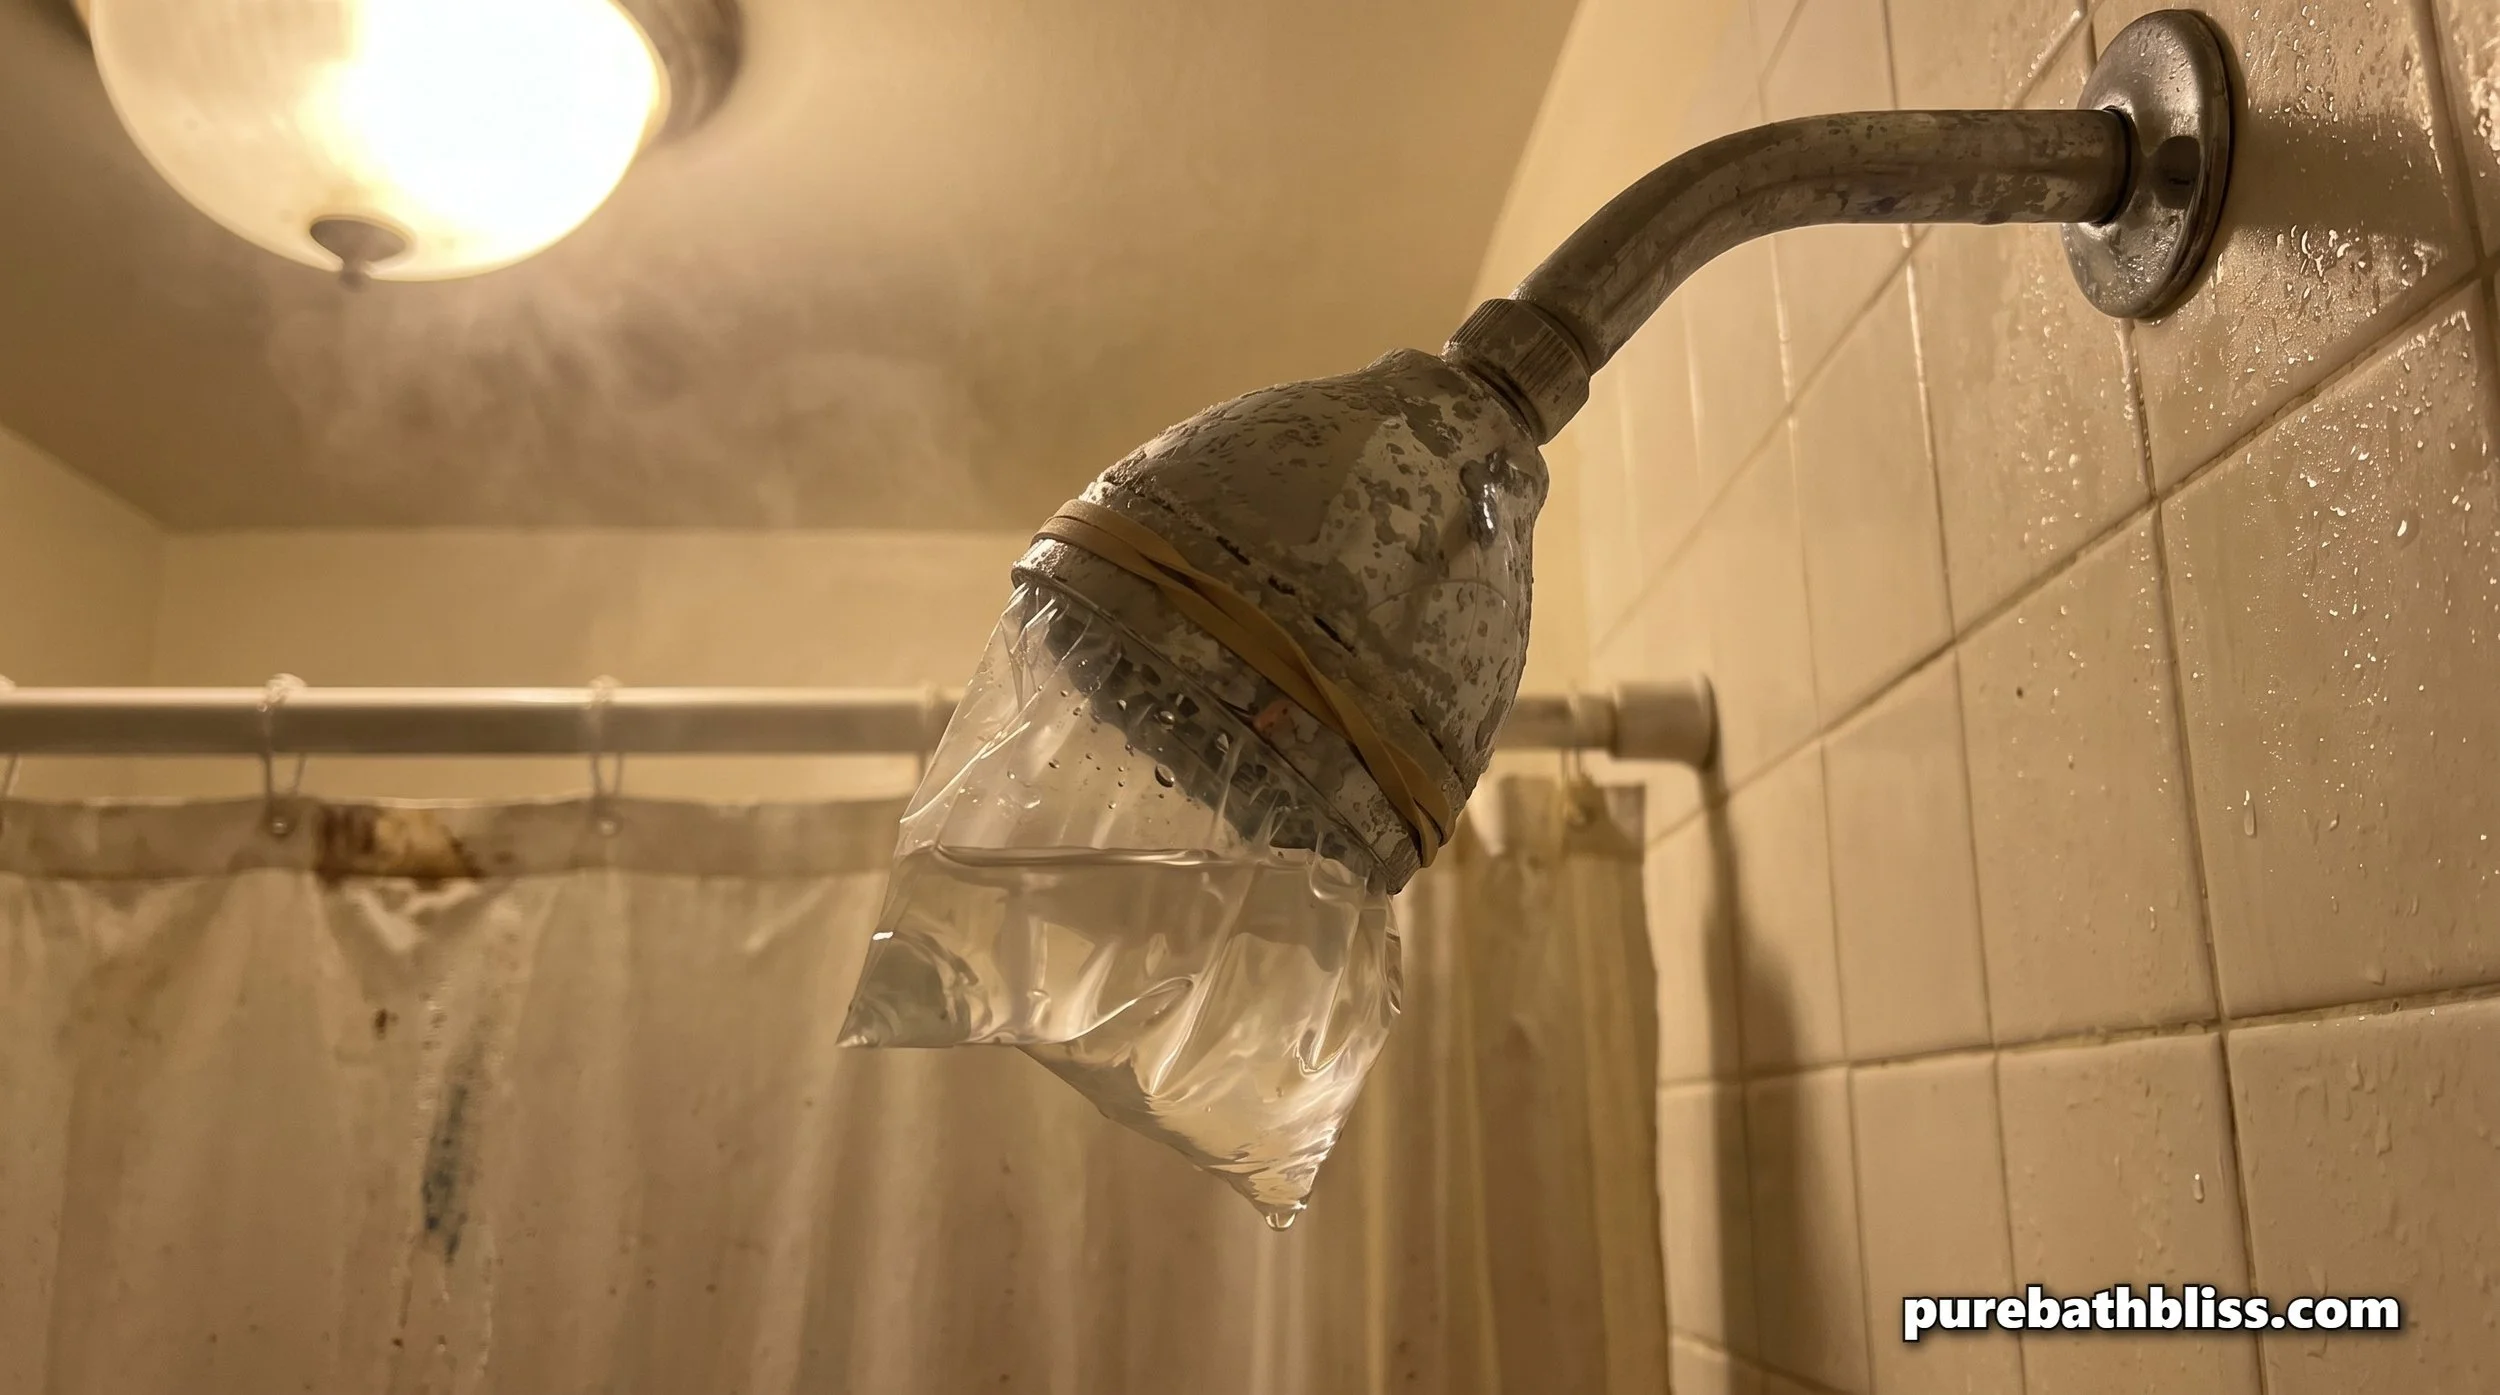
I keep my own showerheads running at full capacity without a single chemical cleaner, without removing the head from the wall in most cases, and without any tools beyond a rubber band and a zip-lock bag. The method works on any finish and any showerhead type, with one specific timing adjustment for brushed nickel and gold fixtures that most cleaning guides do not mention and that will save you from etching an expensive finish with acid.
There is also a second problem in most uncleaned showerheads that gets much less attention than limescale: bacteria. Specifically Serratia marcescens, which is the pink or red slime that appears around nozzles and drain edges, and Legionella, the bacterium responsible for Legionnaires disease, which the New Jersey Department of Health explicitly identifies as a showerhead cleaning concern in its official guidance. These require a different treatment from the vinegar descaling method and a different cleaning frequency. Here is the complete approach covering both.
Why Showerheads Get Clogged and Why It Matters
Hard water contains dissolved calcium and magnesium ions that are invisible in the water but become visible when the water evaporates. Every time your shower runs, water passes through the nozzles, some evaporates on the showerhead surface, and the mineral ions that were dissolved in that water are left behind as a crystalline deposit, limescale or calcium carbonate. Over months and years these deposits accumulate inside and around the nozzles, progressively narrowing the openings and causing the spray pattern distortion and pressure reduction that most people attribute to a plumbing problem.
The scale of the problem depends almost entirely on water hardness. According to the US Geological Survey, approximately 85 percent of American homes have hard to very hard water. In hard water areas, meaningful nozzle restriction can develop within three to six months of installation without any cleaning. In very hard water areas it can develop within weeks. Our guide to restoring bathroom faucet pressure covers the same mineral buildup mechanism in aerators, which accumulate deposits by exactly the same process as showerhead nozzles.
The bacteria problem is separate and less widely understood. The warm, intermittently wet interior of a showerhead is an excellent environment for biofilm formation, a thin layer of microorganisms embedded in a self-produced matrix that adheres to surfaces and is significantly harder to remove than planktonic (free-floating) bacteria. The World Health Organization identifies biofilm in household water systems as a concern for water quality and hygiene. The specific organisms of concern in a residential showerhead are Serratia marcescens, which produces the pink or reddish slime visible around nozzles and drain edges, and Legionella pneumophila, which thrives in warm water between 20 and 45 degrees Celsius and causes Legionnaires disease, a serious form of pneumonia, when aerosolized water containing the bacteria is inhaled during showering.
Method 1: The Vinegar Soak (Descaling)
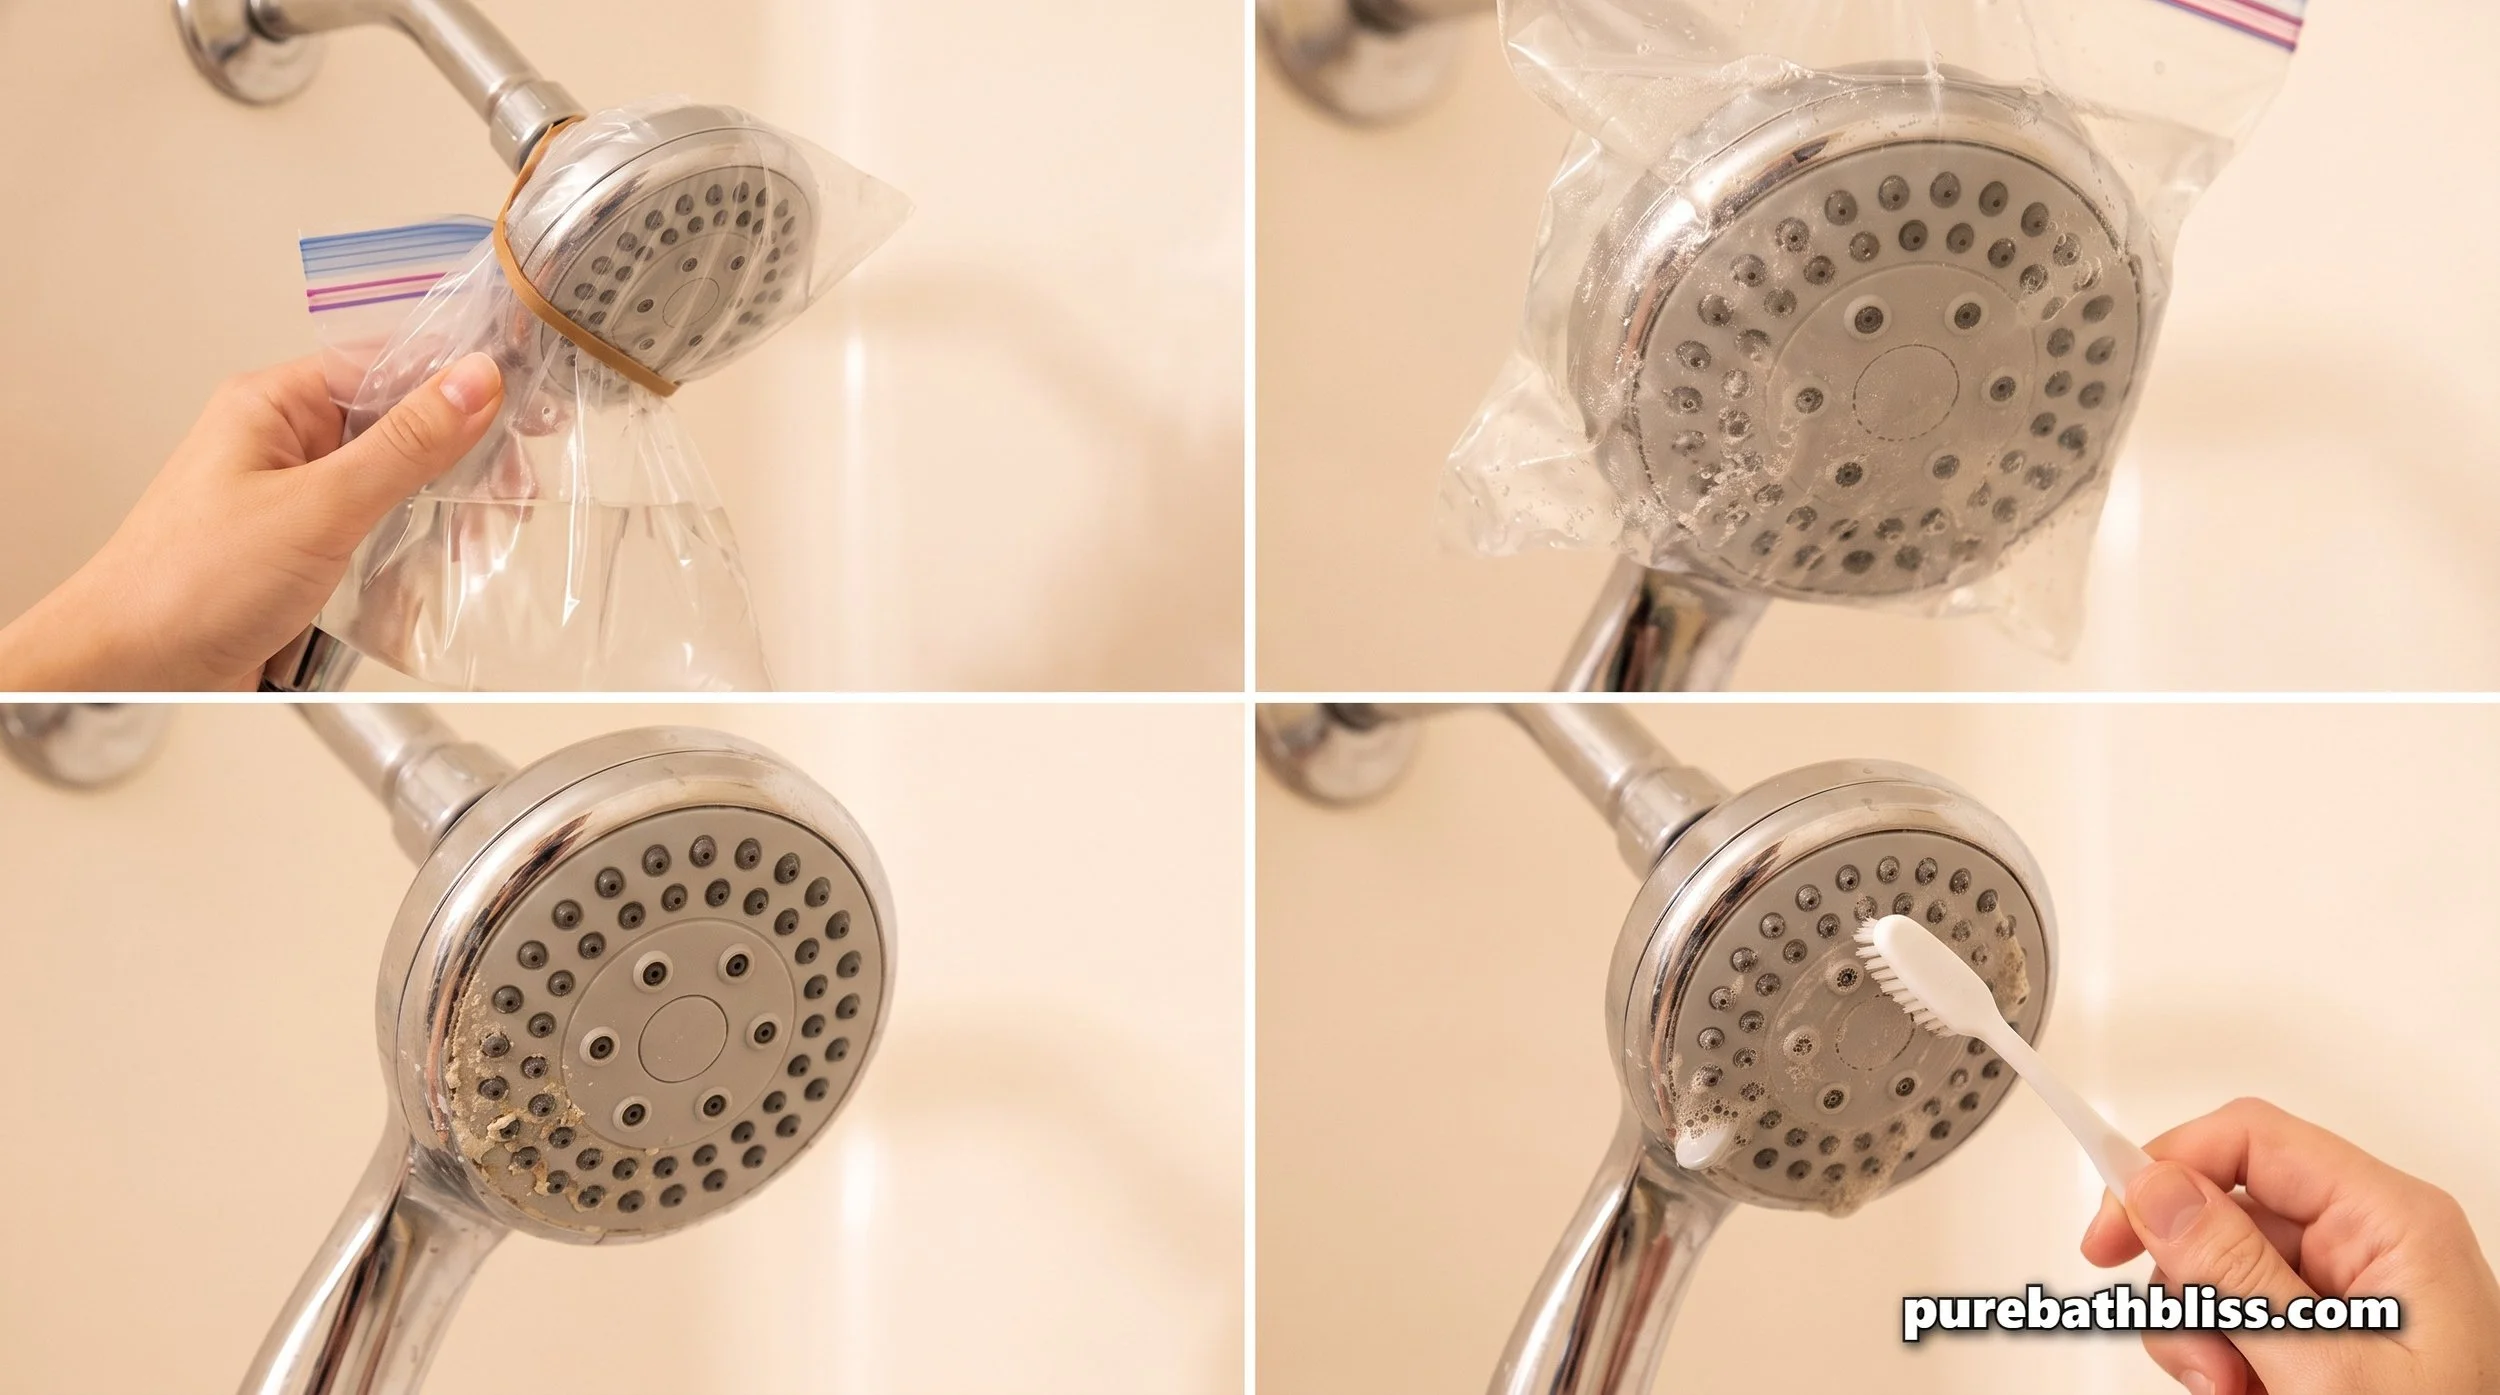
White vinegar is a 5 percent acetic acid solution and acetic acid dissolves calcium carbonate, which is what limescale is made of. The chemistry is straightforward and the effectiveness is genuine. What makes the bag method specifically useful is that it allows the acid to stay in contact with the nozzle surface long enough to dissolve deposits without requiring you to remove the showerhead from the wall.
What You Need
One gallon-size zip-lock bag or a heavy-duty sandwich bag
White distilled vinegar, enough to fill the bag to the level of the showerhead nozzles when secured
Two rubber bands or a zip tie to secure the bag
An old toothbrush for post-soak scrubbing
The Method
Fill the bag with enough white vinegar to fully submerge the nozzle face of the showerhead when the bag is secured around the neck.
Position the bag so the entire nozzle face is submerged, with no nozzles above the vinegar surface. Secure the bag around the shower arm with rubber bands above and below the connection point so it does not slip.
Leave to soak for the appropriate time based on your finish. See the finish timing guide below.
Remove the bag and immediately run the shower on hot for two to three minutes to flush loosened deposits out through the nozzles. You will often see small white or brown particles in the water during this flush, which is the dissolved scale being expelled.
Use an old toothbrush to scrub the nozzle face in circular motions while the water is still running. This removes any remaining surface deposits that the soak loosened but did not fully dissolve.
For silicone nozzles specifically, press each nozzle with your thumb while the water is running. The flexible silicone allows any deposits remaining in or around the nozzle opening to be mechanically dislodged. This is the thumb flick technique that is the most effective maintenance habit available for modern showerheads with silicone nozzles.
The Critical Finish Timing Rule
This is the detail most cleaning guides do not include and the one that prevents people from accidentally damaging an expensive fixture. Acetic acid dissolves calcium carbonate very effectively but it also attacks certain metallic finishes when the contact time is too long. Chrome and stainless steel tolerate extended vinegar contact without damage. Brushed nickel, matte black, oil-rubbed bronze, and gold or brass finishes can be etched or discolored by extended acid contact, particularly if the protective lacquer has any micro-scratches. The safe maximum for these finishes is 20 to 30 minutes. For chrome and stainless, one to four hours is appropriate for heavy buildup. Overnight soaking should be reserved for removed showerheads in chrome or stainless only.
| Finish Type | Maximum Soak Time | Notes |
|---|---|---|
| Chrome or stainless steel | 1 to 4 hours, or overnight for heavy buildup if removed from wall | Most resistant to vinegar acid. Full-strength white vinegar appropriate. |
| Brushed nickel | 20 to 30 minutes maximum | Dilute vinegar 50/50 with water for additional protection. Check at 20 minutes. |
| Matte black | 15 to 20 minutes maximum | Dilute vinegar 50/50 with water. Matte finishes are more porous and acid-sensitive than polished finishes. |
| Oil-rubbed bronze | 15 minutes maximum | Dilute vinegar 50/50 with water. The living finish of oil-rubbed bronze is particularly susceptible to acid etching. |
| Gold or polished brass | 10 to 15 minutes maximum | Dilute vinegar 50/50 with water. Gold finishes are the most acid-sensitive. Use a vinegar-dampened cloth wrapped around the face rather than full submersion. |
| Polished nickel | 20 to 30 minutes maximum | Similar sensitivity to brushed nickel. Dilute 50/50 and monitor. |
Method 2: The Hydrogen Peroxide Disinfection
Vinegar descales mineral deposits but does not reliably kill bacteria. The acetic acid in vinegar has some antimicrobial properties but is not an EPA-registered disinfectant and should not be relied upon for biofilm elimination in a showerhead that shows signs of bacterial growth. For the pink or reddish slime that indicates Serratia marcescens, or for any household with immunocompromised members where Legionella prevention is a genuine concern, hydrogen peroxide is the appropriate follow-up treatment after the vinegar descaling step.
3 percent hydrogen peroxide is an EPA-registered disinfectant that breaks down into water and oxygen after use, leaving no chemical residue and no synthetic compounds in the water stream. It is the non-toxic disinfection option that most cleaning guides overlook in favor of bleach, which is considerably harsher, leaves chemical residue, and is inappropriate for regular bathroom maintenance use in an enclosed space.
The Method
Complete the vinegar descaling step first. Removing the mineral deposits that biofilm can shelter behind makes the disinfection significantly more effective.
Attach a spray nozzle directly to the 3 percent hydrogen peroxide bottle, or decant into a spray bottle.
Spray all nozzle surfaces, the face of the showerhead, and the neck area thoroughly. Ensure all surfaces are visibly wet with peroxide.
Leave for 15 minutes without rinsing. You may see mild fizzing where the peroxide contacts organic material. This is the oxidation reaction working.
Run the shower on the hottest setting for two minutes to flush the peroxide through the nozzles and purge the internal water chamber. The heat helps kill any bacteria remaining inside the head.
The Legionella hot flush. For households with any immunocompromised members, elderly residents, or where the shower has not been used for a week or more, the New Jersey Department of Health guidance recommends running water through the showerhead for at least two minutes at the hottest available temperature before use. Legionella does not survive above 60 degrees Celsius and the hot flush is the most effective single step for eliminating it from a residential showerhead. In a household with a water heater set above 60 degrees, two minutes of hot water running through the head is sufficient. In a home with a thermostatic mixing valve limiting maximum shower temperature to 50 degrees or below, the hot flush is less effective and more frequent peroxide disinfection is the appropriate compensation.
Our sister site Pure Kitchen Bliss covers the broader uses of citric acid and vinegar around the home, including descaling appliances using the same acid chemistry that works on showerhead mineral deposits. The same principles apply across any surface with limescale buildup.
Method 3: The Precision Detail (Stubborn Nozzles)
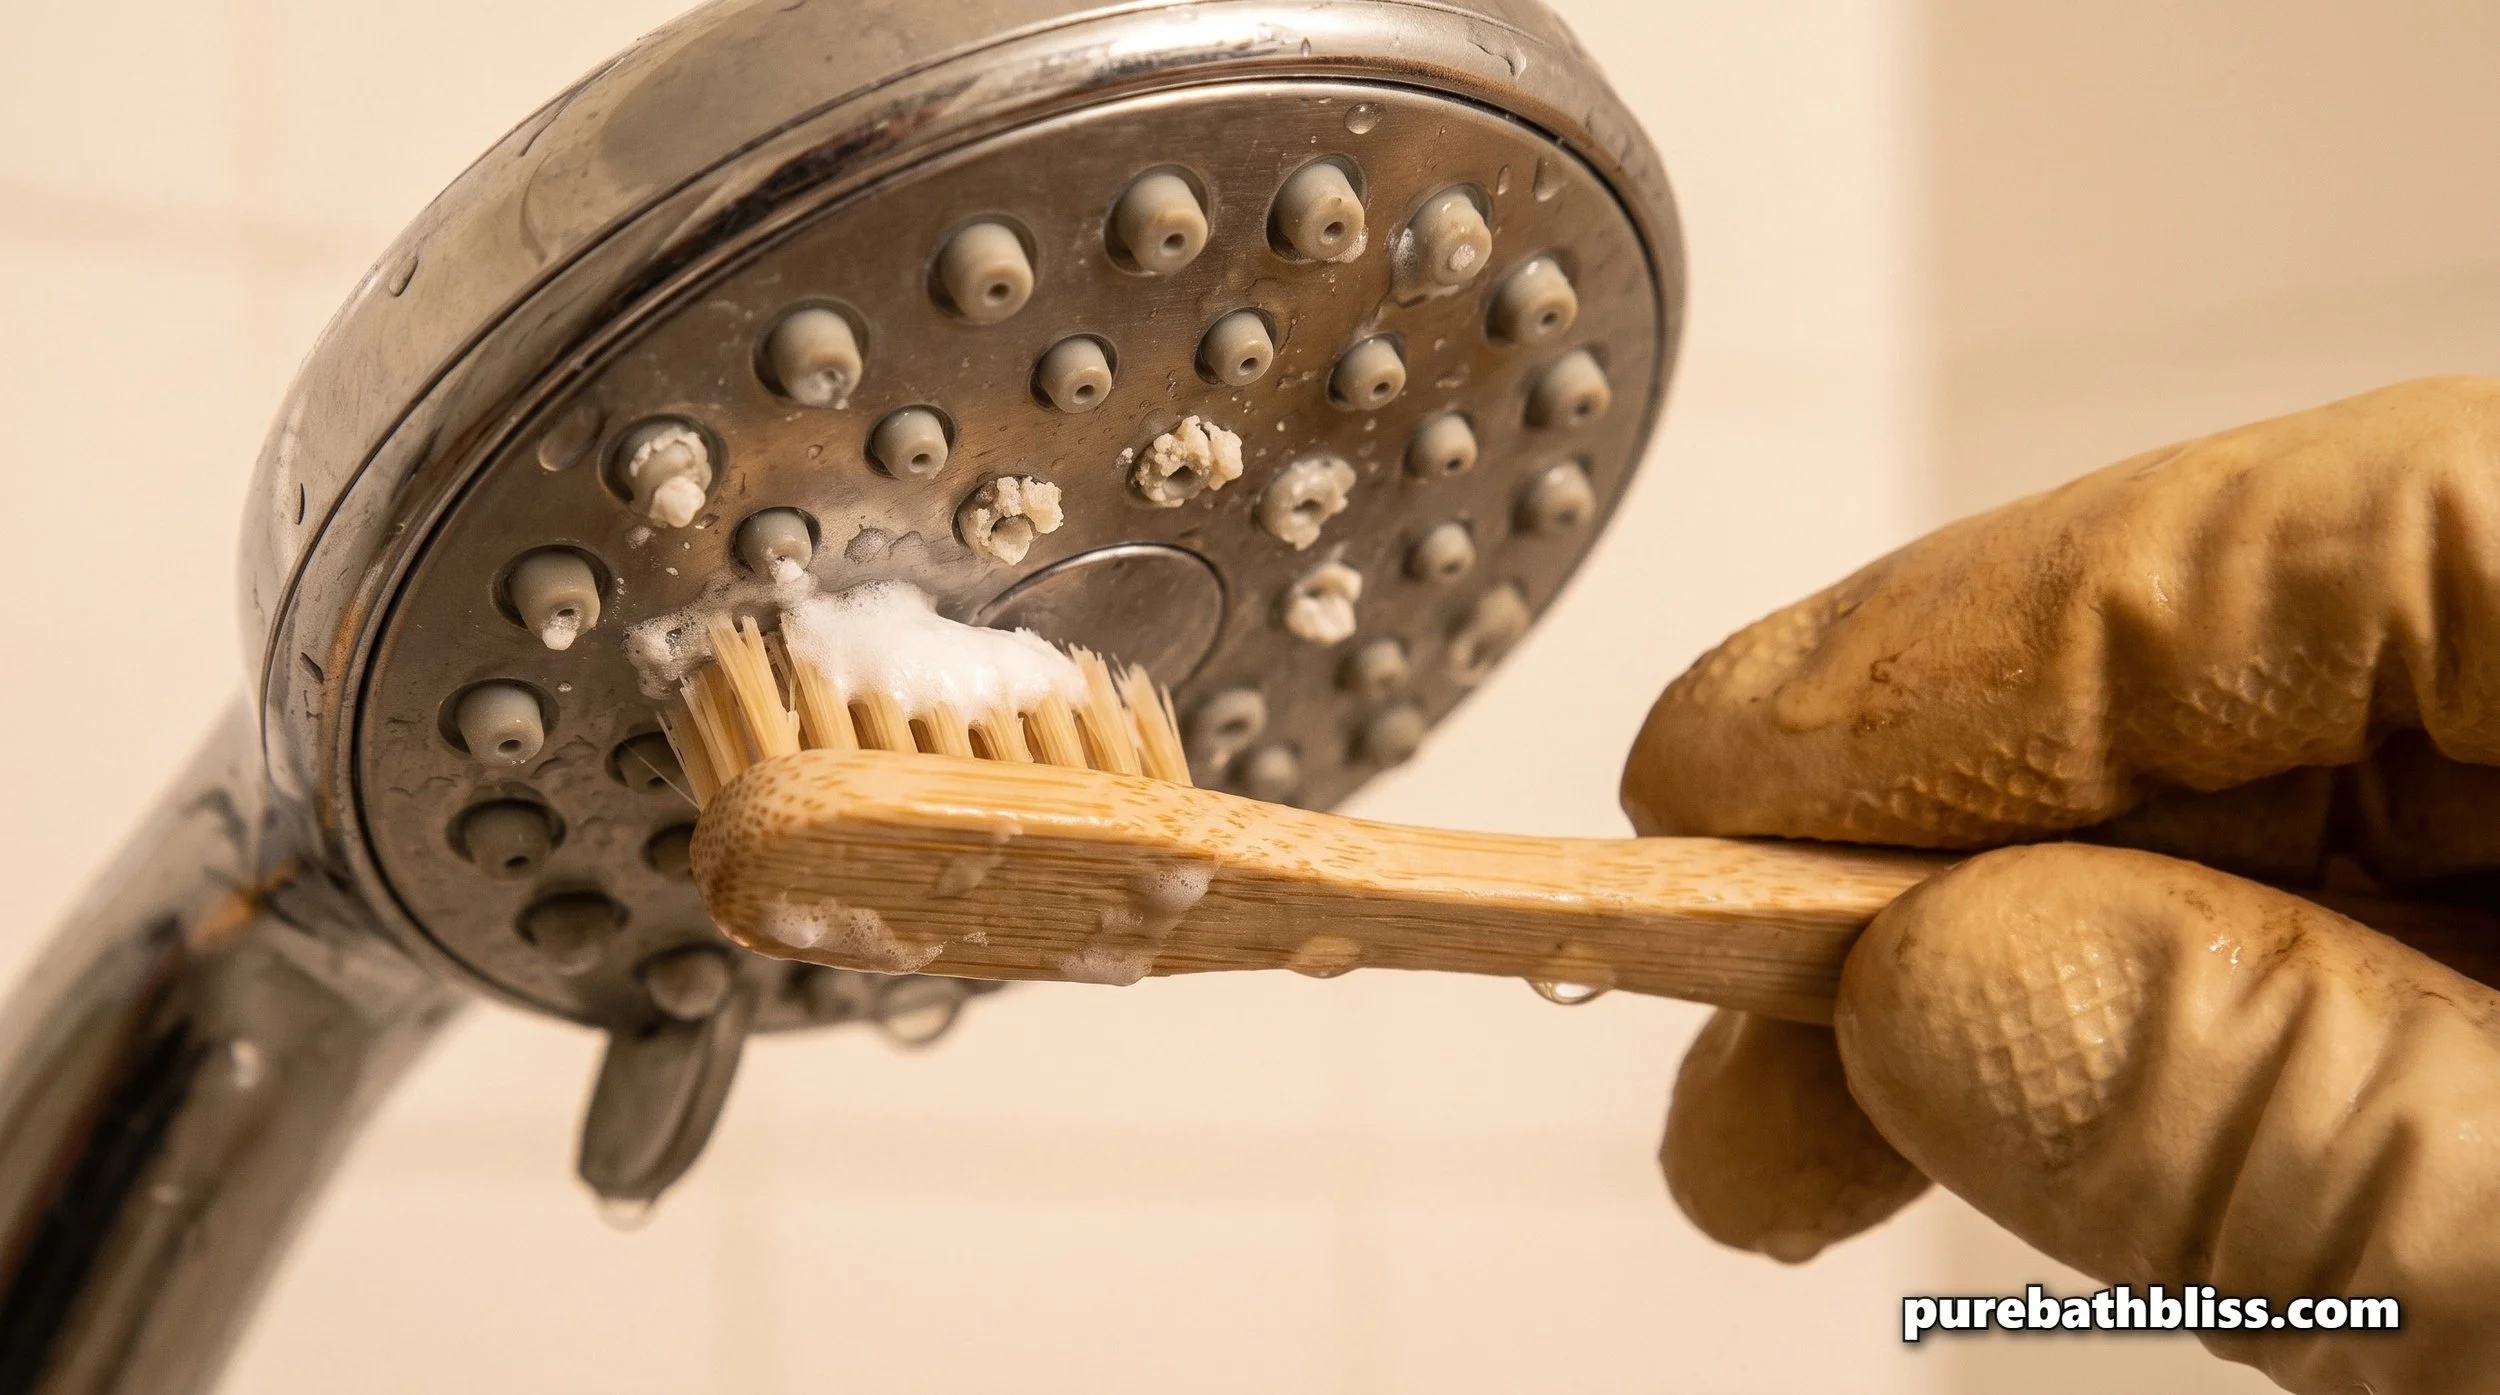
After a vinegar soak and a hot water flush, the vast majority of nozzles will be clear. Occasionally one or two rogue nozzles remain partially blocked with a particularly stubborn piece of calcium that the soak softened but did not fully dissolve. These respond to mechanical action rather than additional soak time.
Make a paste of baking soda and a small amount of water, roughly two parts baking soda to one part water. Apply the paste to the blocked nozzle or nozzles with an old toothbrush and scrub in circular motions. The baking soda provides mild abrasive action without scratching the nozzle surface or finish, and the alkaline pH of the paste reacts with any remaining acid-softened mineral deposit to help lift it. Do not use a needle or pin to poke blocked nozzles. Poking damages the internal coating of rigid nozzles and creates rough surfaces that attract future mineral deposits faster than a smooth nozzle surface.
For silicone nozzles, the baking soda paste method is unnecessary. The thumb-press technique while water is running is both more effective and gentler on the flexible nozzle material. Apply firm thumb pressure to each blocked silicone nozzle while the shower is running and the water pressure behind it does the work of expelling the loosened deposit.
The Shower Filter: Prevention Rather Than Cure
If you are cleaning your showerhead more than once a month, your water hardness is the underlying problem and cleaning is treating the symptom rather than the cause. A shower filter installed between the shower arm and the showerhead reduces the mineral content of the water before it reaches the nozzles, which reduces limescale accumulation by 60 to 80 percent depending on filter quality and water hardness level.
The AquaBliss High Output Shower Filter is the model I recommend most consistently because it addresses both the mineral and chlorine content of the water, installs in under five minutes with no tools, and does not reduce water pressure. Chlorine in shower water becomes a steam inhalation concern in an enclosed shower, and the same filter that reduces mineral buildup for nozzle protection also removes a meaningful proportion of the chlorine that would otherwise be aerosolized during a hot shower. For hard water households, a shower filter produces a longer interval between cleanings, softer-feeling water, and a measurable improvement in both hair and skin condition after switching.
The Maintenance Schedule
| Task | Soft Water Areas | Hard Water Areas | Why |
|---|---|---|---|
| Thumb flick silicone nozzles | Weekly during shower | Every shower | Breaks up mineral deposits before they harden. Takes 10 seconds. |
| Vinegar spray wipe | Monthly | Weekly or fortnightly | Prevents surface mineral buildup from reaching nozzle openings. |
| Full vinegar bag soak | Every 3 to 4 months | Monthly | Dissolves accumulated internal mineral deposits and restores full nozzle opening. |
| Hydrogen peroxide disinfection | Every 3 months | Every 2 months or when pink or black slime appears | Eliminates Serratia and Legionella biofilm. Always follow the vinegar soak, not replace it. |
| Legionella hot flush | After any period of non-use of 1 week or more | After any period of non-use of 1 week or more | Stagnant warm water is the highest-risk condition for Legionella growth. Run hottest water for 2 minutes before using shower after any extended non-use period. |
| Shower filter cartridge replacement | Every 6 months if filter installed | Every 3 to 4 months if filter installed | An expired filter reduces mineral protection and may become a bacterial growth site itself. |
The bathroom ventilation piece matters more than most people realize for showerhead maintenance. A showerhead in a poorly ventilated bathroom that stays damp between showers provides a significantly better environment for bacterial biofilm growth than one in a well-ventilated bathroom that dries out properly between uses. Running the exhaust fan for at least twenty minutes after each shower, as we cover in our bathroom humidity sensor and exhaust fan guide, is one of the most effective passive measures for reducing bacterial growth in the shower zone without any additional cleaning. An exhaust fan with a built-in humidity sensor that automatically runs until the bathroom reaches its pre-shower humidity level is the upgrade that makes this happen without any action required.
Greg's Non-Toxic Cleaning Toolkit
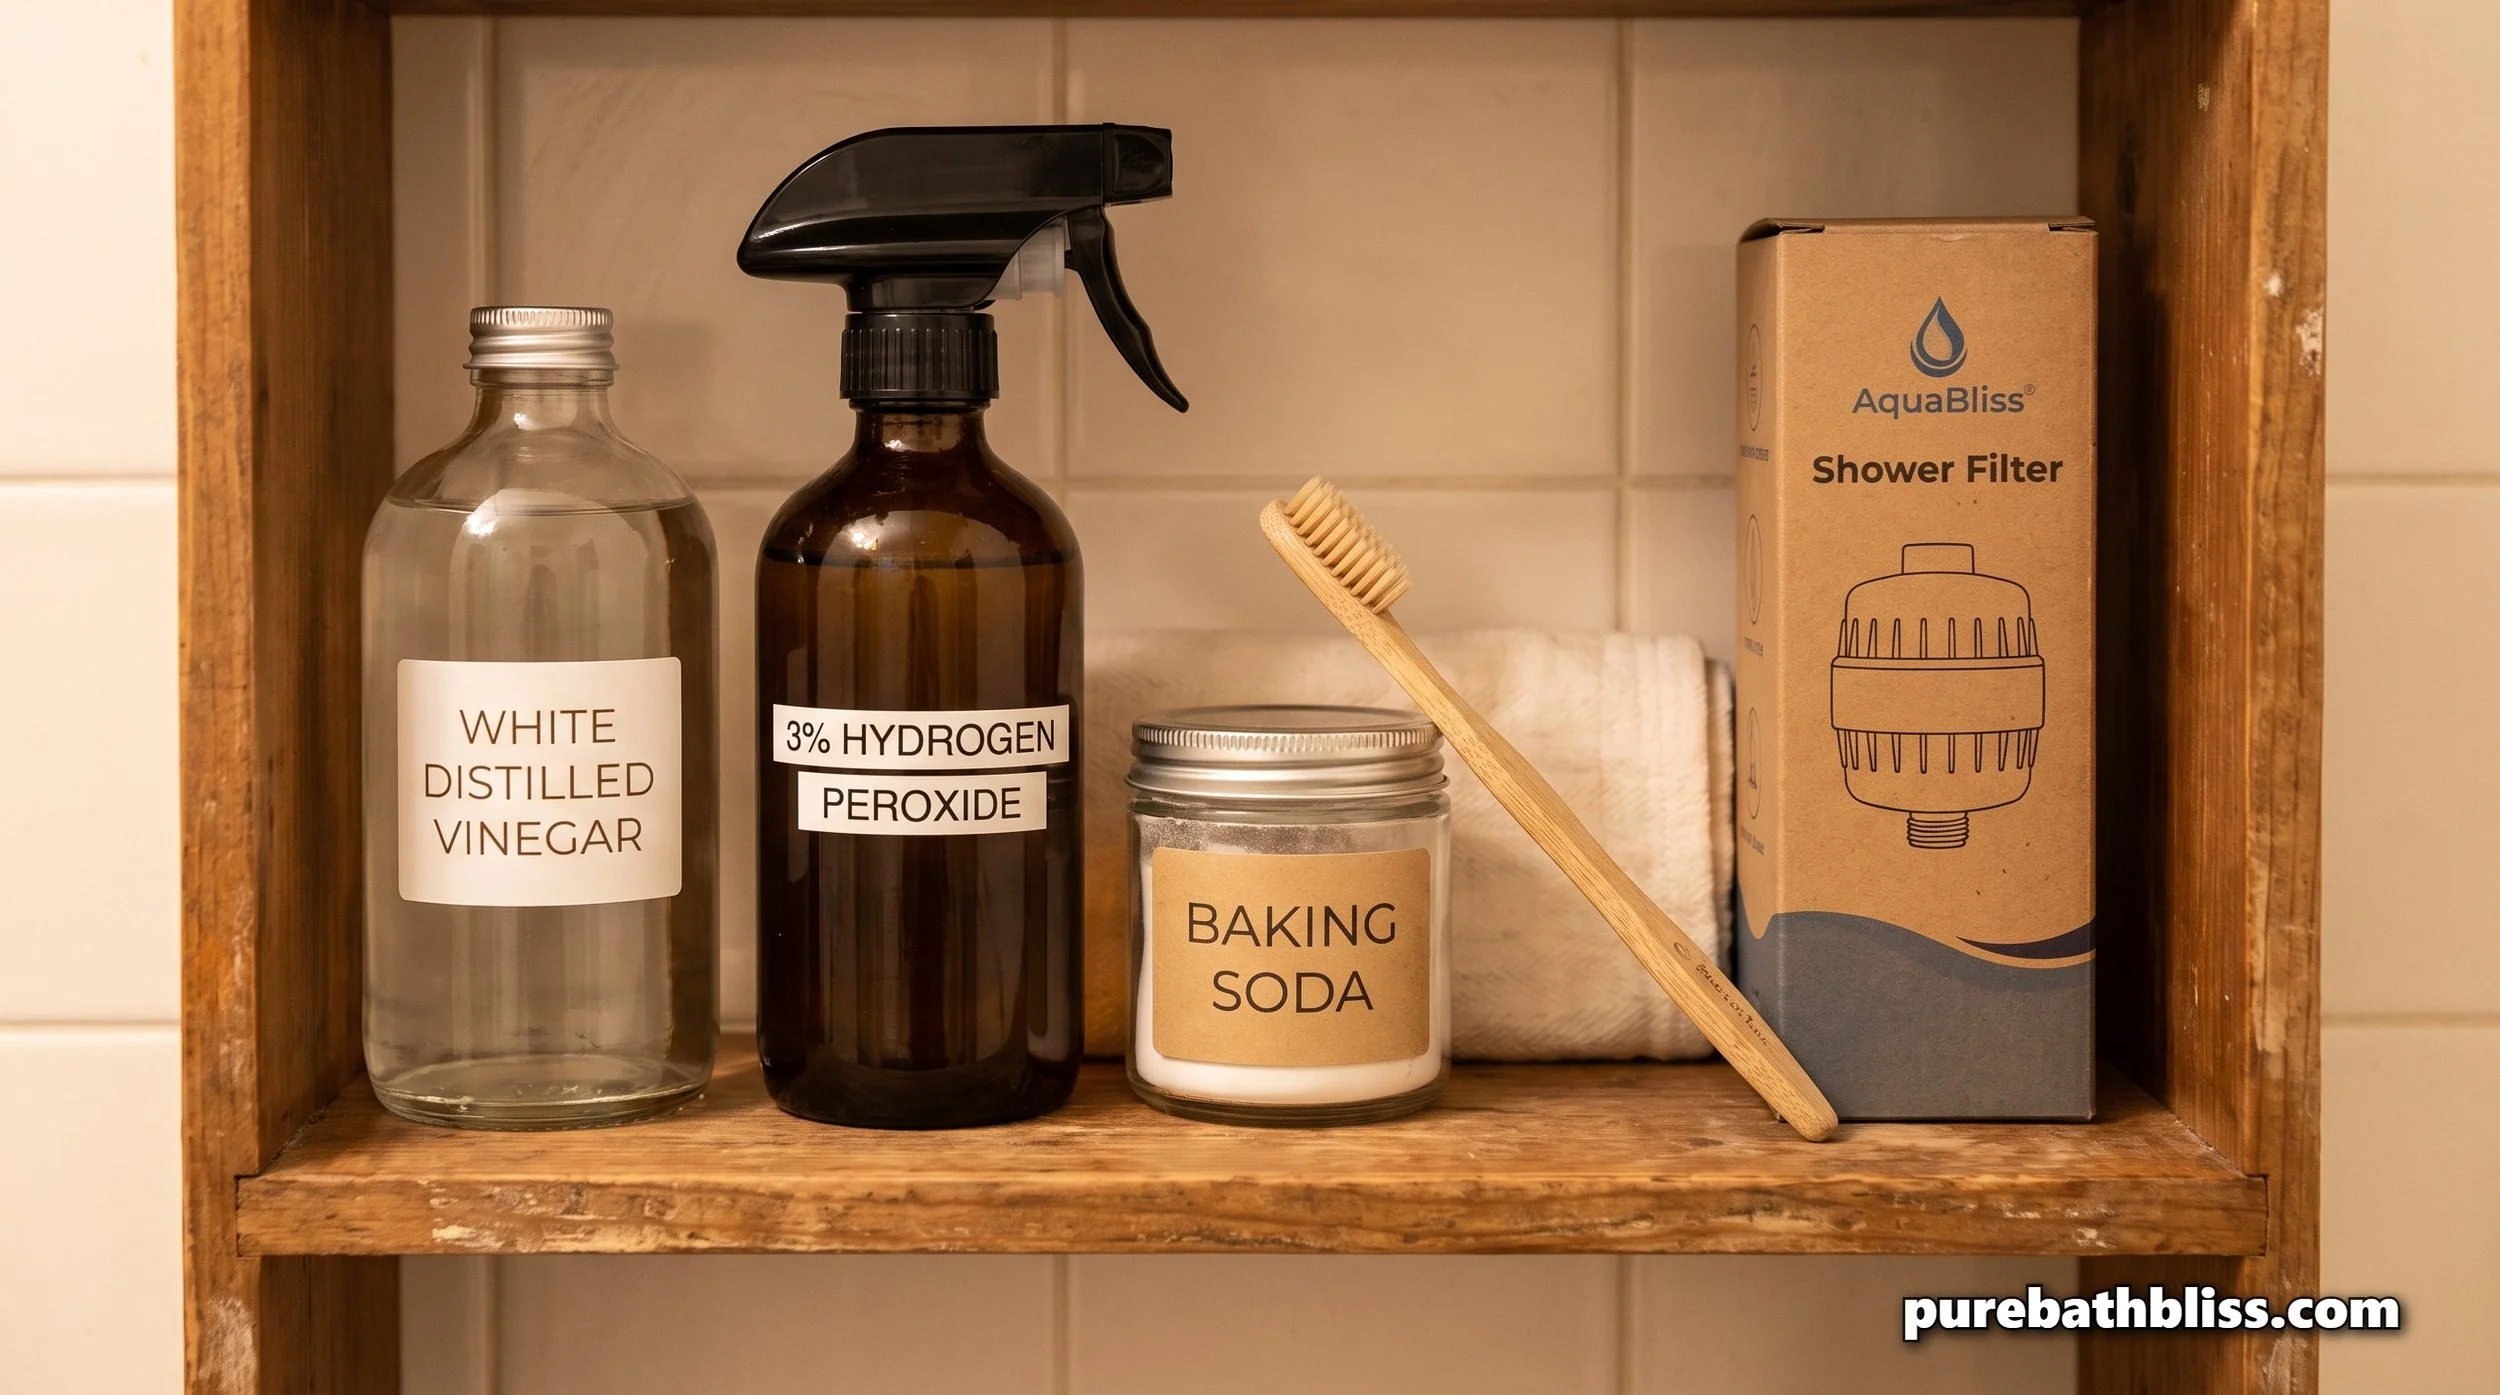
These are the products used in the methods above, all non-toxic and all appropriate for a bathroom used by a family:
3% Hydrogen Peroxide in bulk — the only disinfectant worth keeping under the bathroom sink. Breaks down into water and oxygen, no residue, no synthetic compounds.
AquaBliss High Output Shower Filter — the best single intervention for hard water households. Installs in five minutes, reduces limescale accumulation and chlorine simultaneously.
Organic cotton cleaning cloths — for streak-free finish cleaning after the vinegar soak. Microfiber cloths shed synthetic fibers into the water supply. Organic cotton does not.
Humidity-sensing exhaust fan — the passive maintenance tool that reduces bacterial growth between cleaning sessions by ensuring the bathroom dries properly after every shower.