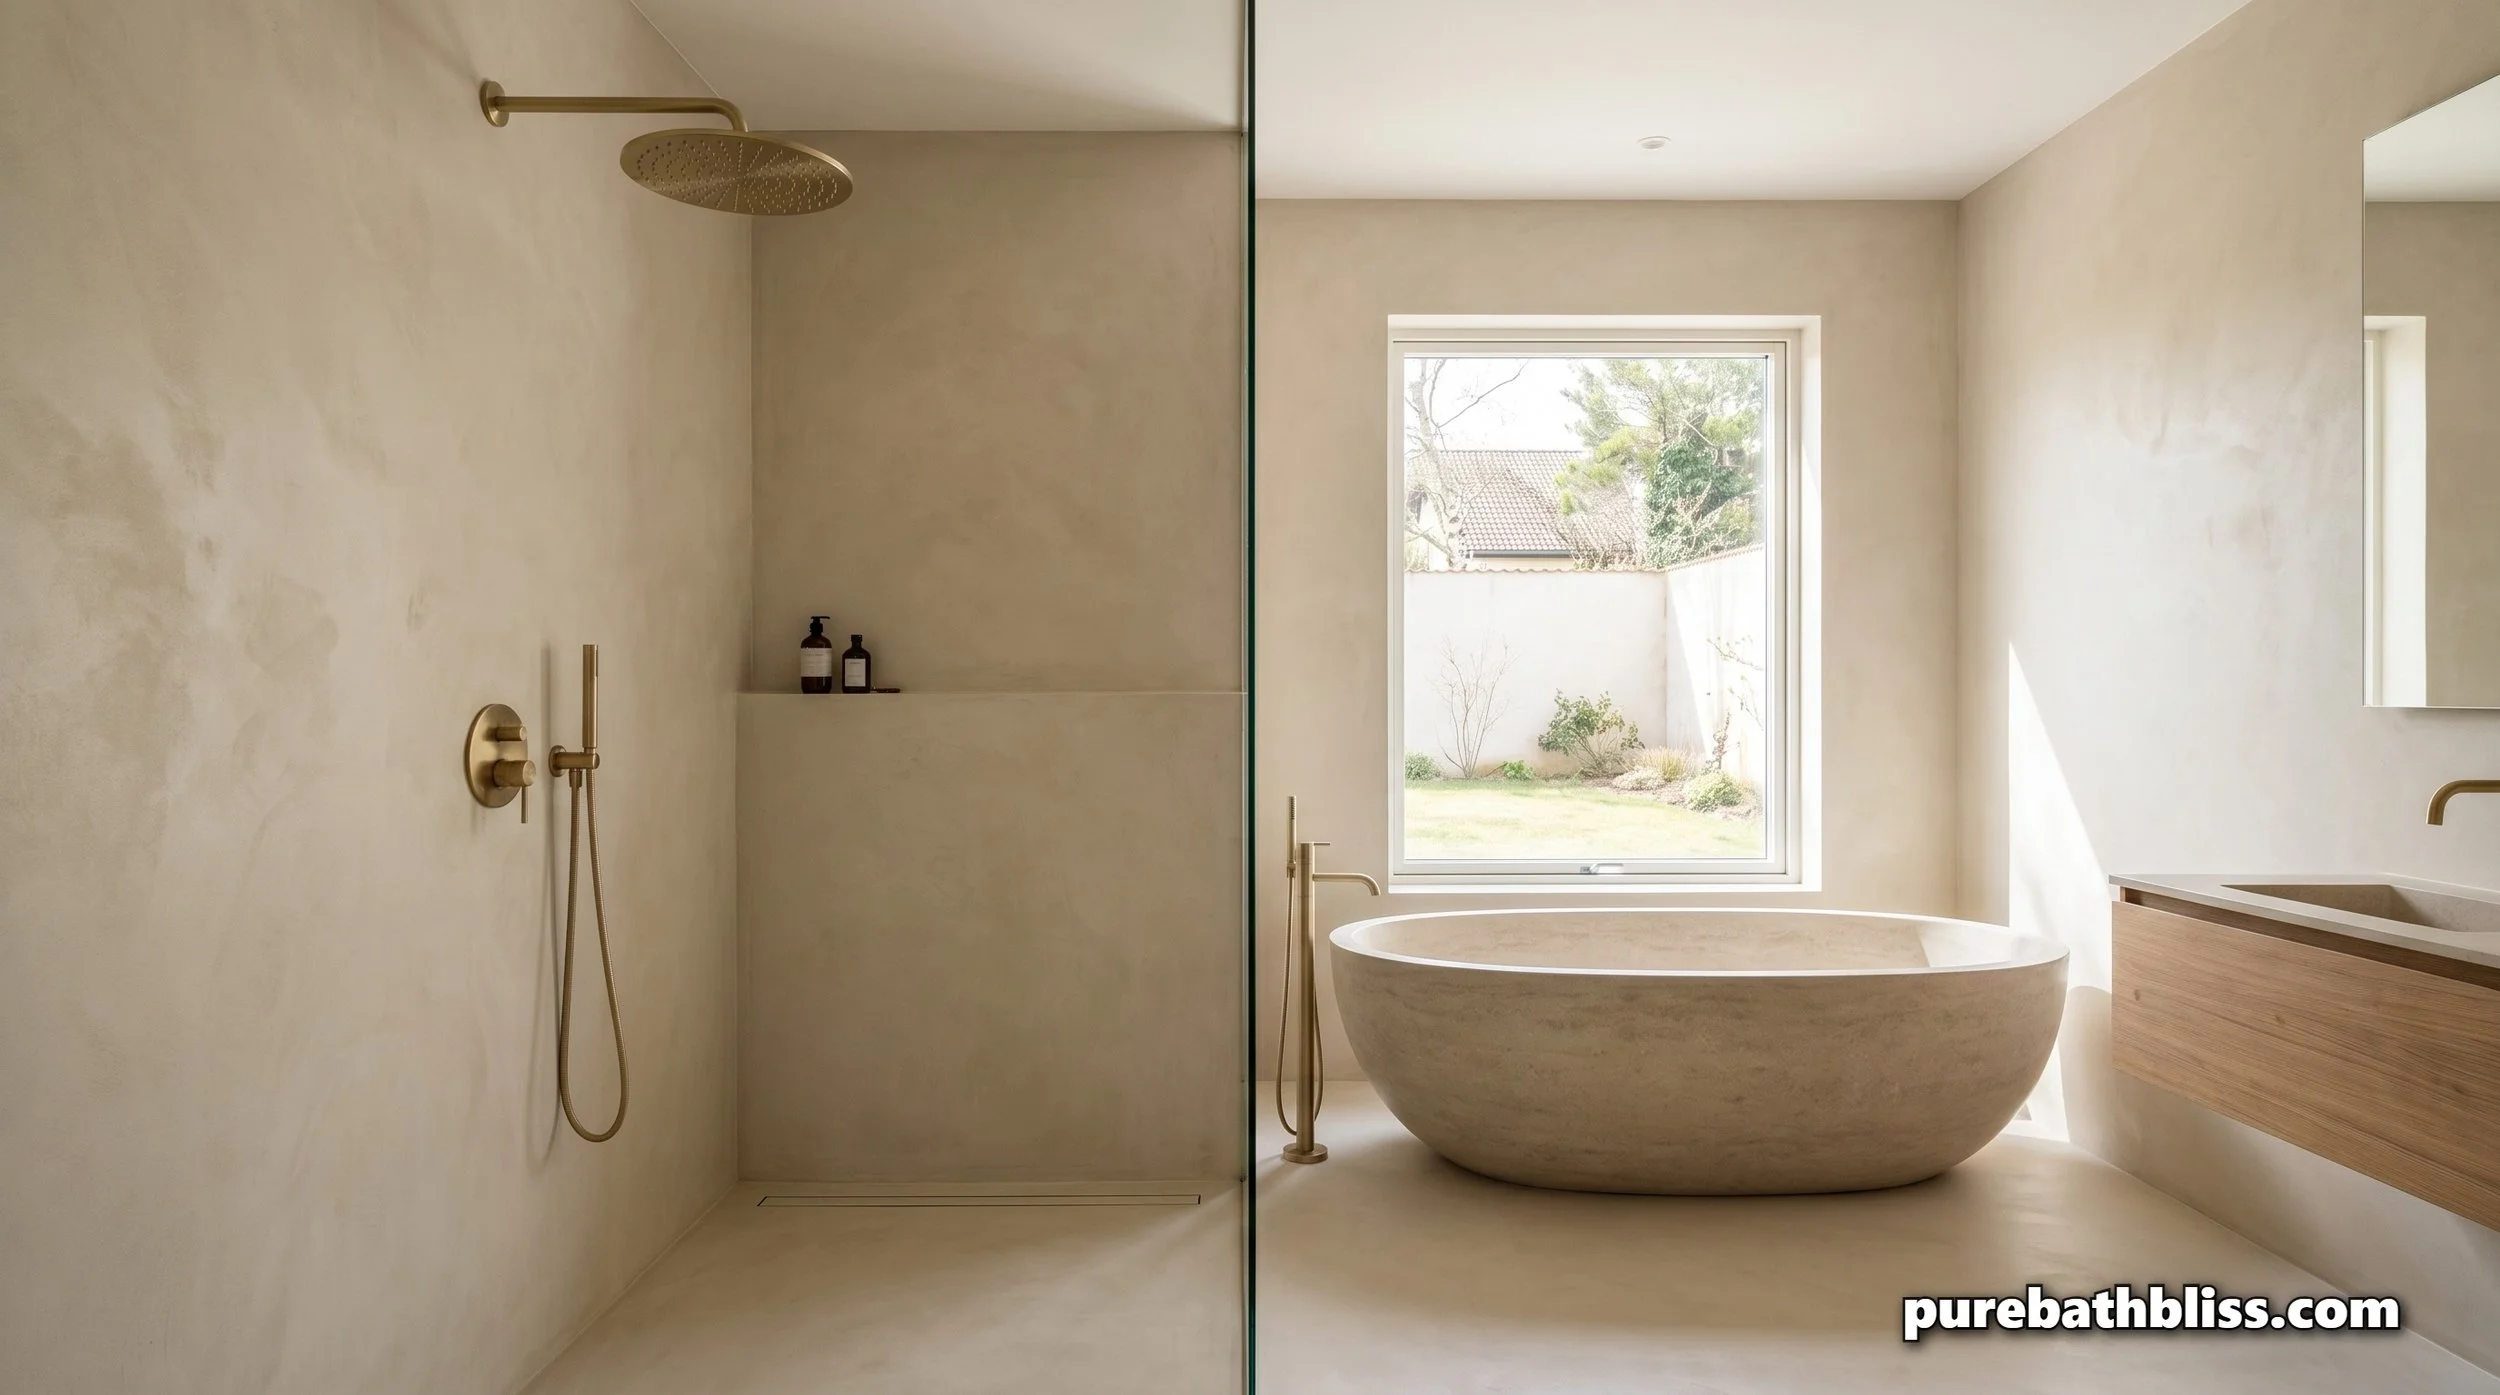
The "Microcement" Aesthetic: 2026’s Seamless Shower Trend
If you’ve spent any time looking at high-end architectural digests recently, you’ve likely noticed a shift away from the busy, grid-like patterns of traditional tile. In 2026, the "Quiet Luxury" movement has reached the bathroom, and its primary medium is Microcement.
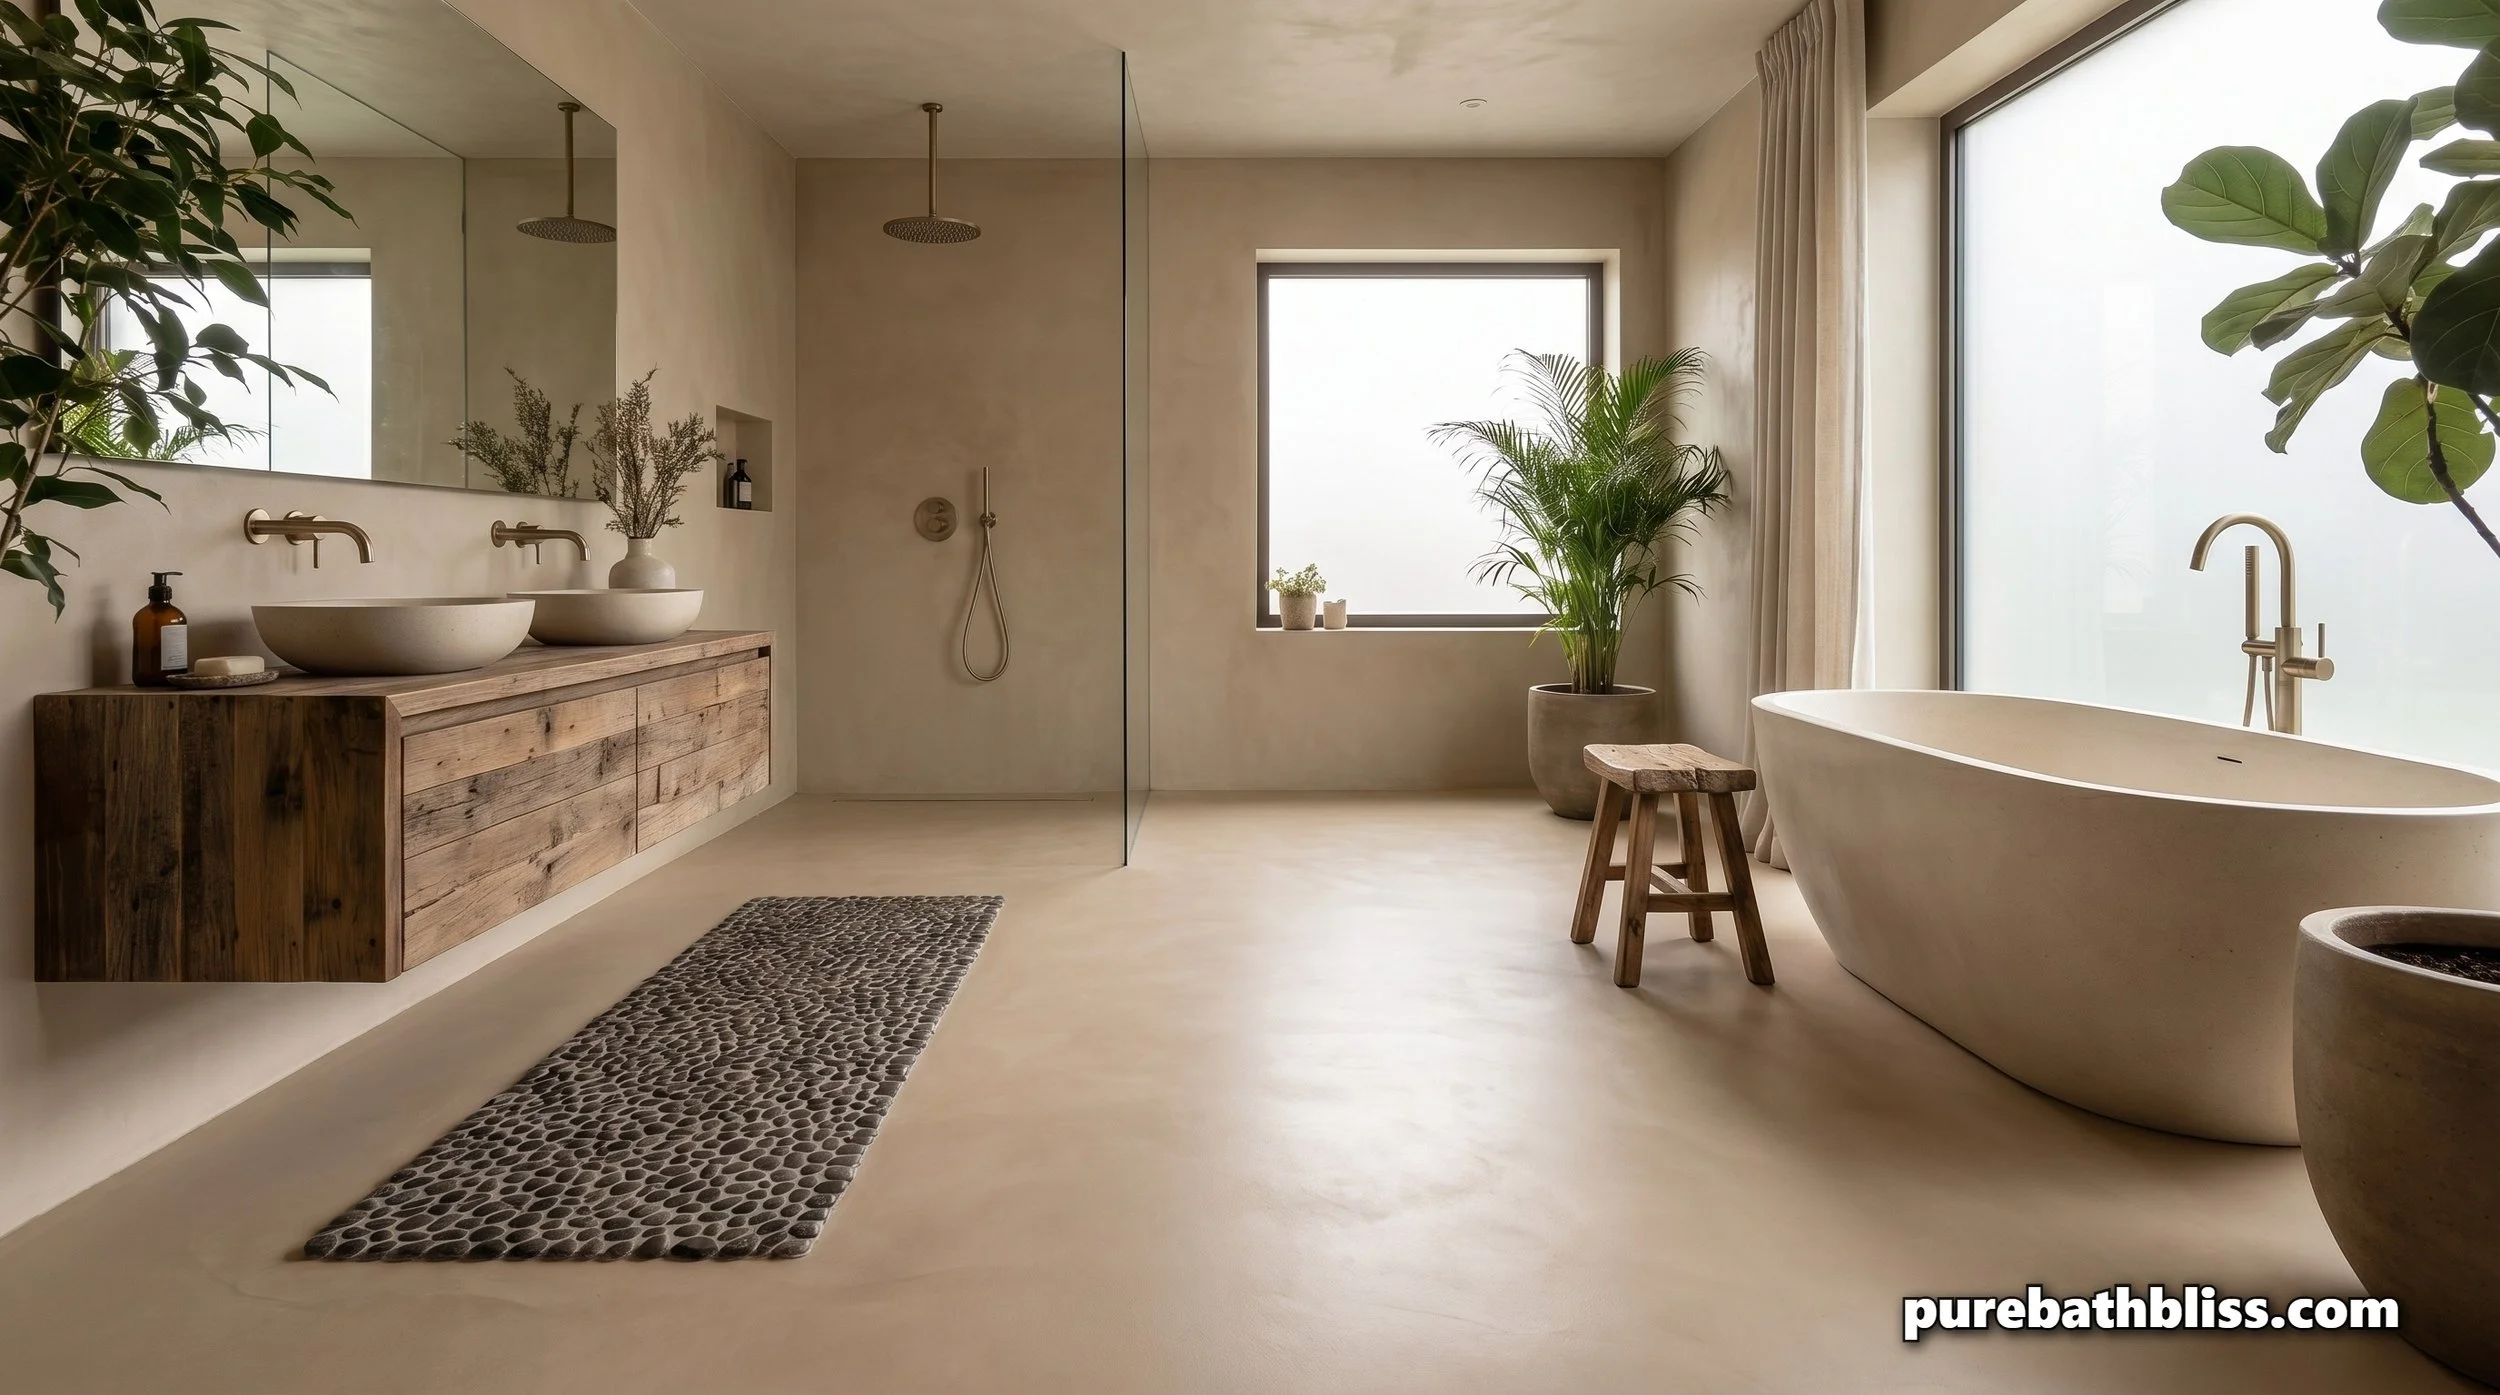
As a builder, I’ve seen every trend from subway tile to penny rounds, but microcement is different. It’s an "Infrastructure" shift. We are moving toward a monolithic, "carved from stone" look where walls, floors, and even sinks blend into one continuous surface. By eliminating grout lines, you don't just change the look; you fundamentally change the psychology of a clean bathroom by removing the visual clutter and the #1 hiding place for pink slime and black mold.
In this guide, we’ll explore why microcement is dominating the 2026 design landscape, how it performs in wet zones, and the professional "Safe-Scrub" secrets for maintaining its seamless beauty.
1. What Exactly is Microcement?
Microcement is a high-performance, cement-based coating that is hand-applied in several thin layers (usually totaling only 2mm to 3mm in thickness). Unlike traditional concrete, which is heavy and prone to cracking, microcement is polymer-modified, making it incredibly flexible and adhesive.
The "Overlay" Power: One of the biggest 2026 builder hacks is that microcement can be applied directly over existing tile. This means you can achieve a luxury "Spa" look without the cost and waste of a full demolition.
The Texture: It is hand-troweled, meaning every installation has a unique, artisanal movement to it. It’s not cold and clinical like a hospital floor; it has a soft, mineral warmth that complements organic bath mats and accessories.
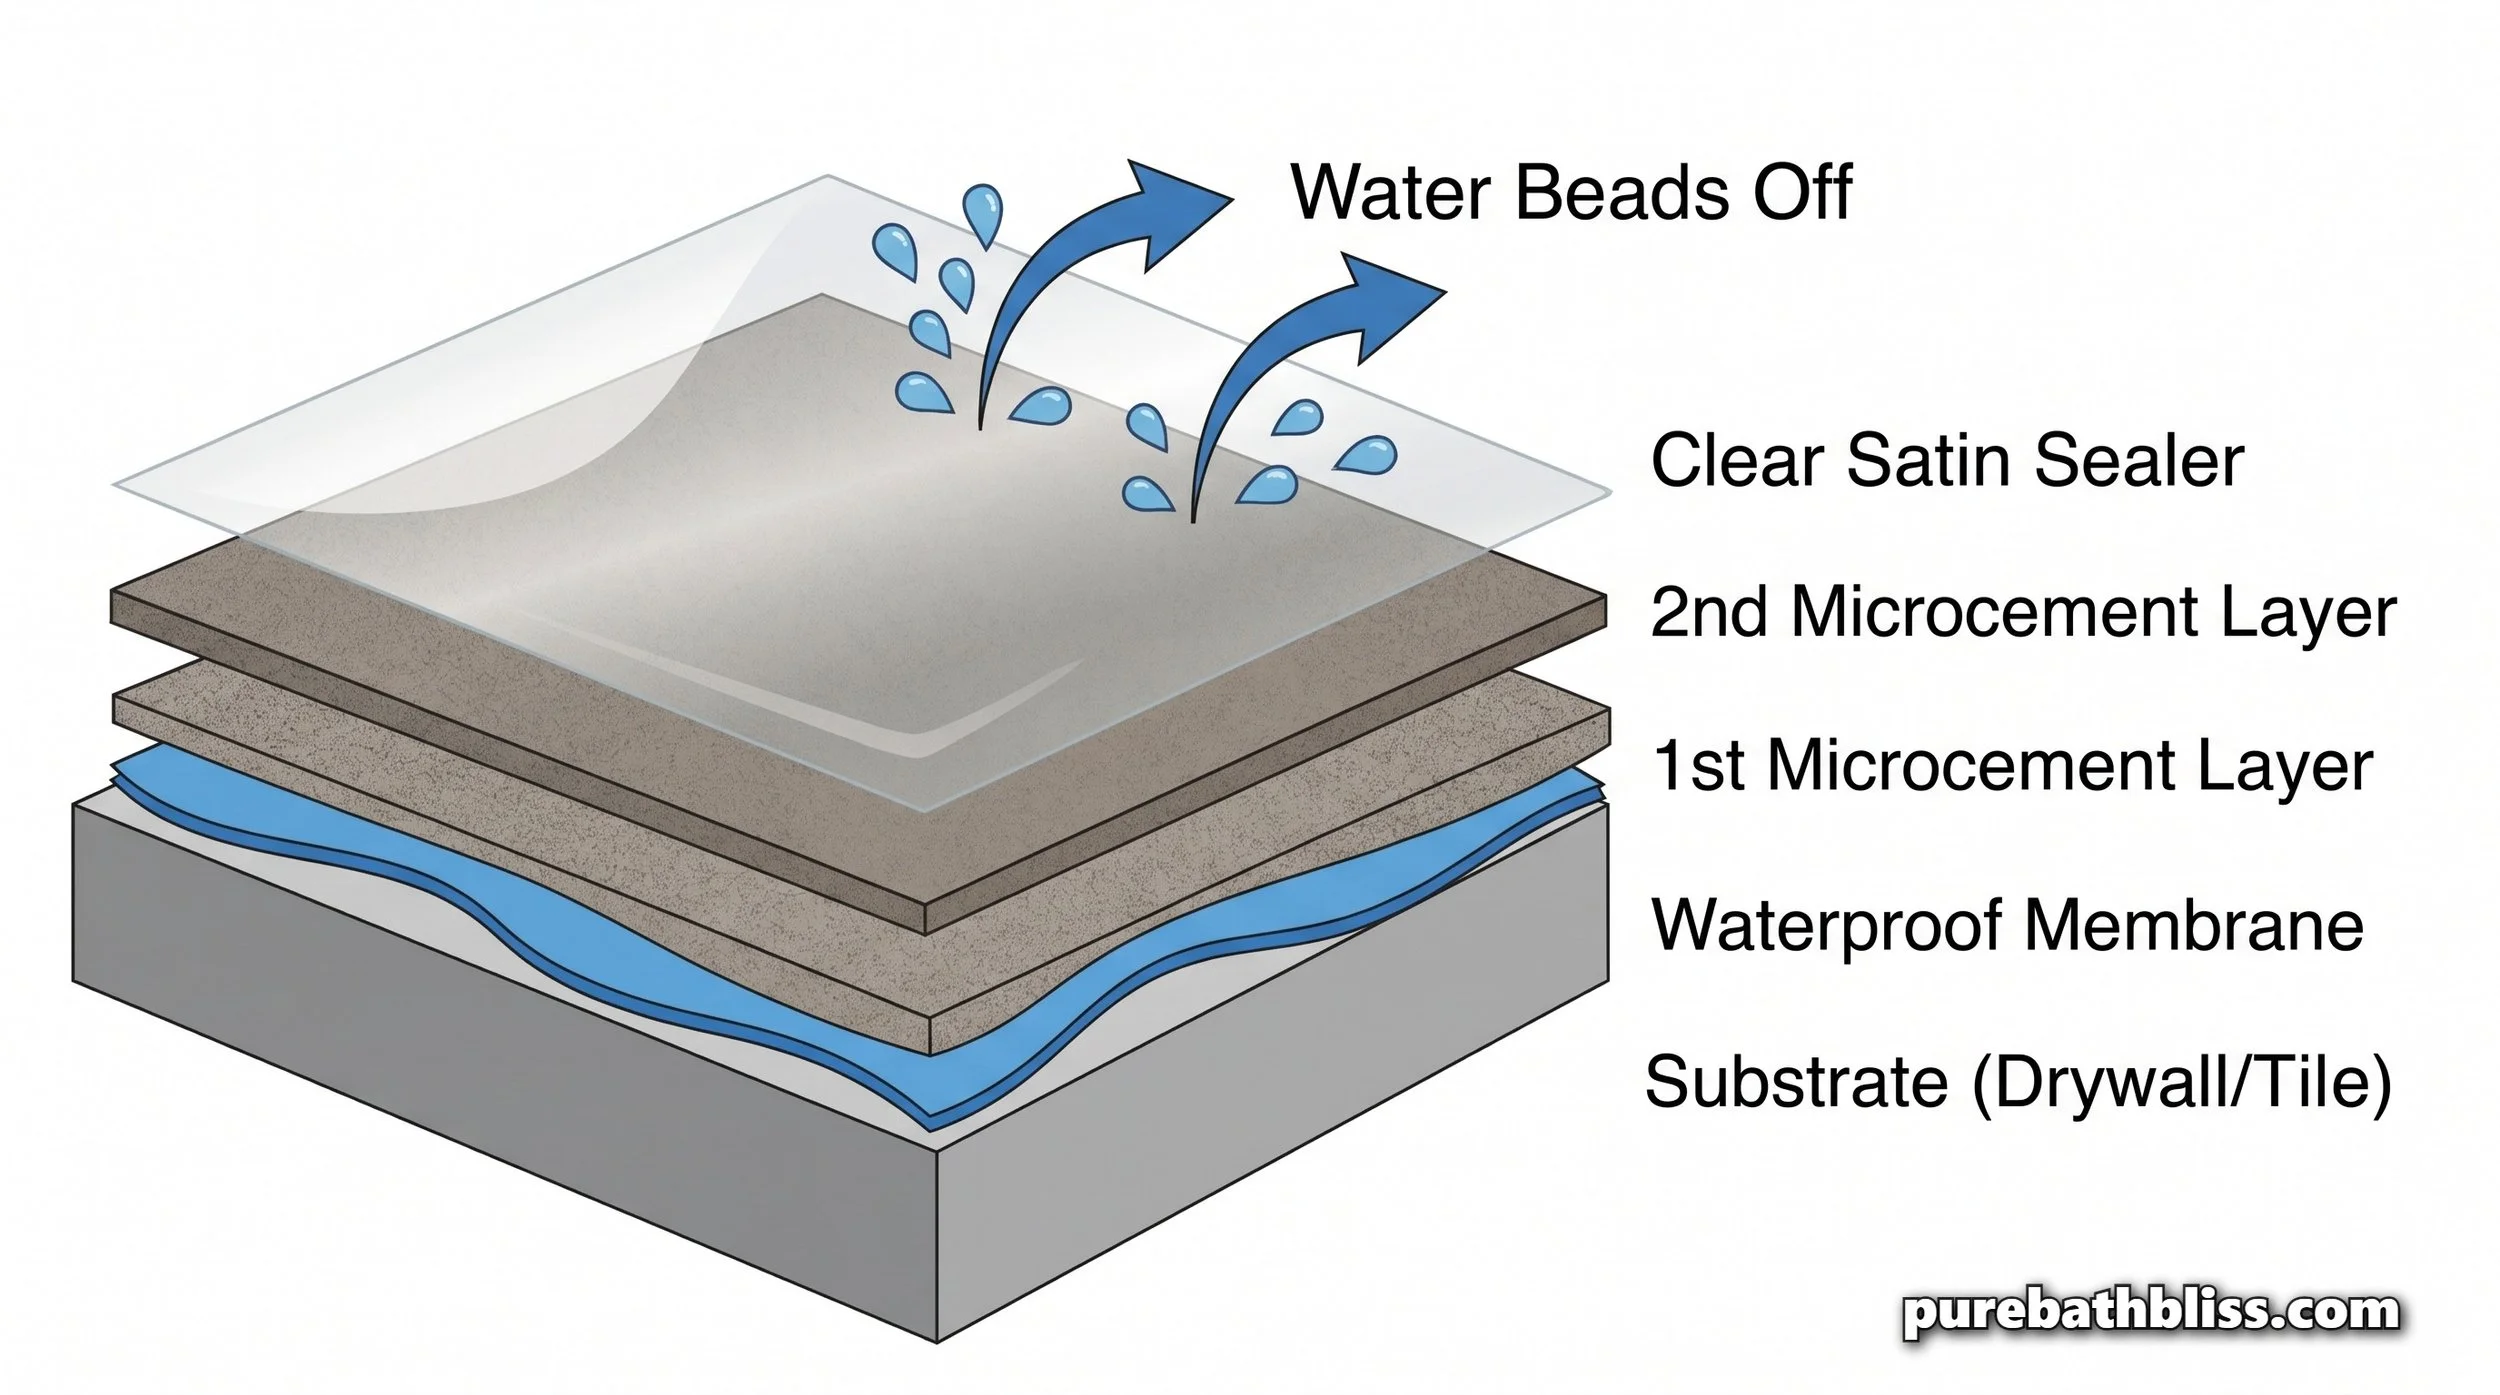
2. Is it Actually Waterproof?
This is the first question every homeowner asks. The short answer is: Yes, but the magic is in the sealer. In a shower environment, microcement relies on a multi-layer "Infrastructure" of protection. It starts with a liquid waterproofing membrane (the same kind used under tile), followed by the microcement layers, and finished with a commercial-grade polyurethane sealer.
The Anti-Mold Advantage: Because there is no porous grout, water has nowhere to sit and stagnate. This significantly reduces the risk of black mold taking root in the corners of your shower.
Seamless Transitions: In 2026, we are seeing "Curbless" showers where the microcement floor of the bathroom continues directly into the shower tray. This creates a high-performance "Dry Zone" when paired with a diatomaceous earth stone mat.
3. Microcement vs. Traditional Tile
| Feature | Microcement (Seamless) | Traditional Tile |
|---|---|---|
| Visuals | Monolithic & Minimalist | Structured & Geometric |
| Maintenance | No Grout; Wipe Clean | Grout scrubbing required |
| Renovation | Apply over existing tile | Full demolition required |
| Safety | Naturally Slip-Resistant | Varies (Can be slippery) |
| Artisanal | Hand-troweled unique finish | Mass-produced repetition |
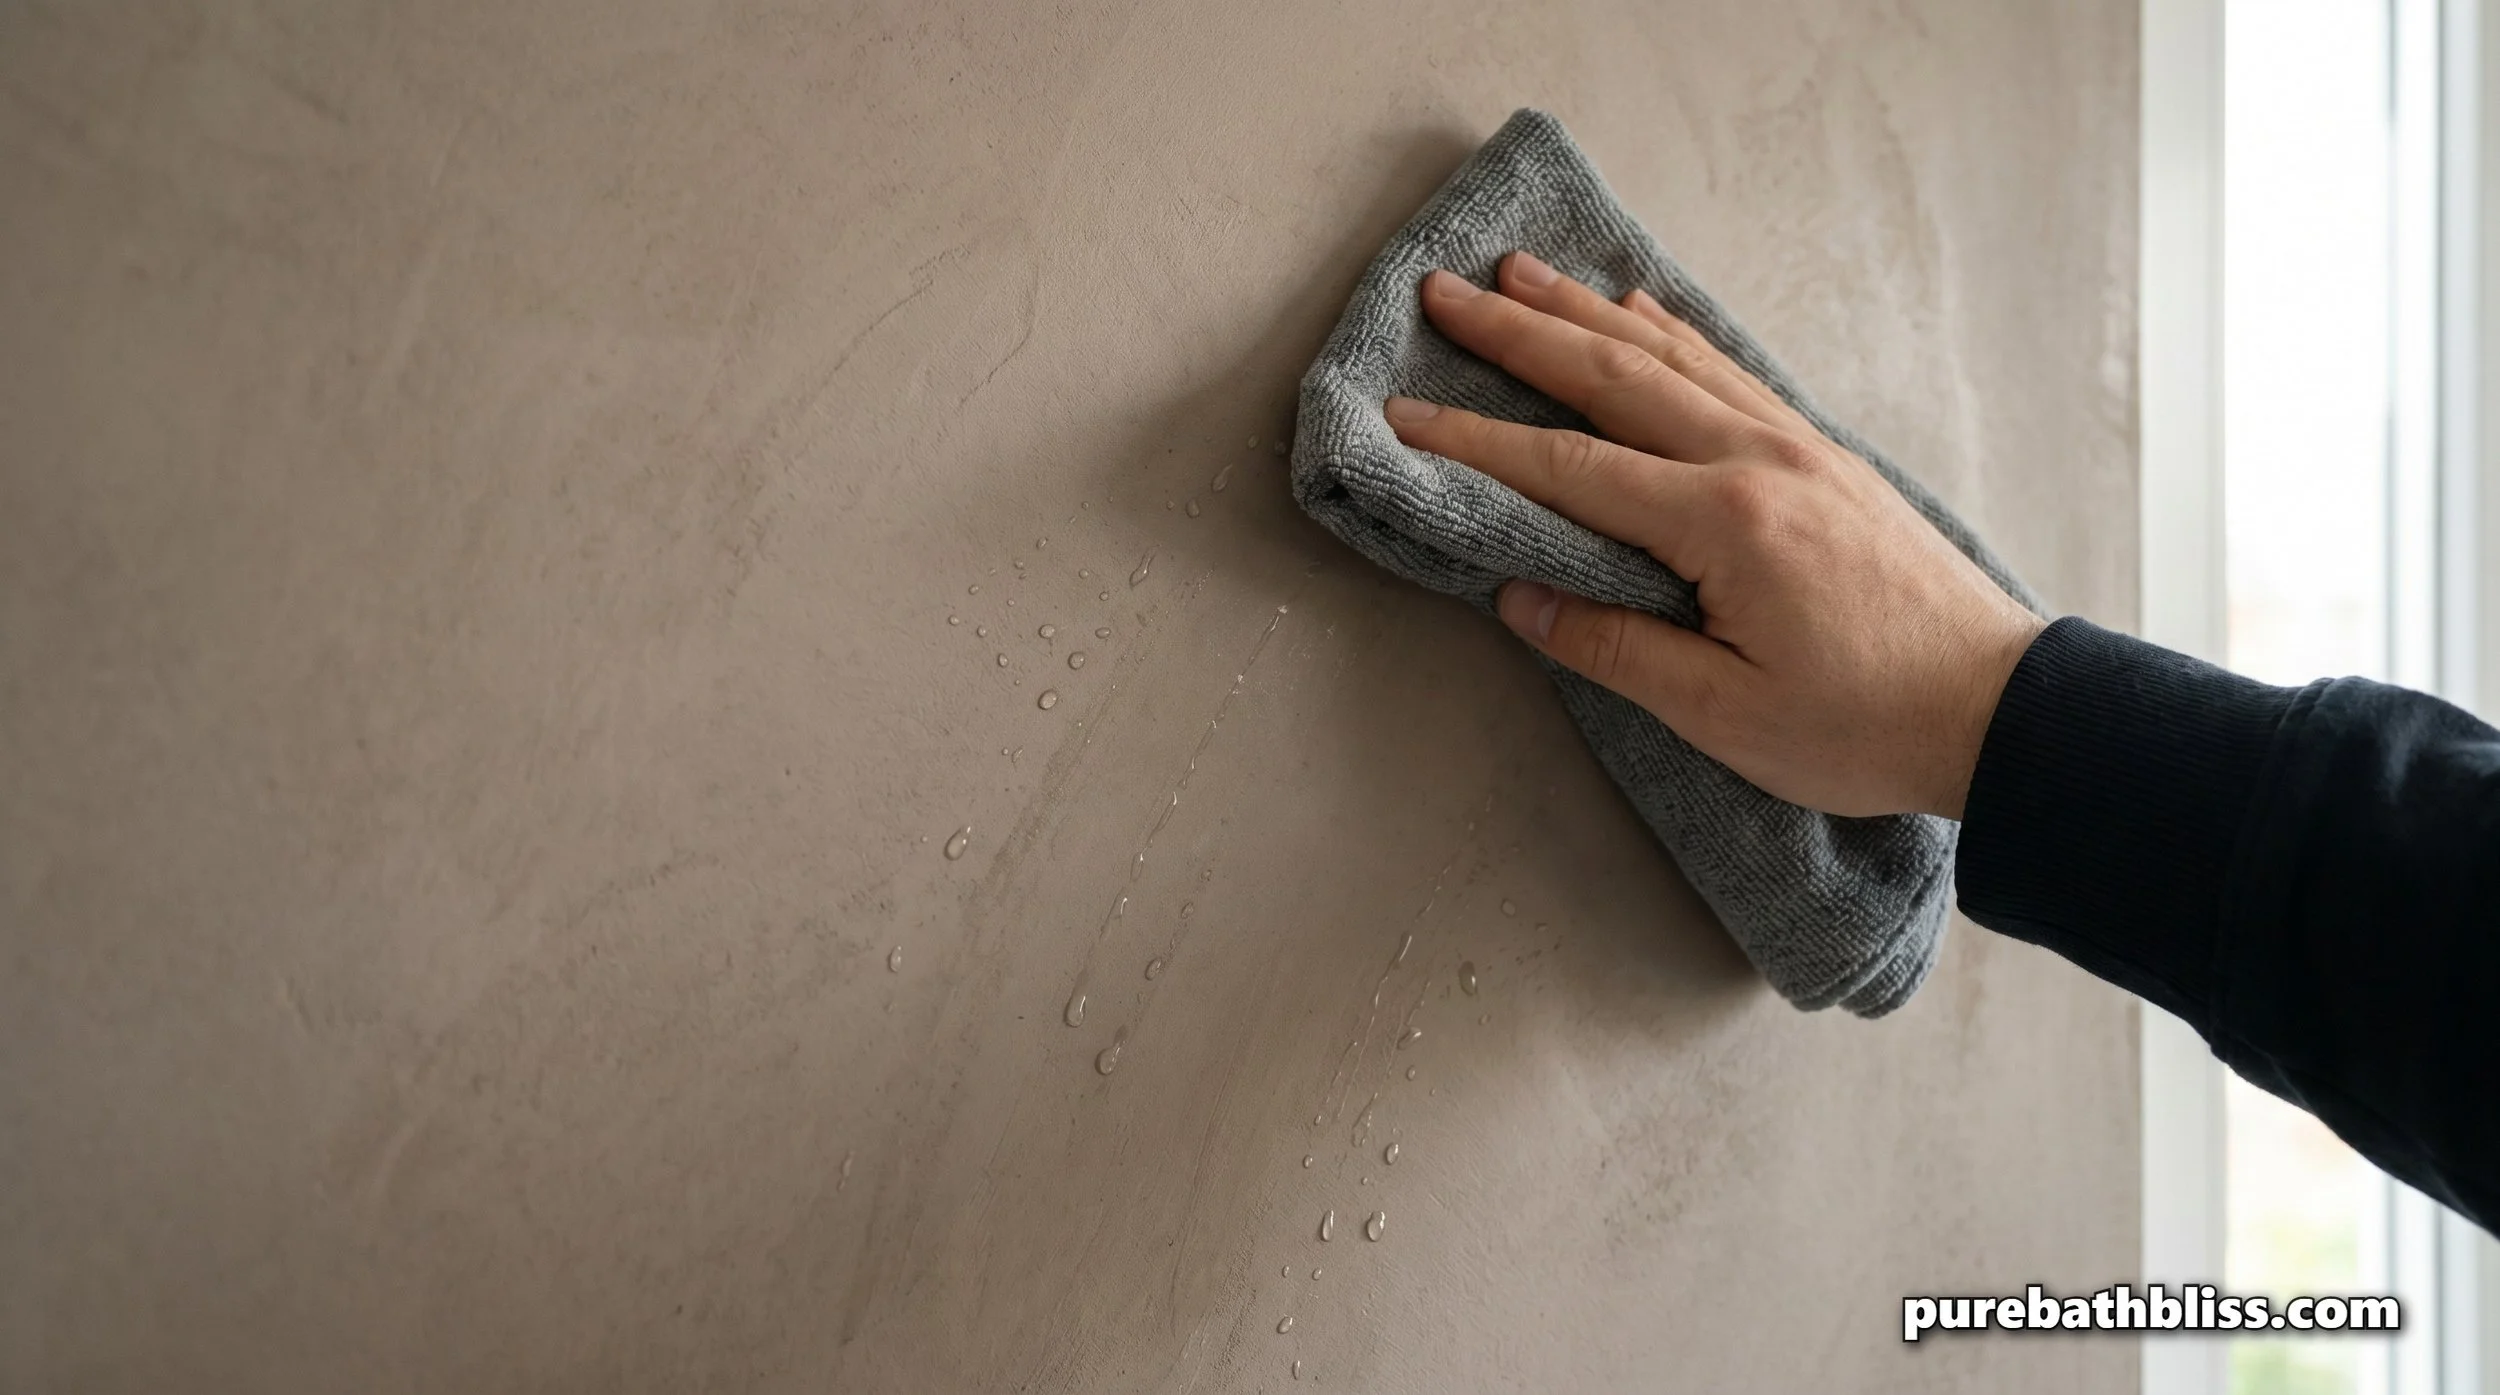
4. Maintenance: The Non-Toxic "Safe-Scrub"
While microcement is durable, it is a "living" surface that needs to be treated with respect. In 2026, we avoid the harsh, acidic cleaners of the past.
The "pH-Neutral" Rule: Never use vinegar or lemon-based cleaners on microcement. The acid can slowly eat through the protective sealer, exposing the cement to moisture. Instead, use a pH-neutral soap or a specialized microcement detergent.
The "Soft-Touch" Method: Use microfiber cloths or soft-bristled brushes. Avoid steel wool or abrasive scouring pads that could micro-scratch the finish.
Bona Free & Simple pH-Neutral Floor Cleaner – This is an excellent, non-toxic choice for keeping microcement floors and walls clean without degrading the seal.
Microfiber Mop with Spray Trigger – Perfect for a quick daily "Maintenance Wipe" to keep your seamless surfaces pristine.
5. The Professional "Cure" Protocol
If you’re installing microcement, the "Infrastructure" of the first two weeks is critical.
Week 1 (The No-Clean Zone): During the first 7 days, the material is still curing. You can walk on it carefully, but do not use any cleaning products—not even water.
Week 2 (Water Only): In the second week, the hardness increases. You can clean with water only.
Week 3+ (Full Strength): After 14 days, the microcement has reached its full structural durability. You can now resume your normal grounding mindfulness rituals and use neutral soaps.
Summary: The Microcement Checklist
Embrace the Monolithic: Use one color for walls and floors for the "carved" look.
Overlay Over Demo: Save time and money by applying over your old tile.
Verify the Sealer: Ensure your installer uses a high-grade polyurethane topcoat.
Stick to pH-Neutral: Protect the seal with gentle, non-toxic cleaners.
Respect the Cure: Give the material 14 days to reach peak hardness.
Style with Texture: Pair your smooth walls with natural wood or stone mats.
Mixed Metal Accents: Use brushed brass to add warmth to the industrial concrete feel.
Microcement isn't just a design trend; it is a smarter way to build. By choosing a seamless, grout-free infrastructure, you create a bathroom that is easier to maintain, healthier for your family, and undeniably beautiful. In 2026, the future of the shower is smooth.