How to Recaulk Your Bathroom Sink: The 15-Minute Moisture Seal
Transparency Note: We independently select these products based on research and user reviews. If you buy something through our links, we may earn a commission.
In the world of home maintenance, "Infrastructure" isn't just about the pipes you can see under the cabinet; it’s about the invisible seals that keep water where it belongs. As a builder, the most common "hidden" damage I see in bathrooms is rotting vanity carcases and crumbling drywall caused by a failed bead of caulk around the sink rim.
When that thin line of silicone cracks or peels, water from every hand wash and face scrub seeps underneath the basin. This creates a dark, damp "petri dish" for pink slime bacteria and structural rot. If you've noticed the edges of your sink looking yellow, black, or pulling away, your first line of defense is a fresh, professional-grade seal.
You don't need a plumber for this. Recaulking a sink is a high-impact, low-cost "reset" that immediately elevates the psychology of a clean bathroom. Here is the professional "no-mess" method for recaulking your sink to achieve a builder-grade finish.
1. The Anatomy of a Perfect Seal
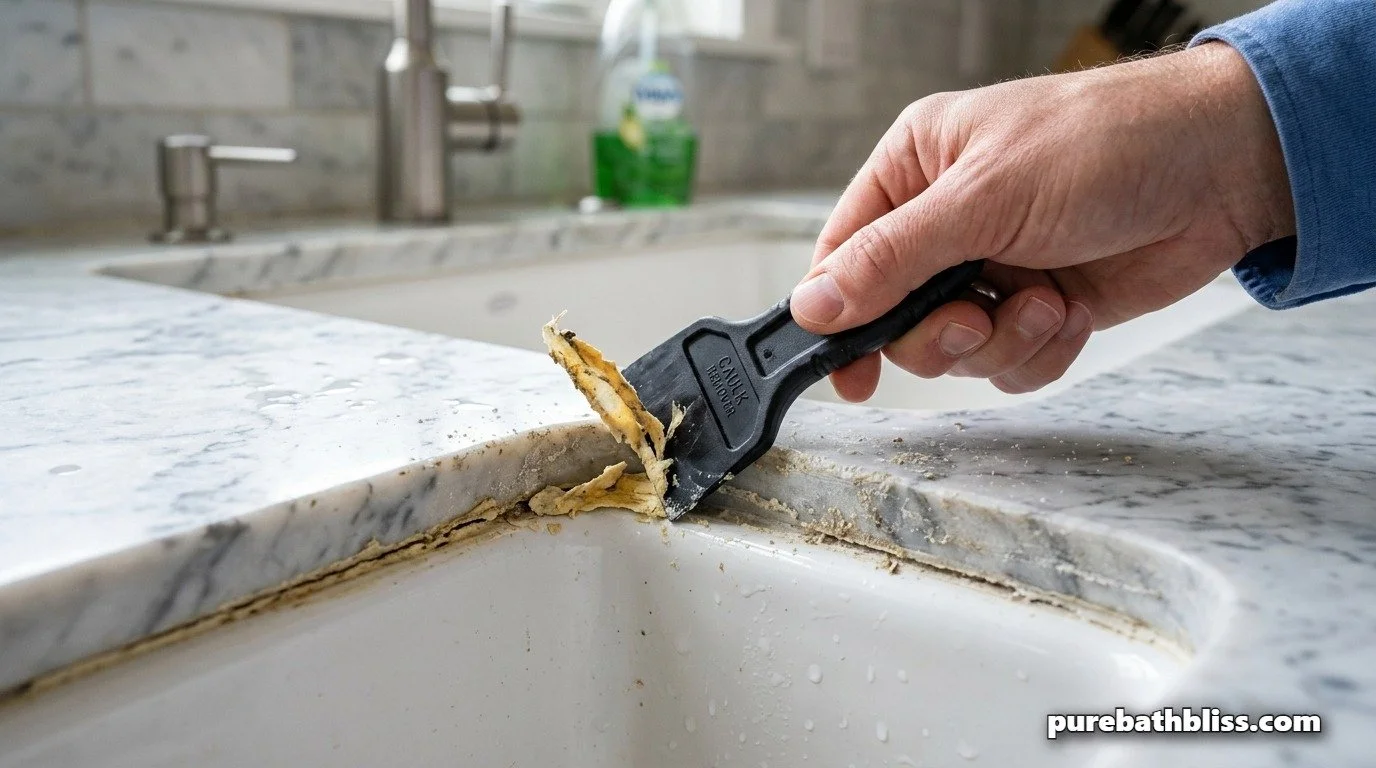
Most homeowners make the mistake of just "layering" new caulk over the old. This is a recipe for failure. New silicone will not bond to old silicone; it’s like trying to tape a dusty box. For a waterproof "Infrastructure" upgrade, you must go back to the base material.
The Removal: Use a dedicated caulk removal tool or a sharp utility knife to slice the old bead away. Be careful not to scratch your brushed brass fixtures or the sink finish.
The Deep Clean: Once the bulk is gone, use a specialized "caulk remover" liquid or high-percentage rubbing alcohol to dissolve the remaining residue. If there is mold present, treat it with a 50/50 vinegar-water mix before proceeding.
2. Choosing Your Material: Silicone vs. Latex
In 2026, the industry standard for bathrooms is 100% Silicone. While "Painter's Caulk" (Siliconized Latex) is easier to apply and clean up with water, it eventually shrinks and cracks in a wet environment.
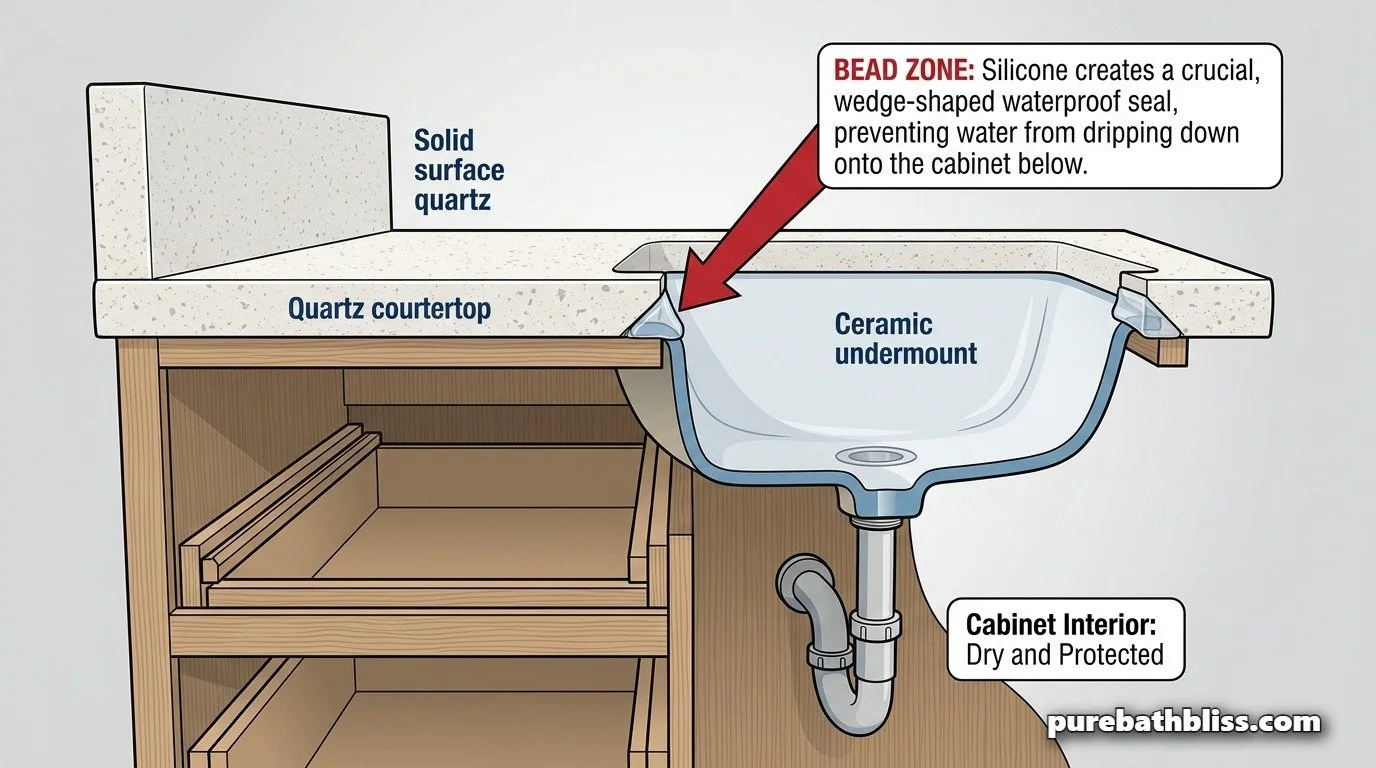
Why Silicone? It is permanently flexible and highly resistant to the black mold that thrives in the humidity of a bathroom. It creates a chemical bond that acts as a gasket between the sink and the counter.
GE Advanced Silicone 2 Kitchen & Bath – This is the professional’s choice. it is "shower ready" in 30 minutes and contains mold-inhibiting additives that are essential for high-traffic family bathrooms.
Gorilla Waterproof Caulk & Sealant – Excellent for beginners because it has a slightly longer "work time" before it skins over.
3. The Recaulking "Pre-Flight" Checklist
| Step | Task | Pro Tip |
|---|---|---|
| 01 | Remove Old Caulk | Use a plastic scraper to avoid scratching stone. |
| 02 | Sanitize & Dry | The surface must be 100% dry or the seal will fail. |
| 03 | Tape the Lines | Use blue painter’s tape for a razor-sharp edge. |
| 04 | Apply Silicone | Cut the nozzle at a 45-degree angle. |
4. The "Tape Method" for a Professional Finish
The reason DIY caulk jobs look messy is "the smear." When you try to smooth the caulk with your finger, it often spreads 2 inches wide. To get a "Builder-Grade" look, use the tape method:
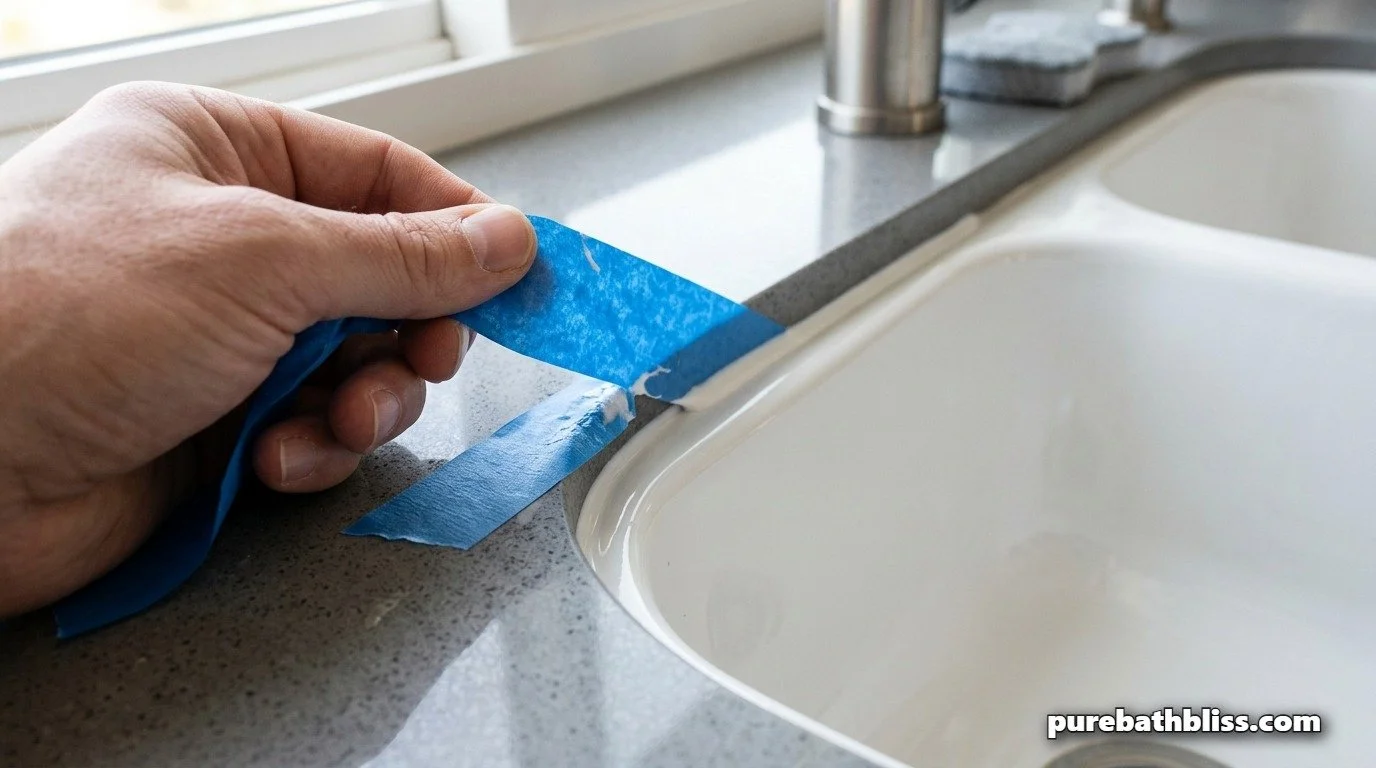
Tape the Perimeter: Run a strip of painter's tape on the countertop and another strip on the sink rim, leaving a small 1/8-inch gap between them.
Apply the Bead: Run a thin, consistent line of silicone in that gap.
Smooth the Line: Wet your finger with a little bit of soapy water (this prevents the silicone from sticking to your skin) and run it along the bead.
The "Big Reveal": Pull the tape while the silicone is still wet. This leaves you with a perfect, crisp line that looks like it was done by a factory robot.
5. Maintenance: Protecting Your New Seal
Once you’ve invested the 15 minutes to recaulk, you want it to last 10 years, not 10 months.
The "No-Scrub" Rule: Don't use abrasive "soft scrubs" on fresh silicone. These contain grit that can micro-scratch the surface of the caulk, giving mold and bacteria a place to take root.
The Dry-Down: After your kids finish their bedtime routine, give the sink rim a quick wipe with a dry cloth. Just as we use a stone mat to keep the floor dry, keeping the sink rim dry prevents the buildup of mineral scale that degrades the silicone bond.
Silicone Finishing Tool Kit – If you don't want to use your finger, this kit includes various profiles (square, round, angled) to give your sink a specialized architectural finish.

6. Sourcing the Right Tools
To do this job like a pro, you need the right kit. Don't try to use a kitchen knife and a rag.
Newborn 930-GTD Drip-Free Caulk Gun – A high-ratio gun makes it much easier to control the flow of thick silicone, preventing those annoying "globs."
Denatured Alcohol (Small Bottle) – The best cleaner for preparing the surface before the new bead goes down.
Blue Painter's Tape (Multi-Pack) – Essential for the "Tape Method" and useful for a dozen other bathroom organization projects.
Summary: The Sink Recaulking Checklist
Strip it Bare: Never caulk over old material.
Alcohol Clean: Ensure the surface is free of oils and soap scum.
Choose 100% Silicone: It’s the only material that survives the "Wet Zone."
Use the Tape Method: This is the only way to get a perfect line without the mess.
Soapy Finger Trick: Keeps the silicone on the sink and off your hands.
24-Hour Cure: Keep the sink completely dry for a full day to let the chemical bond set.
Final Inspection: Check for any "pinholes" where water could still enter the vanity infrastructure.
By taking 15 minutes to properly recaulk your bathroom sink, you are performing a critical maintenance task that protects your vanity, your drywall, and your family's health. It’s a small "Builder-Grade" fix that delivers massive peace of mind.