The "Bath Tray" Aesthetic: How to Style for a Luxury Soak
Transparency Note: We independently select these products based on research and user reviews. If you buy something through our links, we may earn a commission.
In the world of professional renovation, we spend a lot of time talking about the "bones" of the room, the brushed brass fixtures and the waterproof sink seals. But once the infrastructure is sound, the focus shifts to how the space feels. As a builder and a parent, I’ve found that the "Bath Tray" is the single most effective tool for bridging the gap between a functional bathroom and a luxury sanctuary.
A bath tray (or caddy) isn't just a piece of wood across a tub; it is a curated "workstation" for relaxation. In 2026, the aesthetic has moved away from cluttered, plastic-heavy caddies and toward a "Quiet Luxury" look that emphasizes natural materials, intentional placement, and a few high-quality wellness staples.
Whether you’re preparing for a magnesium sleep soak or just need 20 minutes of silence, here is the professional guide to styling a bath tray that looks as good as it feels.
1. Choosing Your Foundation: Wood vs. Acrylic
Just like we compare stone vs. bamboo mats, your bath tray material dictates the "infrastructure" of your spa vibe.
Solid Hardwoods (Teak & Walnut): Teak is the "Builder's Choice" for a reason. It is naturally high in oils, making it resistant to the steam and humidity that can cause other woods to warp or grow pink slime bacteria. Walnut offers a darker, moodier aesthetic that feels incredibly high-end.
Modern Acrylic: If you have a very modern, "Warm Minimalist" bathroom, a clear acrylic tray offers a "floating" look. It’s practical, waterproof, and doesn't hide the beautiful lines of a designer tub.
Royal Craft Wood Luxury Bamboo Bathtub Caddy – This is the classic "all-in-one" option. It’s expandable, meaning it fits everything from a standard alcove tub to a wide freestanding basin.
Temple Spring Bamboo Bathtub Tray Caddy – A more minimalist, sleek design for those who want a clean "Hunker" look without the built-in wine glass holders.
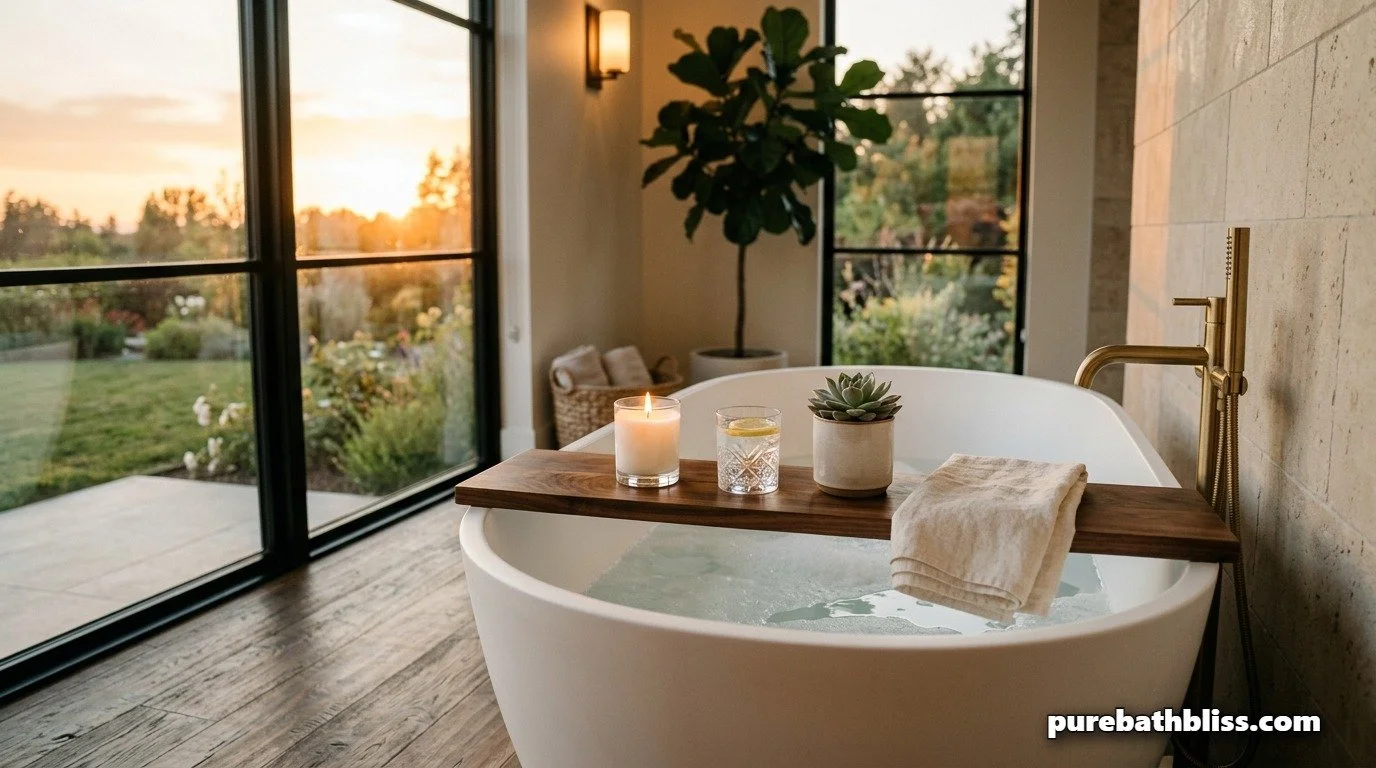
2. The Three Layers of Styling
To achieve that professional "Styled" look, you need to think in layers. A flat tray with items scattered on it looks like a junk drawer; a tray with "height and texture" looks like a spa.
Layer 1: The Functional Base. This is your primary "tool", a book, a tablet, or a notebook. It should be centered and act as the anchor for the tray.
Layer 2: The Sensory Element. This is where you bring in the "Wellness Infrastructure." A high-quality candle or a small bowl of magnesium flakes adds a tactile and olfactory dimension.
Layer 3: The Natural Accent. Every tray needs a touch of "Life." A small vase with a single eucalyptus sprig or a tiny succulent brings the "Biophilic" trend of 2026 into the tub.
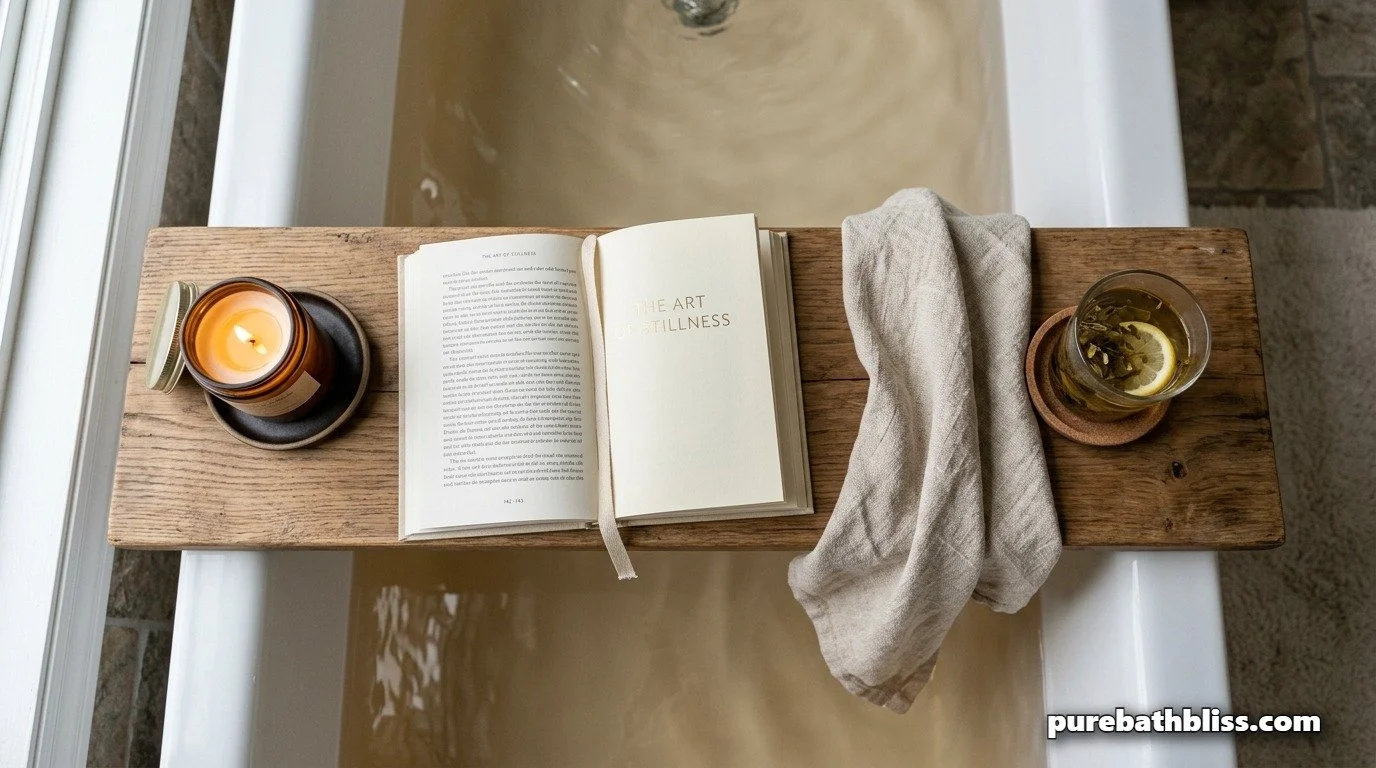
3. The Spa Tray "Essential Kit"
| Component | The Aesthetic Choice | The "Pure Bliss" Benefit |
|---|---|---|
| Scent | Beeswax or Soy Candle | Non-toxic air quality & mood lighting. |
| Hydration | Glass of infused water | Regulates body temp during a hot soak. |
| Textile | Organic Linen Washcloth | Adds softness and protects tray from water. |
| Mindset | Physical Paper Book | Digital detox for better sleep cycles. |
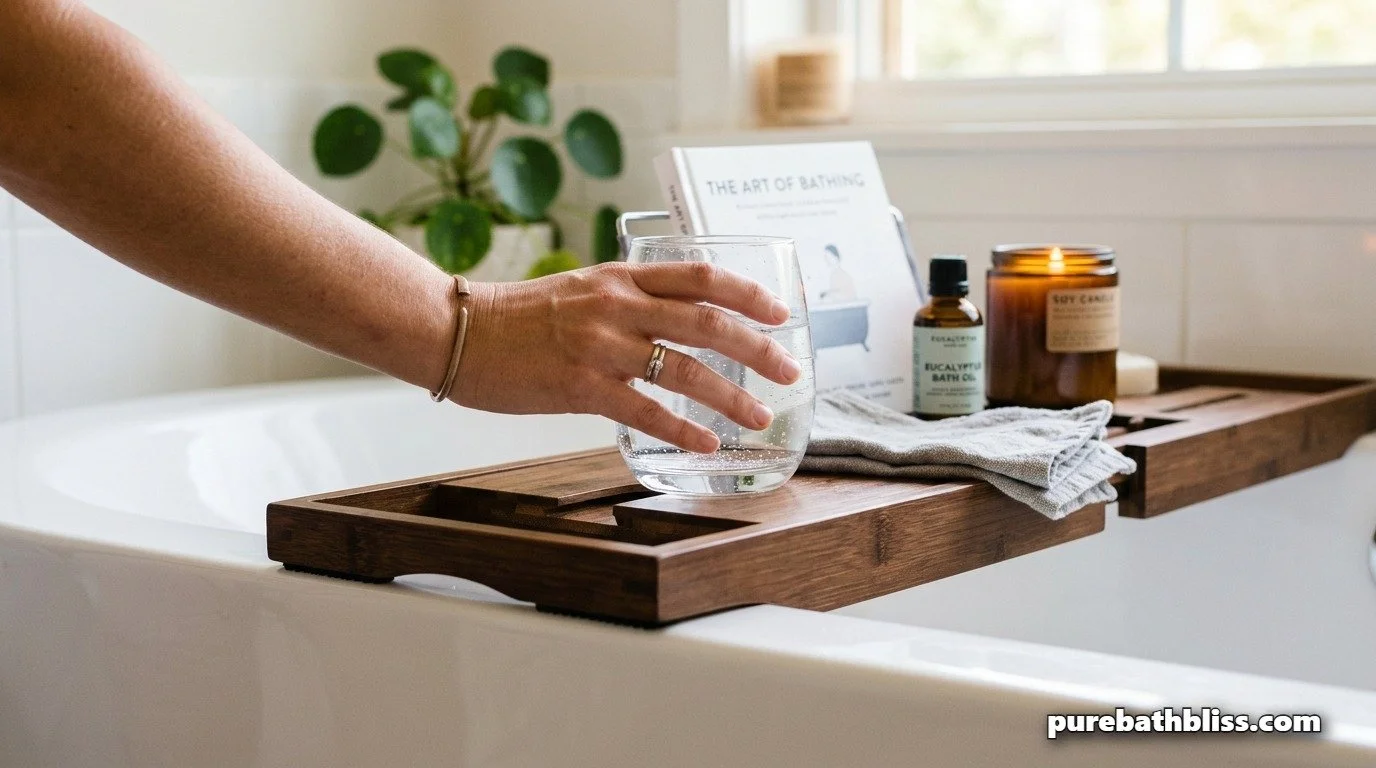
4. Ergonomics: Placement and Safety
As a builder, I can't talk about styling without mentioning safety. A bath tray that slips can cause a serious mess—or worse.
The Grip Rule: Ensure your tray has silicone or rubber grips on the underside where it meets the tub rim. This is the same logic we use for safe bath mats for kids; we want "high-friction" contact points.
The "Weight Balance": Don't overload one side of the tray. If you have a heavy book on the left, balance it with your candle and water on the right. An unbalanced tray is more likely to tip when you reach for a towel.
Non-Slip Silicone Adhesive Pads – If your wood tray doesn't have grips, buy these and stick them to the underside. It’s a 2-minute fix that prevents a catastrophic "tablet in the water" event.
5. Maintenance: Preventing the "Pantry Effect"
In 2026, we avoid the "Pantry Effect"—where the bath tray becomes a permanent shelf for half-used bottles.
The "After-Bath" Reset: When you are done with your soak, the tray should be cleared. Moisture trapped under bottles will eventually cause the wood to mold. Wipe the tray dry with a clean towel and, if possible, store it vertically against the wall. This allows for 360-degree airflow, just as we recommend for maintaining bath toys.
Howard Sun-Stick Wood Conditioner – Every few months, give your wood tray a light coat of beeswax or mineral oil. This keeps the "Infrastructure" of the wood waterproof and prevents splintering.

Summary: The Bath Tray Styling Checklist
Material Matters: Choose Teak or Bamboo for the best moisture resistance.
Odd Numbers Only: Style your items in groups of three for a balanced, designer look.
Mix Textures: Combine the "hard" wood tray with a "soft" linen towel and "organic" plants.
Prioritize Safety: Use silicone grips to prevent the tray from sliding.
Keep it Lean: Only include what you actually need for that specific soak.
The Post-Bath Reset: Dry and store the tray vertically to prevent mold growth.
Harmonize Your Hardware: Match your tray accents to your brushed brass fixtures.
Styling a bath tray is about more than just "decorating"; it’s about creating a functional "Infrastructure for Relaxation." By choosing the right materials and following these professional styling rules, you transform your weekly bath into a high-performance wellness ritual that clears the mind and calms the body.