How to Replace a Toilet Seat: The 10-Minute Hygiene Upgrade
Transparency Note: We independently select these products based on research and user reviews. If you buy something through our links, we may earn a commission.
In the world of home maintenance, we often focus on the "big ticket" infrastructure, like brushed brass fixtures or high-performance low-flow toilets. But from a day-to-day perspective, the most "high-touch" piece of equipment in your home is the toilet seat. As a builder, I’ve seen that a loose, cracked, or stained seat isn't just an eyesore, it’s a failure in your bathroom’s "Hygiene Infrastructure."
If you’ve recently moved into a new home, or if your current seat has developed those annoying "wobbles," replacing it is one of the easiest and most satisfying DIY tasks you can perform. It immediately elevates the psychology of a clean bathroom and provides an opportunity to deep-clean areas of the porcelain that are usually inaccessible.
In 2026, we are moving away from cheap, flimsy plastic seats and toward "Soft-Close" and "Quick-Release" models that make cleaning a breeze. Here is the professional, step-by-step guide to replacing your toilet seat like a pro.
1. Measuring for the Perfect Fit
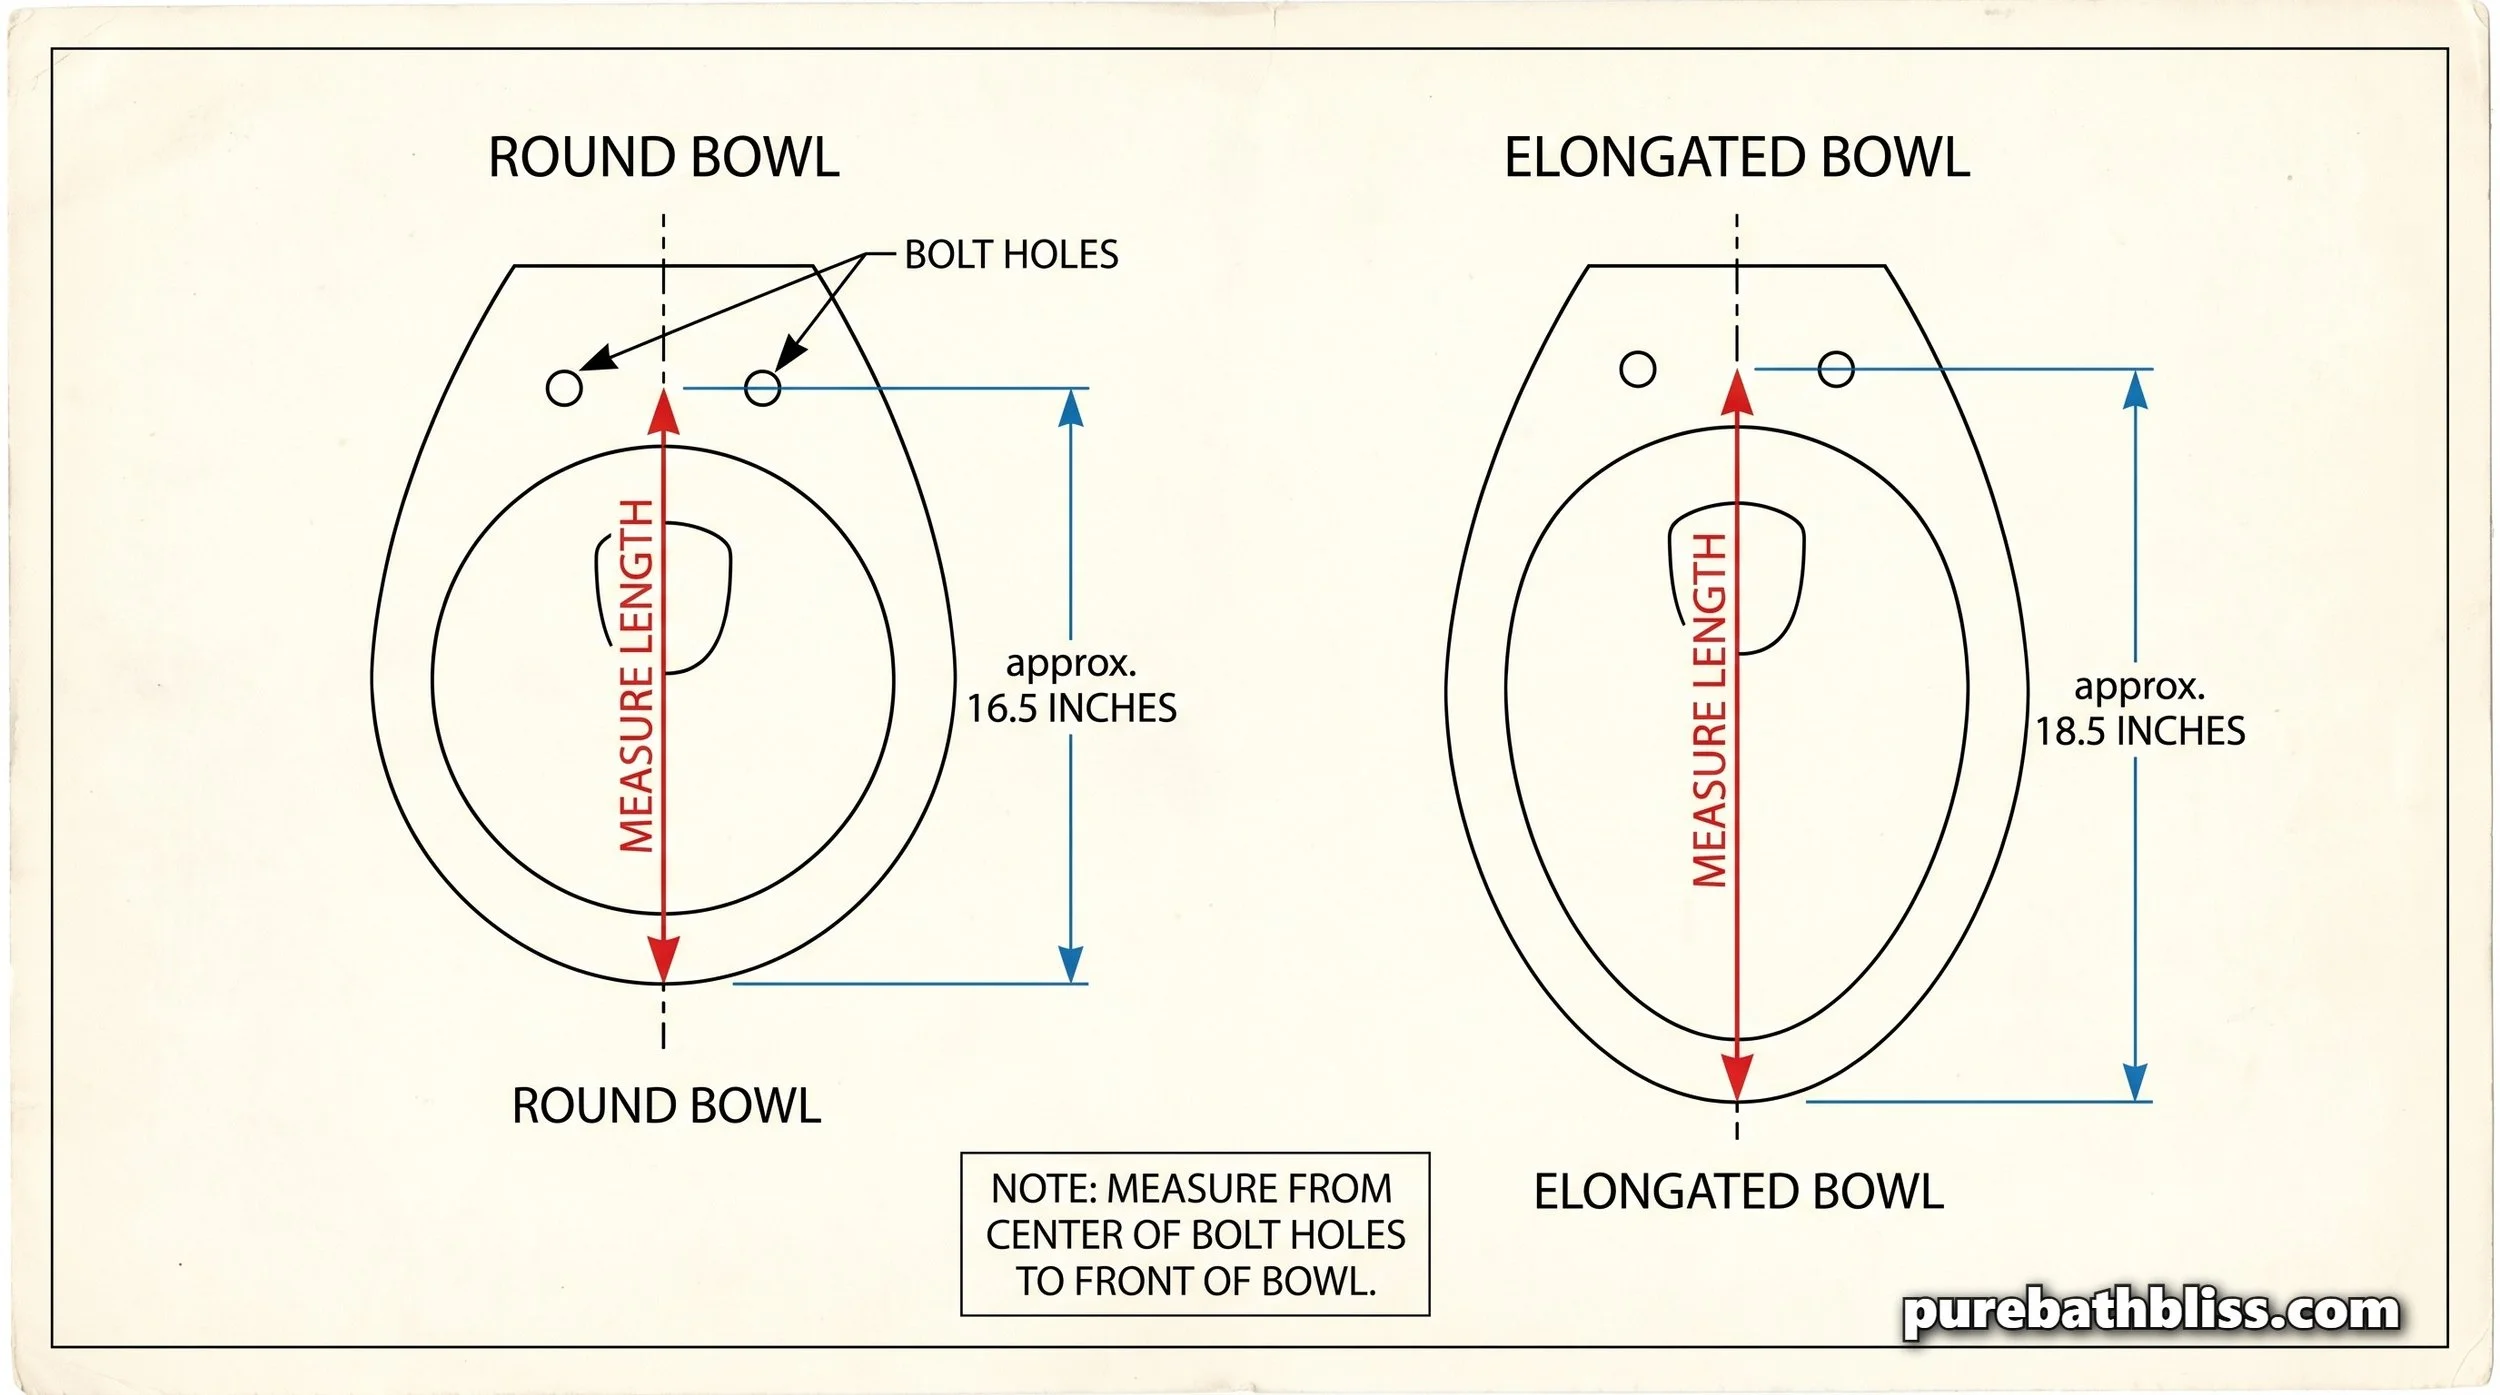
Before you head to the hardware store or browse Amazon, you need to know what you’re looking for. Toilet seats come in two standard shapes, and they are not interchangeable.
Round: Usually found in older homes or smaller powder rooms. These measure approximately 16.5 inches from the center of the mounting holes to the front of the bowl.
Elongated: The 2026 standard for comfort and "Luxury Infrastructure." These measure approximately 18.5 inches from the mounting holes to the front.
The "Mounting Hole" Rule: Almost all residential toilets in North America have a standard 5.5-inch spacing between the two bolt holes.
2. Choosing Your Material: Wood vs. Plastic
This is where homeowners often get stuck. Your choice depends on your specific "Bathroom Workflow."
Molded Wood (Enameled): These feel more "solid" and stay warmer in the winter. However, they are prone to chipping over time, and once the enamel is broken, the wood can absorb moisture and grow pink slime bacteria.
High-Impact Polypropylene (Plastic): In 2026, high-end plastic is the professional's choice. It is non-porous, chemically resistant, and virtually indestructible. It doesn't chip, and most modern models include antimicrobial properties built into the material.
Mayfair Soft-Close Toilet Seat (Elongated) – This is the gold standard for a "Quiet Home." It features "Top-Tite" bolts that prevent the seat from ever loosening.
KOHLER Cachet Quiet-Close with Grip-Tight Bumpers – Excellent for families because the "grip-tight" bumpers prevent the seat from shifting sideways, protecting the porcelain.
3. The Seat Selection Cheat Sheet
| Feature | The "Old Way" | The 2026 Standard |
|---|---|---|
| Closure | Loud Slamming | Soft-Close (Silent) |
| Cleaning | Bolted Down | Quick-Release (Pops Off) |
| Bolts | Plastic (Snaps easily) | Stainless or Top-Tightening |
| Comfort | Standard Flat | Ergonomic Contoured |
4. The Removal: The "Deep Clean" Opportunity
The hardest part of this job is often removing the old seat. If the bolts are old, they may be corroded or stuck.
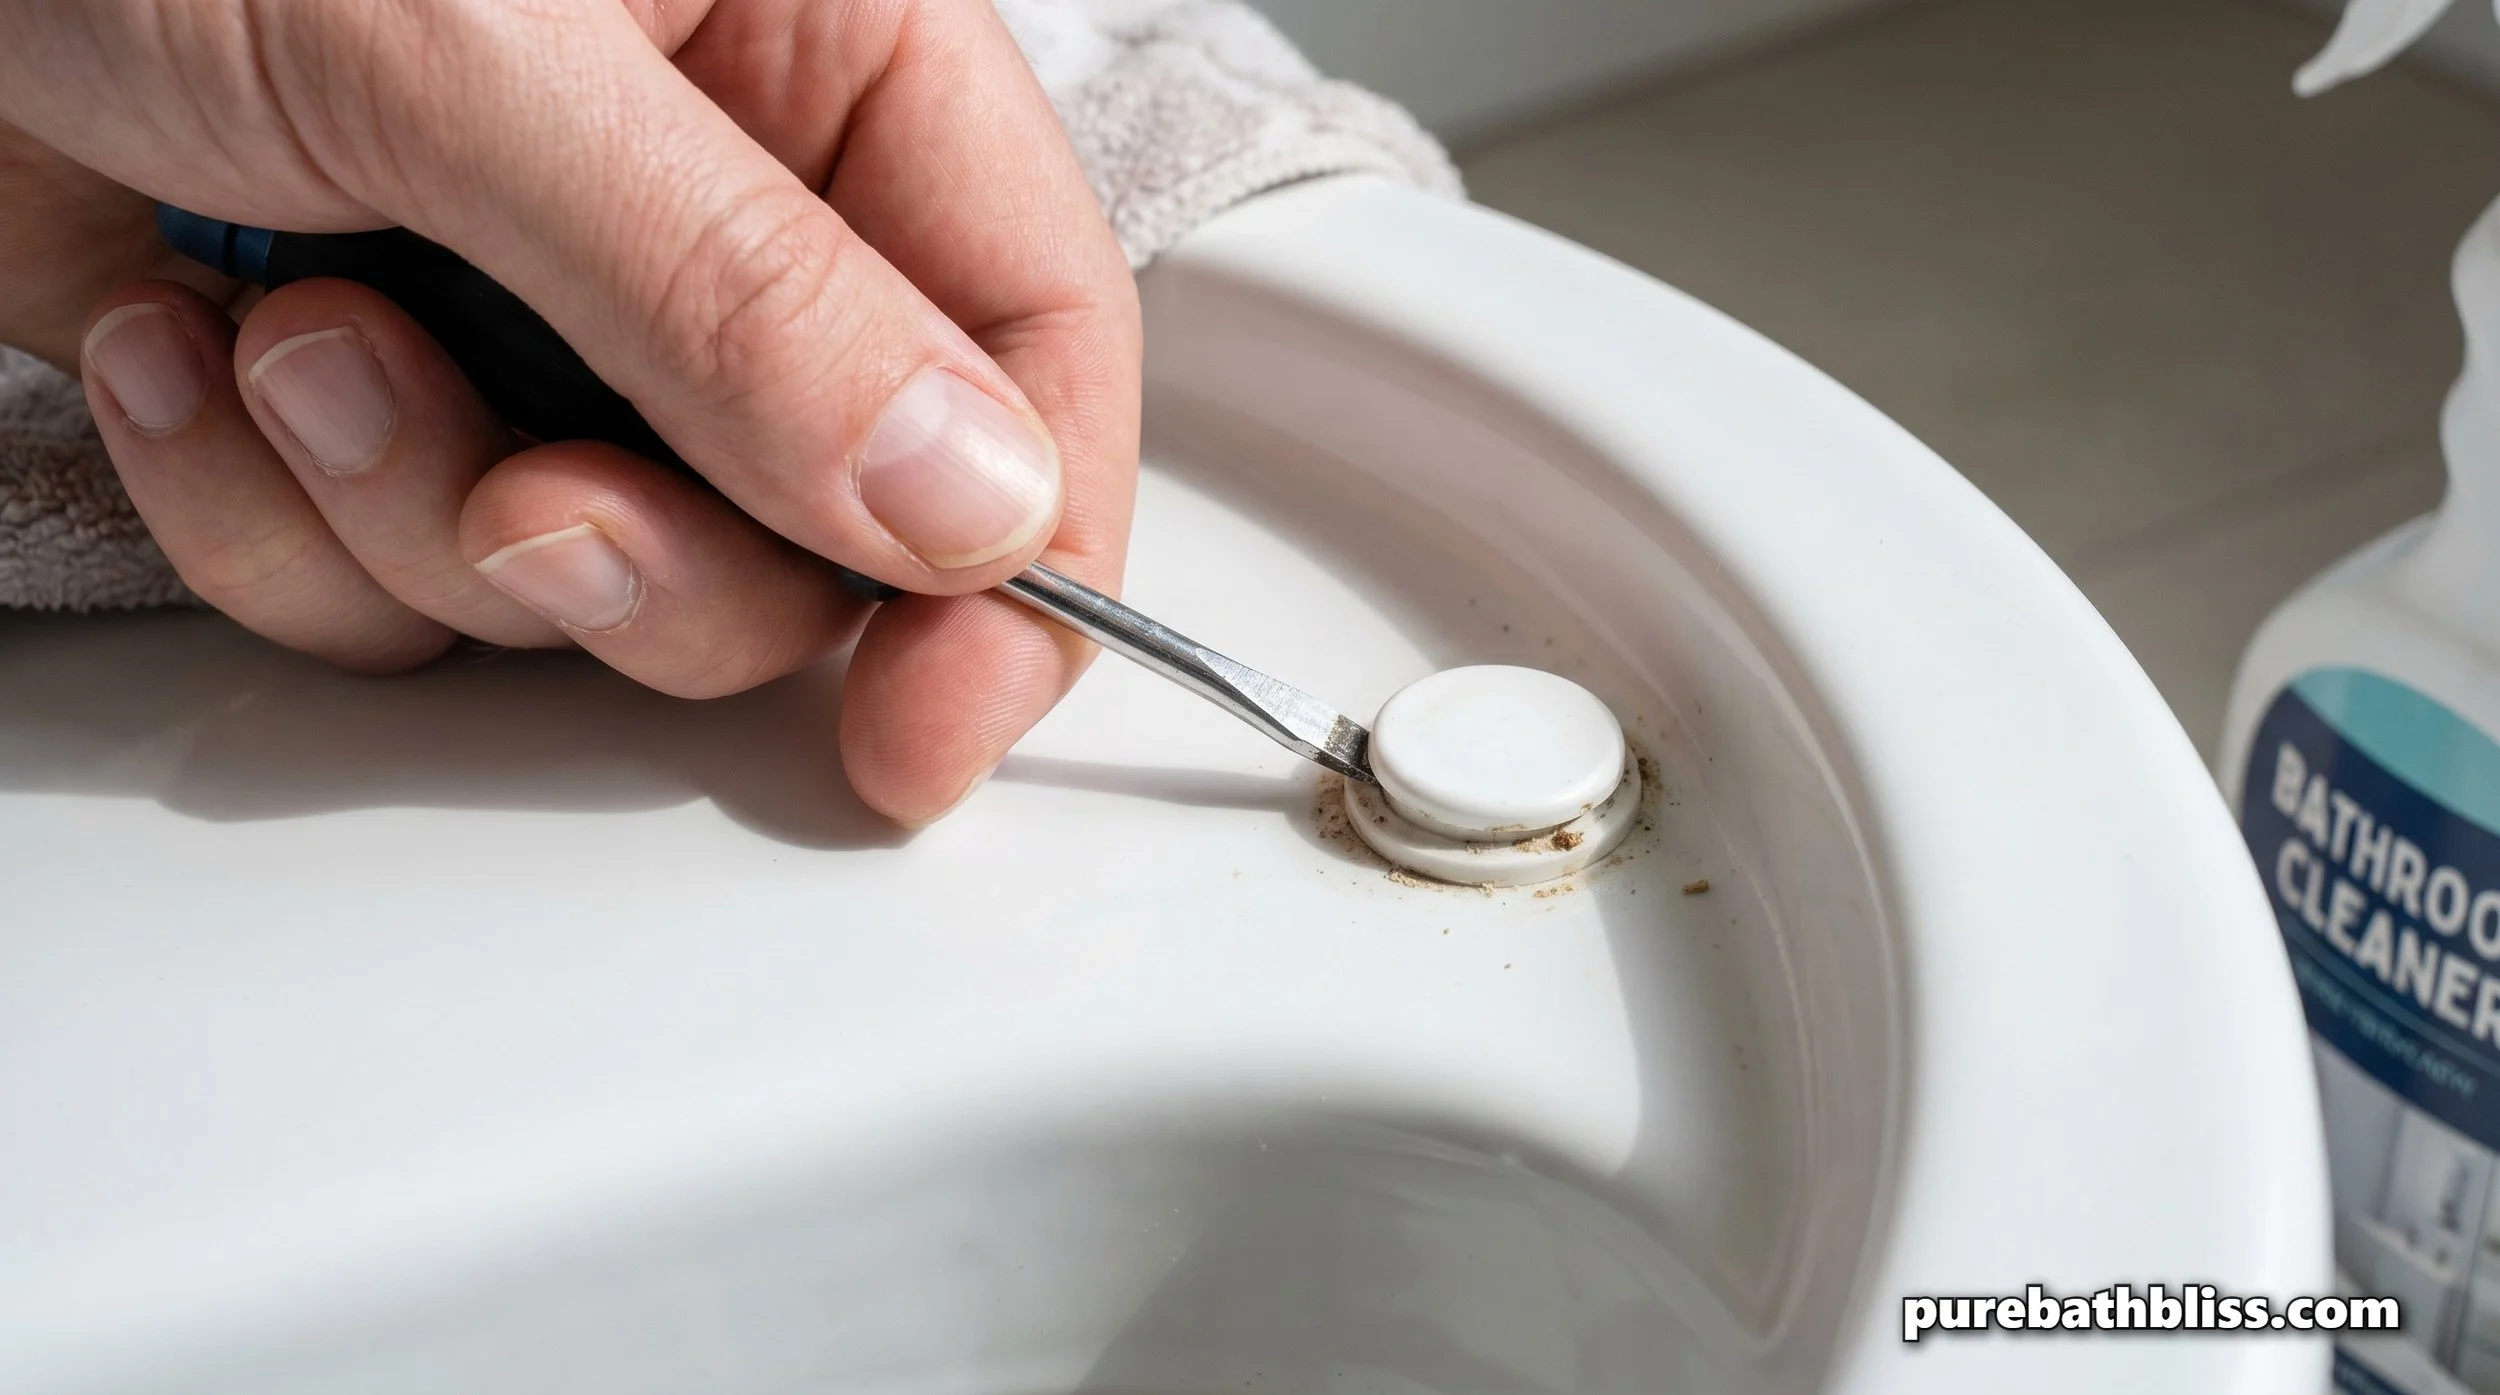
Pop the Caps: Use a flathead screwdriver to flip up the plastic covers at the back of the seat.
Unscrew the Nuts: Reach under the bowl and unscrew the nuts. If they are plastic, they should come off by hand. If they are metal and stuck, a quick spray of WD-40 will do the trick.
The Hidden Zone: Once the seat is off, you will see a build-up of mineral scale and grime that a normal mop can never reach. Use a 50/50 mix of vinegar and water to scrub this area until the porcelain shines. This is a critical step in maintaining the sink and fixture seal integrity of the whole room.
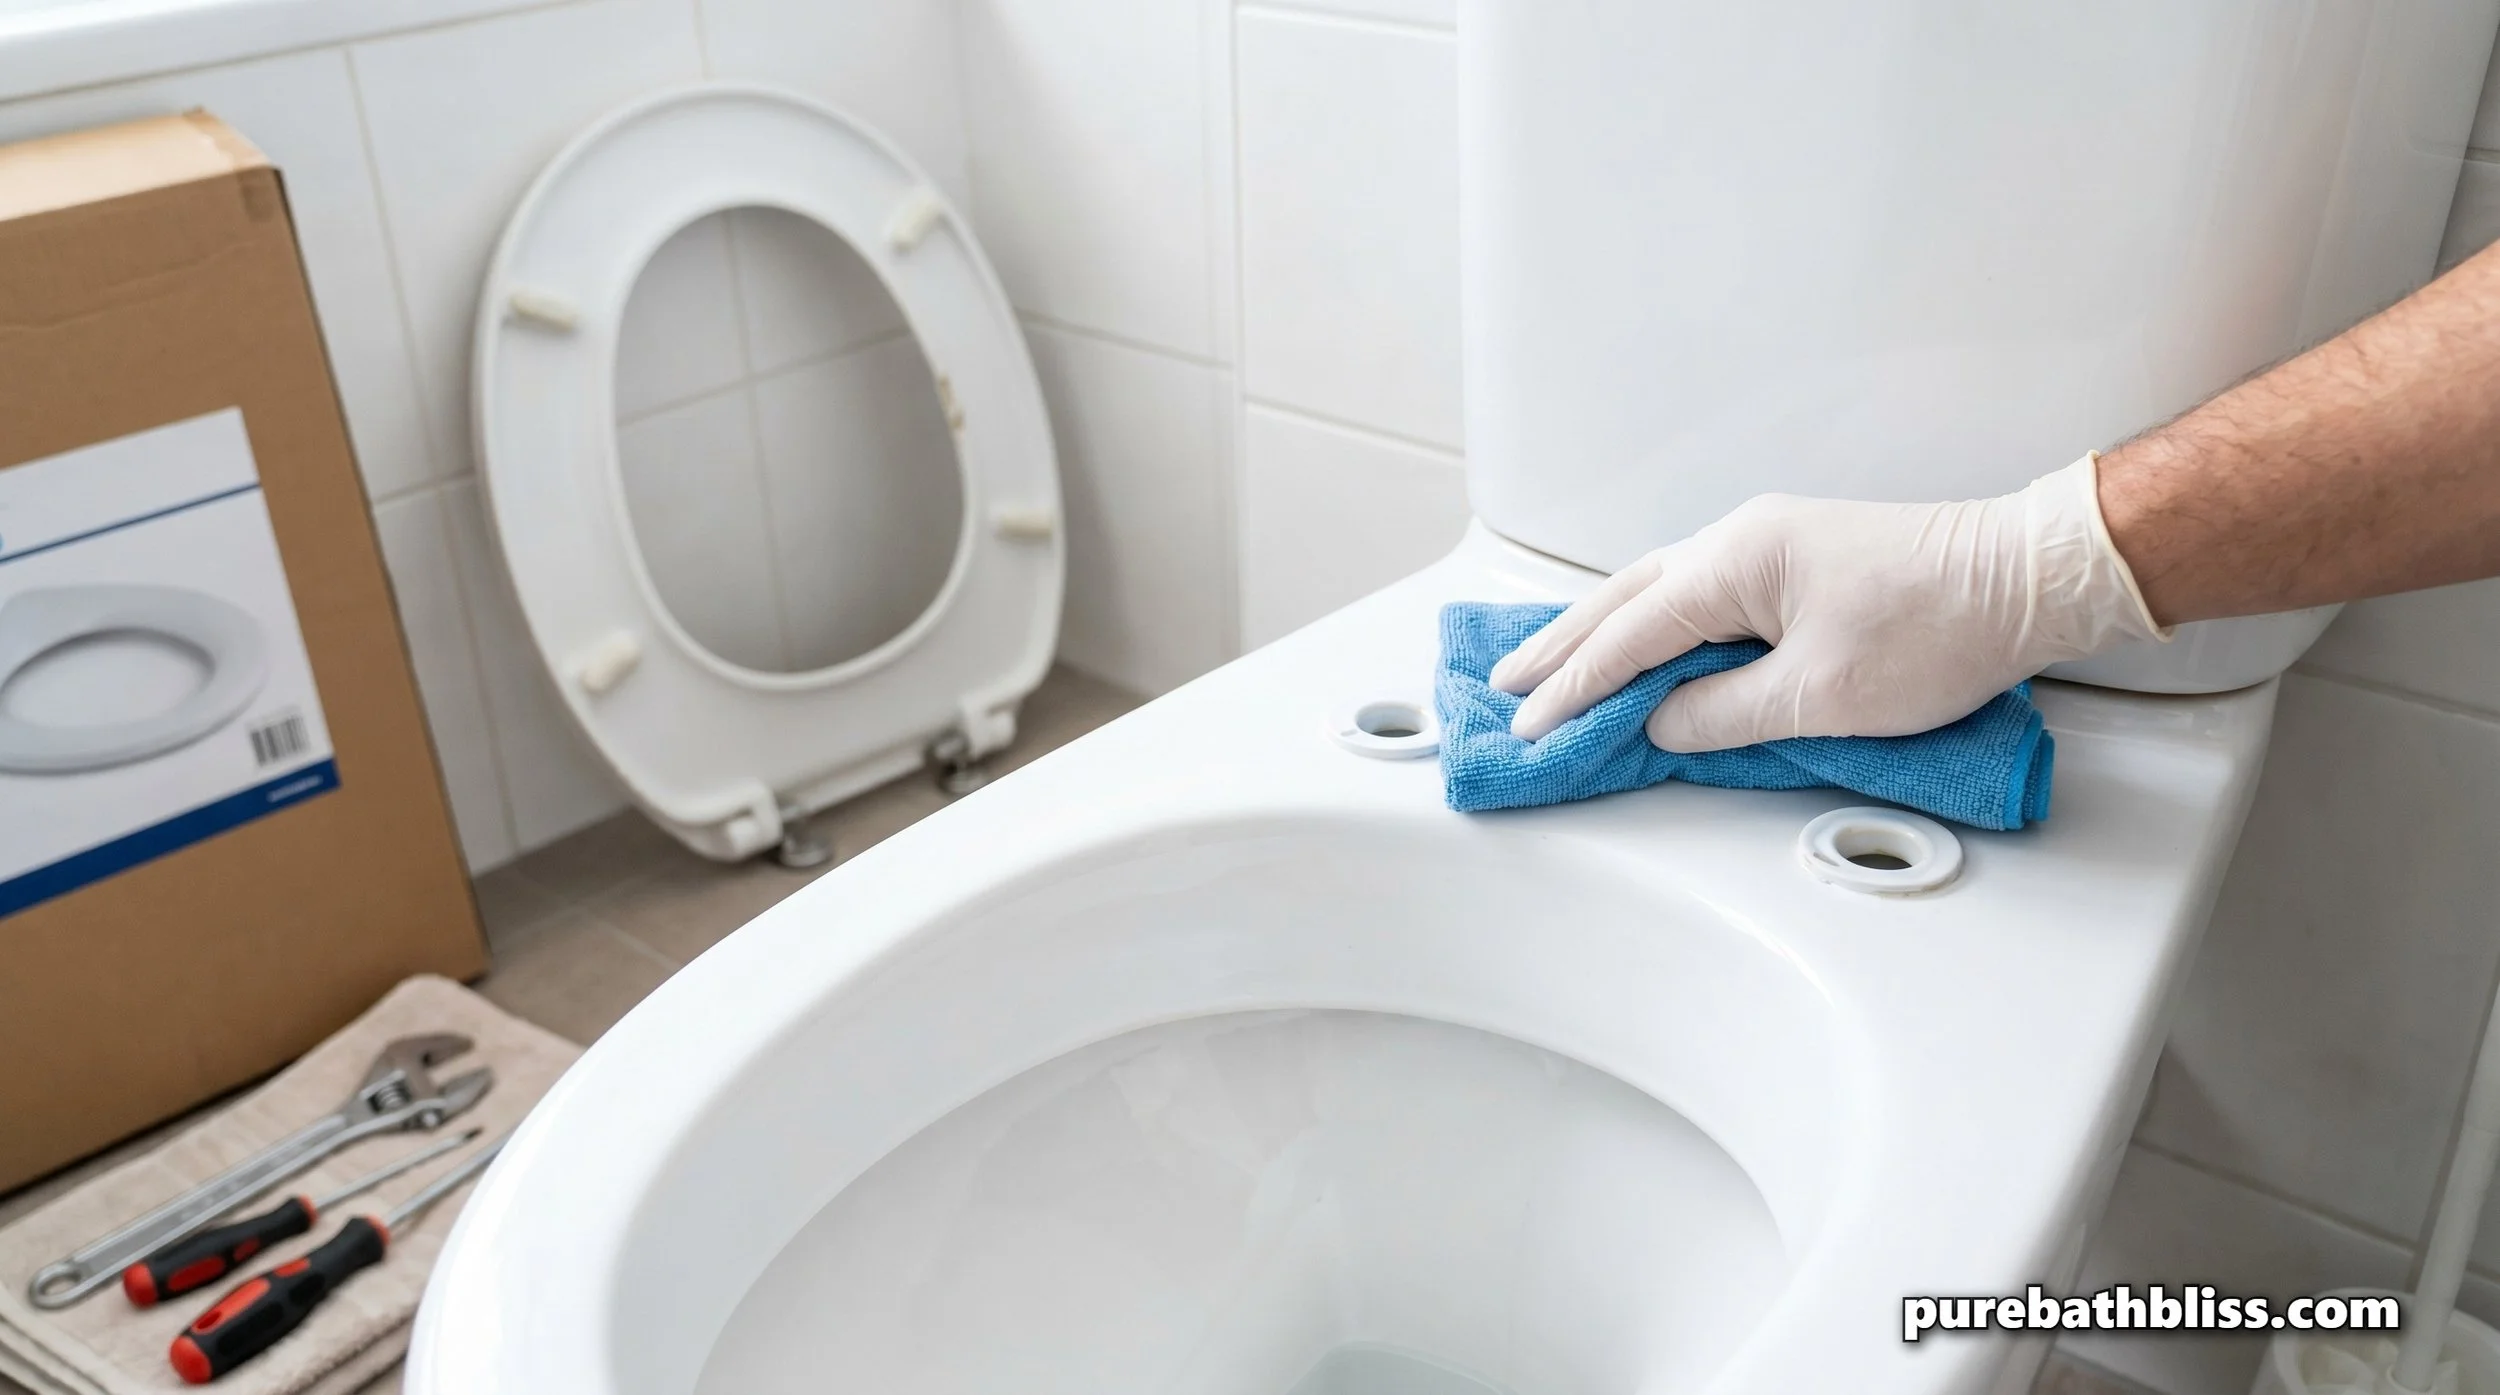
5. Installing Your New Infrastructure
Most 2026 models feature "Top-Tightening" hardware, which means you don't have to lay on the floor and reach behind the toilet.
Align the Hinges: Place the new seat on the bowl and align the hinges with the holes.
Drop the Bolts: Insert the bolts through the hinges and into the holes.
Tighten to "Snug": Screw the nuts on from underneath (or tighten from the top, depending on the model). Pro-Tip: Do not over-tighten. If you use a wrench and go too hard, you risk cracking the porcelain of the bowl. Tighten until the seat doesn't move, then give it a quarter-turn more.
Test the Soft-Close: Give the lid a gentle push. It should glide down silently.
6. Sourcing the Right Tools and Upgrades
While you’re at it, consider these "Builder-Grade" upgrades for your toilet:
Little2Big Toilet Seat with Built-In Potty Seat – If you’re a parent of four like me, this is a lifesaver. It features a built-in toddler seat that magnetically secures into the lid when not in use.
LUXE Bidet Neo 120 – The ultimate 2026 upgrade. It installs under your new seat in minutes and completely transforms your personal hygiene infrastructure.
Clorox ToiletWand System – Because a new seat deserves a new cleaning routine. It keeps the "Hygiene Zone" spotless without the gross storage of a traditional brush.
Summary: The Toilet Seat Upgrade Checklist
Measure Twice: Know if you need Round or Elongated.
Go Soft-Close: Save your ears (and your kids' fingers) from the slam.
Prioritize Quick-Release: Makes deep cleaning the porcelain effortless.
Deep Clean the Base: Use the removal as an opportunity to sanitize the hidden zones.
Don't Over-Tighten: Protect your porcelain "Infrastructure" from cracks.
Verify the Bumper Grip: Ensure the seat doesn't slide sideways when you sit.
Match Your Vibe: Ensure the white (or biscuit) color matches your sink color.
Replacing a toilet seat is a low-effort, high-impact maintenance task. By choosing the right material and following these professional steps, you ensure that your bathroom remains a clean, functional, and comfortable sanctuary for everyone in the family.