The Chemistry of Freshness: A DIY Toilet Odor Neutralizer
Transparency Note: We independently select these products based on research and user reviews. If you buy something through our links, we may earn a commission.
In a household with four daughters, the bathroom is the most high-traffic zone in the home. It is where infrastructure meets daily reality. And while we spend plenty of time talking about Why Your Bathroom Floor is Working Harder Than You Think and keeping the hard surfaces pristine, we rarely talk about the chemistry of air quality.
Most store-bought bathroom sprays are essentially "perfume bombs." They don’t eliminate odors; they just layer synthetic, phthalate-heavy fragrances on top of them, creating a cloying mixture that often makes the situation worse. As a builder, I prefer to solve problems at the source. The "before-you-go" spray isn't magic, it’s physics. By creating a physical barrier on the surface of the water, you trap the sulfurous compounds beneath the surface, preventing them from ever entering the air you breathe.
Let’s look at the science of the barrier and how to build a non-toxic solution right at your workbench.
The Physics of the Barrier: Molecular Dynamics
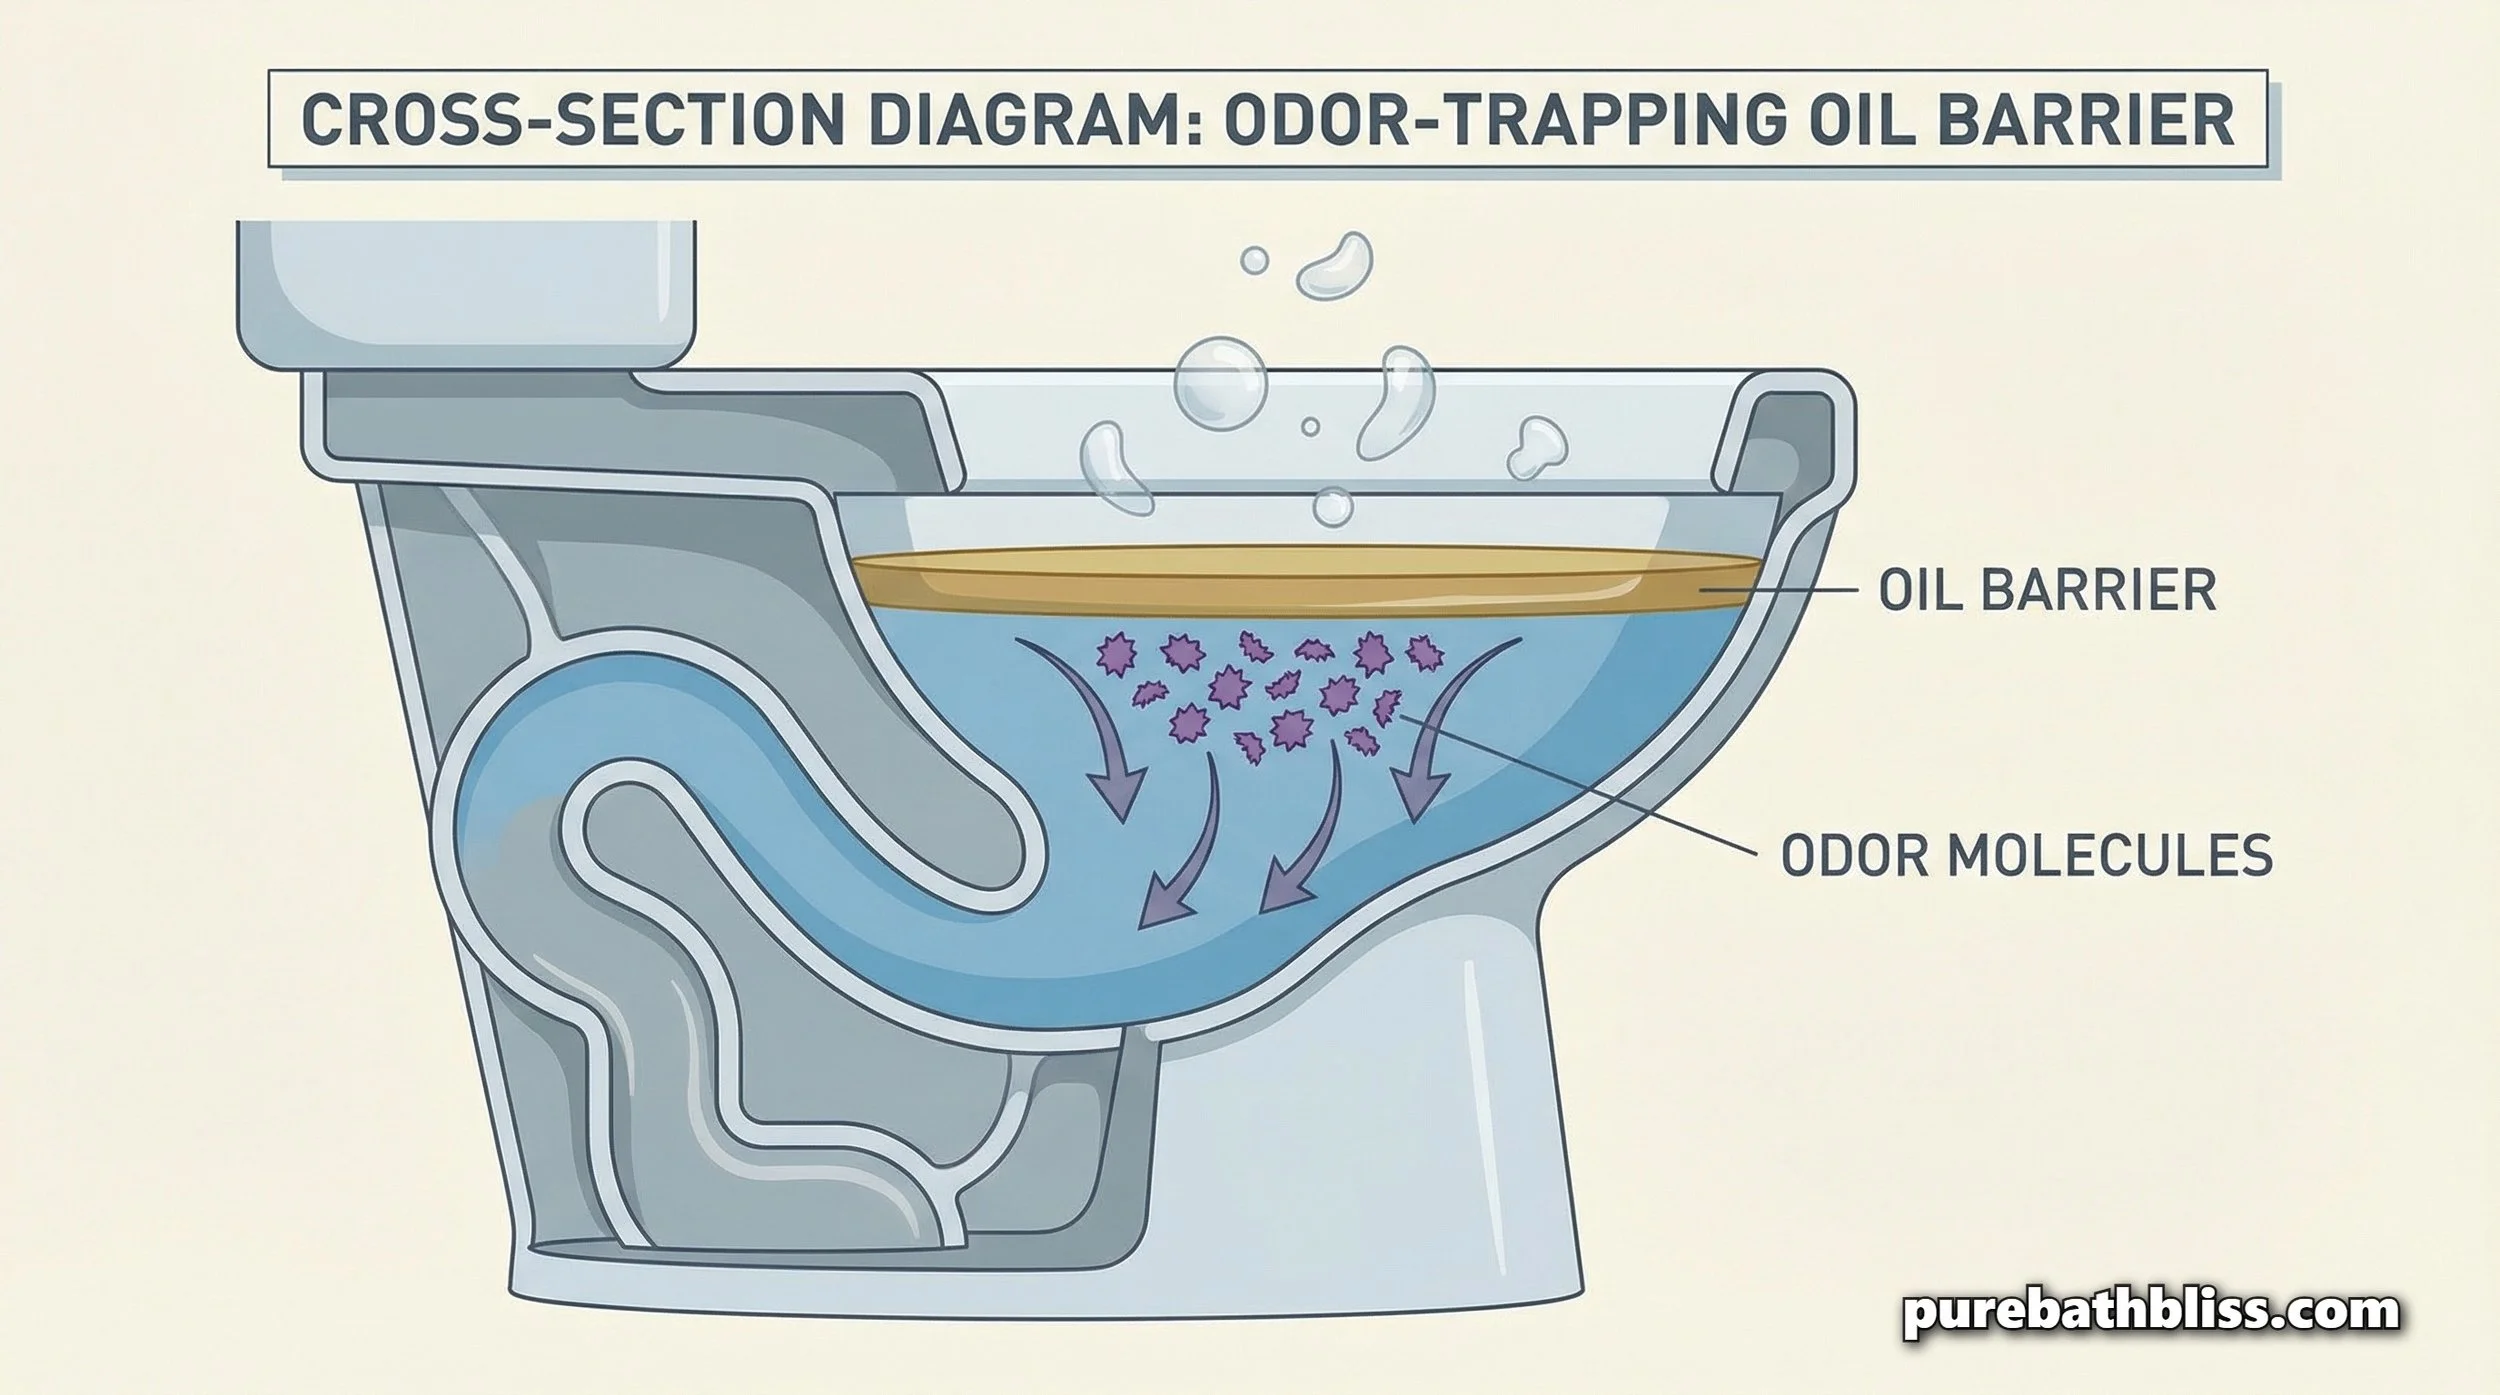
To understand why these sprays work, you have to understand surface tension and molecular behavior. Water has high surface tension due to hydrogen bonding. When you spray an oil-based solution into the toilet bowl before use, you are exploiting this property.
The essential oils in your DIY mixture are hydrophobic, meaning they are "water-fearing." They do not want to mix with the water; instead, they immediately rise to the surface and spread out to form a thin, cohesive film. This film acts as a mechanical gasket. When organic waste hits the water, the odors, which are primarily volatile sulfur compounds, are physically blocked from escaping.
The molecules are literally trapped beneath the oil layer until the flush occurs. This is "encapsulation." Unlike aerosol sprays that rely on masking, which simply overloads your olfactory system with strong scents, this method neutralizes the path of the odor before it enters the air.
However, a clean bathroom isn't just about what you spray in the bowl; it’s about the holistic environment. If your bathroom storage is cluttered with dust-collecting items, you’re creating "dead zones" where odors cling to surfaces. Before you begin your odor-neutralization project, consider performingThe Bathroom Purge to reclaim your space and improve overall airflow.
The Infrastructure Impact: Why Aerosols Damage Your Bath
We talk a lot about protecting materials in this library. Whether it is your grout or your caulk, we emphasize longevity. This is why I avoid aerosol sprays entirely.
Commercial aerosol sprays rely on propellants, usually liquefied petroleum gases like butane or propane, to push the product out of the can. These propellants often carry VOCs (Volatile Organic Compounds) that can settle onto your bathroom surfaces. Over time, these chemicals can interact with the polymer chains in your sealant, potentially degrading the flexibility of your Why Your Caulk is the Bathroom’s First Line of Defense.
When you switch to a pump-action spray bottle using a distilled water-and-oil base, you are eliminating the propellant. You are no longer spraying chemicals that can potentially etch your natural stone vanity or dull the sheen of your faucet finish. It is a subtle change in infrastructure maintenance that pays dividends in the longevity of your bathroom’s fit and finish.
The "Builder’s Formula" for Natural Neutralizers
You don’t need a chemistry degree or a massive budget to make an effective spray. You just need a high-quality carrier, a dispersing agent, and essential oils.
Understanding the Components
Essential Oils: These are the heavy lifters. Citrus oils (Lemon, Bergamot) are naturally deodorizing and antimicrobial. Herbaceous oils (Eucalyptus, Tea Tree, Peppermint) add depth and have anti-fungal properties.
The Solubilizer: This is the most critical part of the build. Oil and water do not mix. If you put oil in water without a bridge, it will float in large globules and clog your sprayer nozzle. You need a base like high-proof rubbing alcohol (isopropyl) or a high-quality vegetable glycerin to act as a solubilizer. This allows the oil to disperse evenly in the water.
Distilled Water: Always use distilled. Tap water contains minerals that can cause bacterial growth over time inside your spray bottle.
Quick Reference: The DIY Mixing Guide
| Ingredient | Function | Pro-Tip |
|---|---|---|
| Rubbing Alcohol (70%+) | Solubilizer | Acts as the bridge between oil and water. |
| Essential Oils | Neutralizer | Use 30 drops per 2oz bottle. |
| Distilled Water | Carrier | Always shake before use. |
The Material List
Before you start the assembly, you need to ensure you have the right components. Do not substitute these materials, as they are chemically specific to the goal of creating an stable, effective barrier.
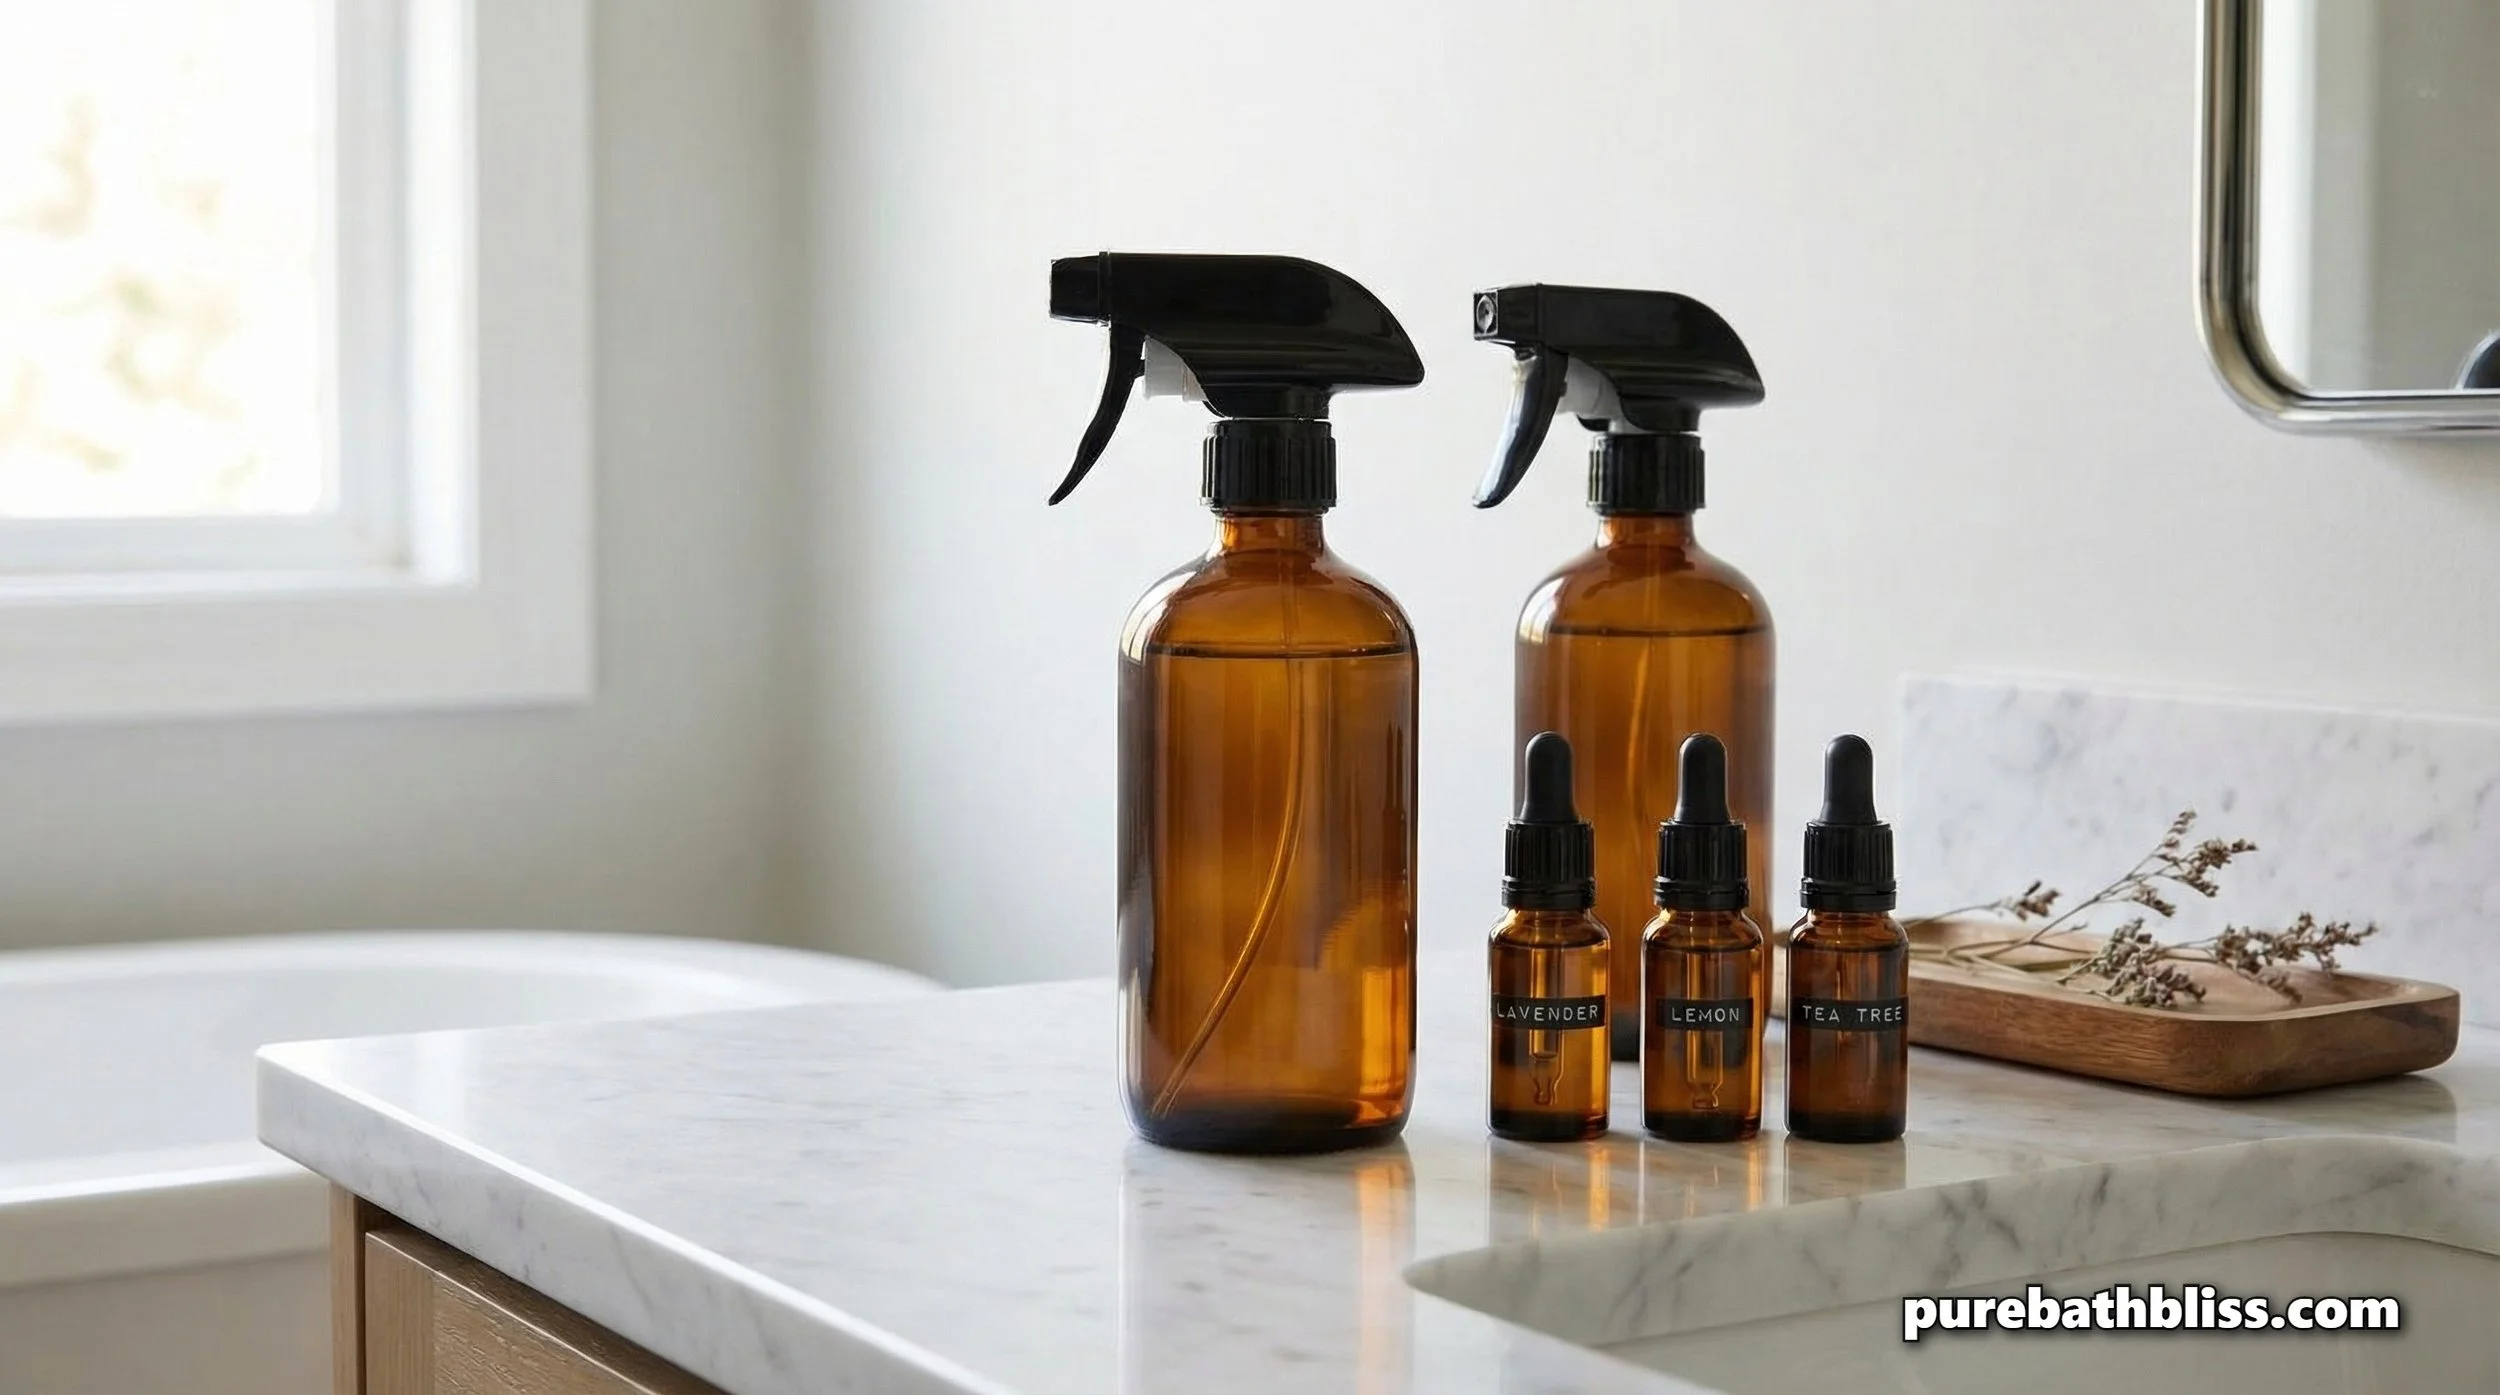
Amber or Cobalt Glass Spray Bottle (2oz/60ml): Never use clear plastic. Essential oils can degrade plastic over time, and light will oxidize your oils.
Essential Oils (30–40 Drops total): High-quality, therapeutic-grade oils like Eucalyptus, Peppermint, Lemon, or Bergamot.
High-Proof Rubbing Alcohol (1–2 Tablespoons): This acts as the solubilizer. Without this, your oil and water will never mix.
Distilled Water: Essential. Tap water contains minerals that can cause bacterial growth inside the bottle over time.
Mixing Your Neutralizer
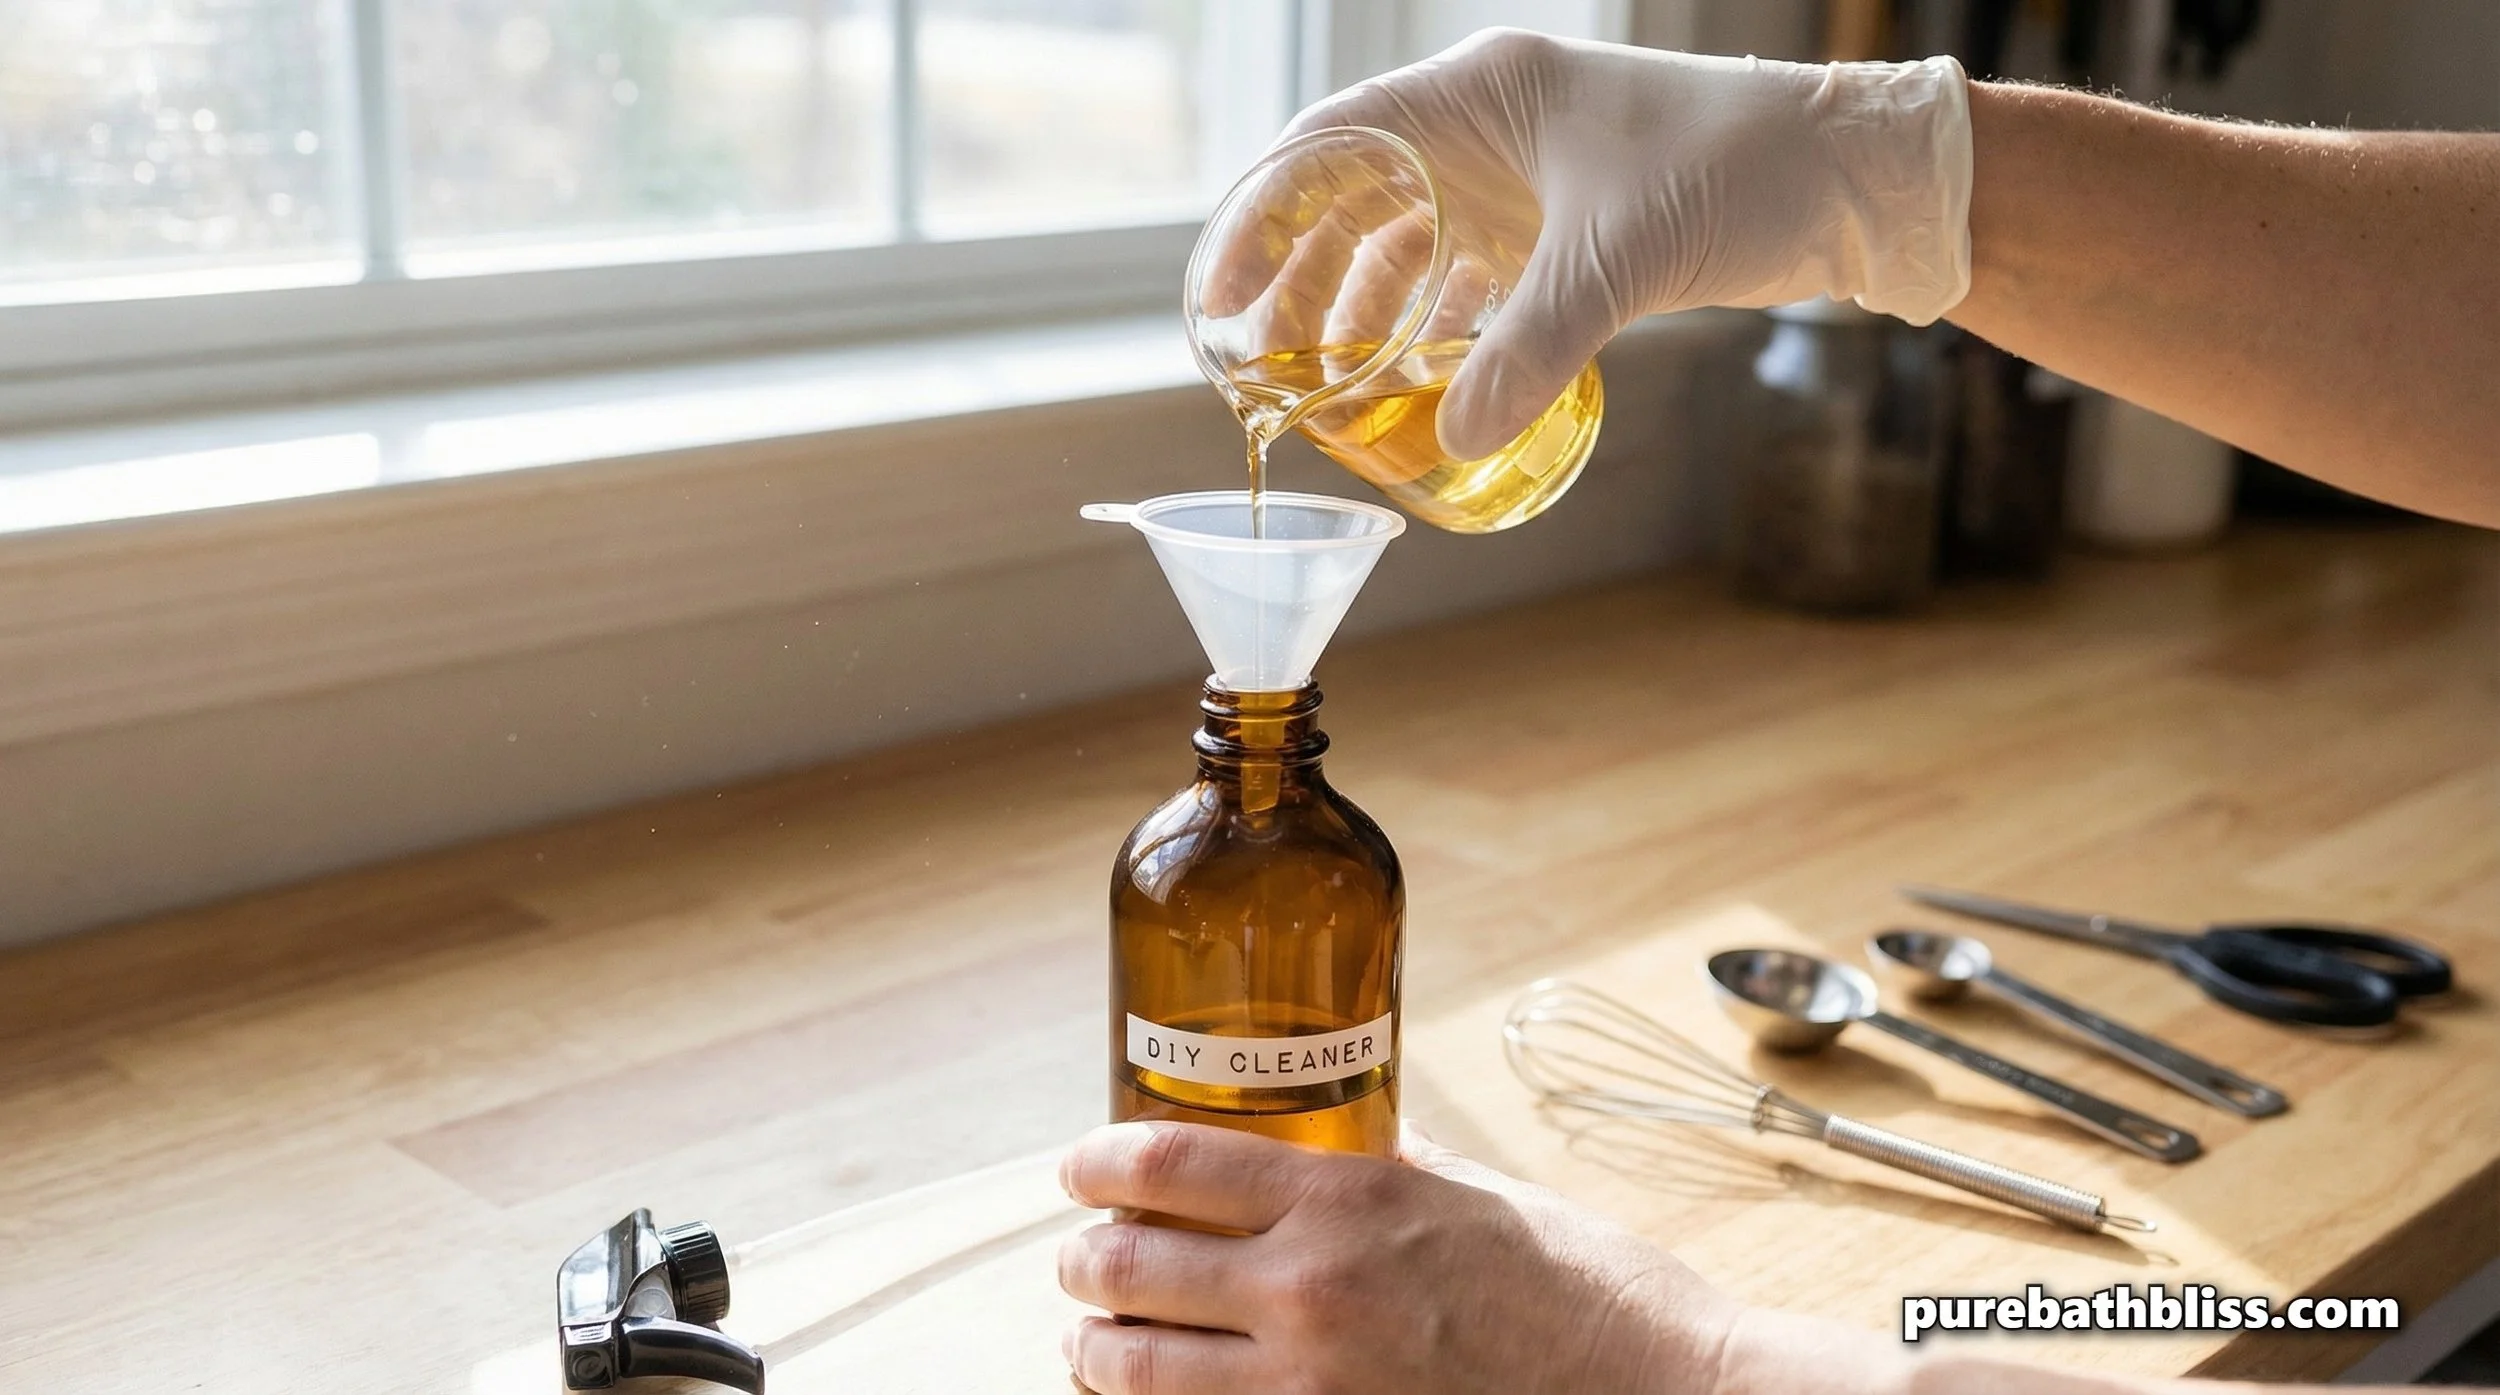
This isn't a complex build, but like any construction project, the order of operations matters. If you mix your oils and water first without the solubilizer, you’ll end up with an unstable solution that separates immediately.
Prep the Vessel: Ensure your 2oz amber glass spray bottle is clean and completely dry. Any residual water from the factory or a previous soap rinse can harbor bacteria.
The Base: Measure out 1 tablespoon (15ml) of your rubbing alcohol (or vegetable glycerin) into the bottle.
The Infusion: Add your 30 drops of essential oils directly to the alcohol. Shake the bottle gently for 10 seconds. This is the most important step, by mixing the oils into the alcohol first, you ensure the oils are fully dissolved. If you add the water first, the oils will just float on top.
The Fill: Carefully top off the bottle with distilled water, leaving about 1/2 inch of headspace at the top for the spray mechanism to sit.
The Final Seal: Cap the bottle tightly and give it a rigorous, 20-second shake. Your neutralizer is now ready.
Pro-Tip: Every time you go to use it, give it a quick shake. Essential oils are volatile and will naturally separate from the water over time. A quick shake ensures every spray is perfectly balanced.
Troubleshooting and Long-Term Stability
In my shop, I always preach about tool maintenance. Your DIY spray bottle is a tool, and it requires care.
1. The Emulsification Issue
If your spray head keeps clogging, you have an emulsification failure. You aren't using enough alcohol to bridge the oil. If you find the oil is still separating, increase the ratio of rubbing alcohol. Do not use dish soap as an emulsifier; while it works as a surfactant in the sink, it will create unwanted bubbles and suds in your toilet bowl that aren't necessary.
2. Oxidation and Light Degradation
Essential oils are delicate. They oxidize when exposed to light and heat, which ruins their scent profile and can change their chemical behavior. Always store your DIY neutralizer in an amber or cobalt glass bottle. Never use clear plastic, as it allows UV light to penetrate and can actually react with the essential oils, potentially breaking down the plastic over time.
3. Safety Protocols
Essential oils are concentrated. This is not a body mist. Keep it clearly labeled and stored away from areas where your children might confuse it with a perfume. If you ever have a mishap or a spill while mixing your solution in the bathroom, don't panic. Refer to our guide on How to Clean a Bathroom Accident for the proper cleanup procedure to avoid damaging your flooring.
The Sanctuary Standard: Why DIY Matters
When you move to a simple water-and-oil blend, you are protecting not just your air quality, but the longevity of your vanity and fixtures. It’s the same logic we use to protect your caulk; every chemical you introduce into your bathroom has a potential interaction with the materials installed there.
By neutralizing odors at the source, you’re creating a more restorative space for your family—one that feels clean, smells natural, and respects the materials that make up your home.
If you find that your bathroom still has a "lingering" odor after you've implemented this spray, it might be time to investigate the hidden areas. Sometimes, moisture trapped in grout or behind a vanity creates a musty scent that no spray can fix. Keep your routine tight, keep your surfaces sealed, and keep your space organized.