The 15-Minute Weekly Ritual to Keep Bathroom Mold Away (Without Bleach)
Let’s be honest: nobody wakes up on a Saturday morning excited to scrub grout.
For most of us, bathroom cleaning is a chore we dread, procrastinate, and then attack with aggressive chemicals in a frantic attempt to "nuke" the grime. We hold our breath, spray something that smells like a swimming pool, and scrub until our arms ache.
But here is the uncomfortable truth: if you are relying on bleach to keep your bathroom mold-free, you are fighting a losing battle.
Mold is not just "dirt." It is a living organism. When you blast it with chlorine bleach, you might bleach the color out of the surface spores (making it look clean), but the chemical structure of bleach prevents it from penetrating porous materials like grout or drywall. The result? The "roots" of the mold (hyphae) remain alive and well beneath the surface, feeding on the moisture left behind.
This is why that black spot in the corner of your shower keeps coming back, no matter how hard you scrub.
At Pure Bath Bliss, we believe in smarter, safer strategies. You don't need harsh toxins to maintain a sanctuary; you just need a better routine. By shifting from "reactive scrubbing" to "proactive maintenance," you can keep your bathroom perpetually fresh in just 15 minutes a week.
Here is the science-backed, eco-friendly ritual that will change your relationship with your bathroom—and save your grout.
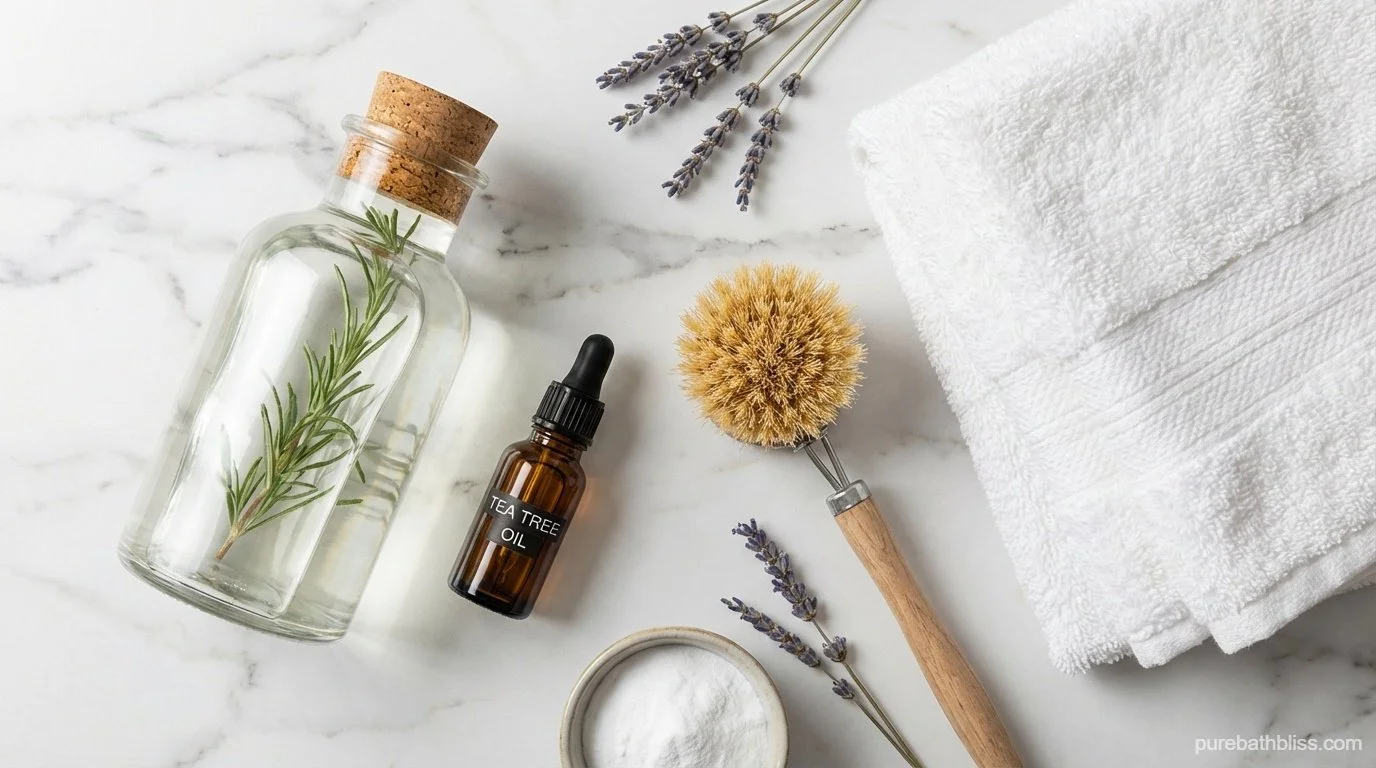
Part 1: The "Anti-Bleach" Toolkit
Before we dive into the routine, we need to swap out your arsenal. If your cleaning cabinet is full of bottles with skull-and-crossbones warnings, it’s time to simplify.
To effectively kill mold roots without poisoning your indoor air, you need acidity and friction, not chemical burns.
The Essentials:
Distilled White Vinegar: The holy grail. The acetic acid in vinegar penetrates porous surfaces to kill mold at the root.
Hydrogen Peroxide (3%): A powerful alternative to bleach that breaks down into water and oxygen. (Note: Don't mix this with vinegar in the same bottle; use one or the other).
Tea Tree Oil: A natural fungicide that smells like a spa and keeps spores from landing.
Microfiber Cloths: These grab dust and spores rather than just pushing them around.
A Stiff Grout Brush: Essential for agitation. An old toothbrush works in a pinch, but a dedicated grout brush saves time.
Part 2: The Daily "Pre-Hab" (2 Minutes)
The secret to a 15-minute weekly clean is ensuring the bathroom never gets truly dirty in the first place. You can eliminate 90% of mold growth by managing one thing: Moisture.
Mold spores need 24–48 hours of dampness to germinate. If you dry out the room effectively, they can't grow. It’s that simple.
1. The Squeegee Swipe (30 Seconds)
Keep a squeegee in your shower. As soon as you turn the water off, swipe the droplets off the glass and tile walls.
Why: You are sending that water down the drain now, rather than forcing your ventilation fan to work for hours to evaporate it into the air.
The Benefit: No more hard water spots on your glass, and no moisture sitting in your grout lines.
2. The Fan Rule (20 Minutes)
As we detailed in our Ultimate Air Quality Guide, the biggest mistake people make is turning the fan off when they leave the room.
The Fix: Leave the fan running for at least 20 minutes after your shower. If you don't have a timer switch, set an alarm on your phone. You need to pull the humidity out of the drywall itself, not just clear the mirror fog.
3. The Curtain Shake
If you use a shower curtain, never leave it bunched up in the corner. That creates a dark, wet pocket where mildew thrives. Pull it fully closed across the tub so air can circulate around the entire surface.
Still using a plastic liner? Read why it might be time to swap it for hemp or cotton.
Part 3: The 15-Minute Weekly Ritual
It’s Saturday morning. You have your coffee. You have your playlist. Let’s do this.
Minute 0–2: The Vinegar Soak
Walk into the bathroom and spray your shower walls, tub, and especially the corners of the grout with undiluted white vinegar.
Do not scrub yet.
The Science: Vinegar needs dwell time to penetrate the calcium in hard water deposits and the porous structure of the grout.
Pro Tip: If the vinegar smell is too intense, add 10 drops of Lemon Essential Oil to the bottle. It cuts the sourness and adds extra grease-fighting power.
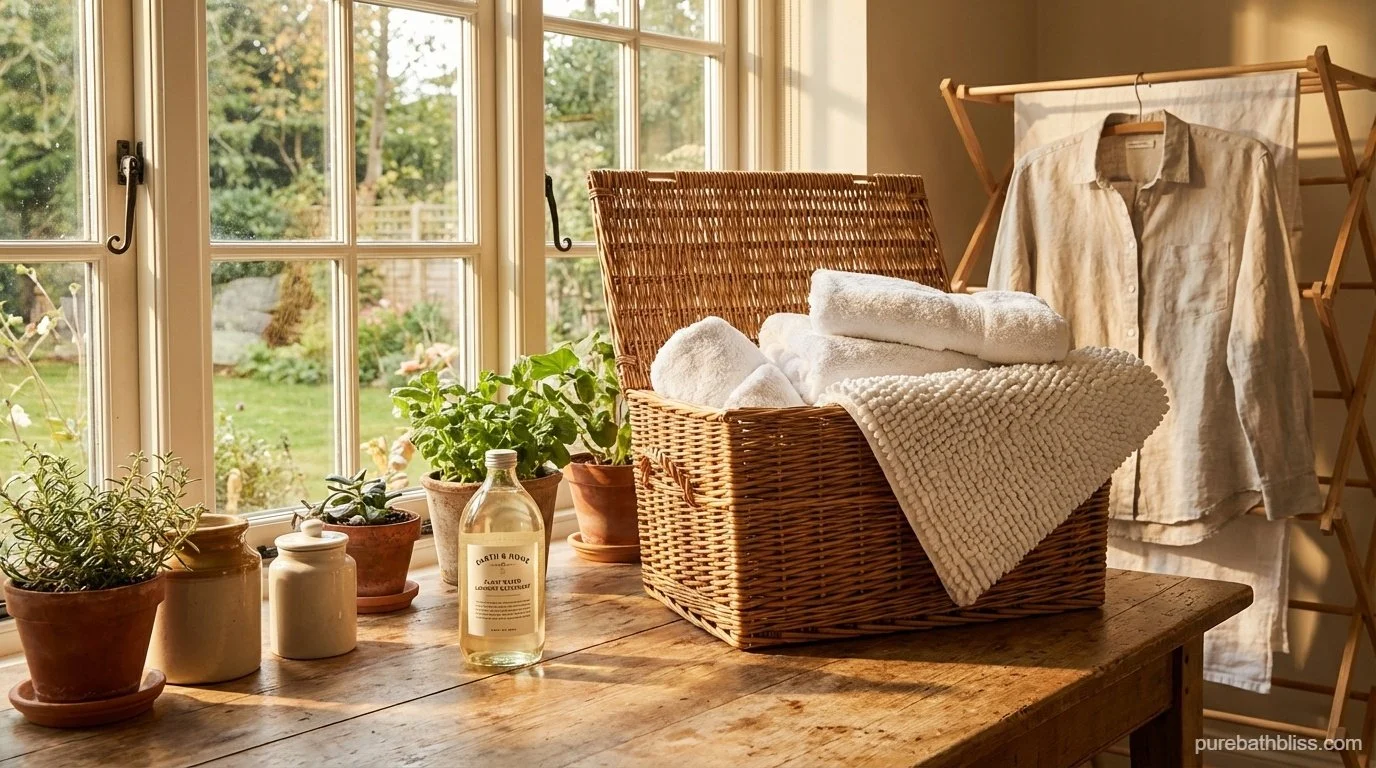
Minute 2–5: The Linen Reset
While the vinegar is doing the heavy lifting in the shower, strip the room.
The Towels: Damp towels are a breeding ground for bacteria (and the source of that "musty" smell).
The Bath Mat: This is the most overlooked item in the bathroom. It sits on the floor, absorbing water and dead skin cells—a buffet for mold.
The Action: Throw the towels, the bath mat, and your fabric shower curtain liner into the wash immediately. Wash on Hot (unless the care label strictly forbids it) to kill dust mites and bacteria.
Minute 5–10: The High-Low Wipe Down
While the shower soaks, tackle the surfaces. We work from Top to Bottom so that dust falls onto the floor, which we will clean last.
The Fan Grille: Look up. Is your fan grille fuzzy? That gray fuzz is dust mixed with moisture—perfect mold food. Swipe it with a microfiber cloth.
The Vanity: Wipe down the sink and faucet. Use a cloth dampened with vinegar to shine the chrome and remove toothpaste splatter.
The Toilet: Give the bowl a quick brush and wipe the seat and handle. (We recommend keeping a separate set of cloths for the toilet to avoid cross-contamination).
Minute 10–13: The Shower Scrub
Return to the shower. The vinegar has now been sitting for 10 minutes, breaking down soap scum and mineral deposits.
The Agitation: Take your stiff brush and give the grout lines a quick scrub. You shouldn't need to use much elbow grease; the vinegar has loosened the bonds.
The Rinse: Turn on the shower (hot water) and use a handheld sprayer or a cup to rinse everything down.
The Finish: Squeegee the water off immediately.
Minute 13–15: The Floor Polish
The final step. All the dust from the fan and counters is now on the floor.
Vacuum or Sweep: Quickly remove the hair and dust bunnies.
The Damp Mop: Using a microfiber mop (or a cloth on a swiffer), wipe the floor with a mix of water and a drop of dish soap.
Important: Don't soak the floor. Excess water on tile floors can seep into the subfloor if your grout is cracked. Damp is better than wet.
...And you are done.
Part 4: The "Secret Weapon" DIY Daily Spray
If you want to make your weekly clean even easier (we’re talking 5 minutes instead of 15), keep a bottle of this "Preventer Spray" in the shower. Mist it on the walls after you squeegee, and just leave it there. It creates an inhospitable environment for mold spores.
The "Pure Bath Bliss" Preventer Recipe:
1 Cup Distilled Water
1/2 Cup White Vinegar
10 Drops Tea Tree Oil (Antifungal powerhouse)
10 Drops Eucalyptus Oil (For that spa scent)
Shake before every use, as oil and water separate.

Part 5: When to Call a Professional
Sometimes, despite our best efforts, mold wins. It is crucial to distinguish between surface mildew (which this routine handles) and structural mold (which requires remediation).
Red Flags:
The "Push" Test: Press on the drywall or tile where you see mold. If it feels soft, spongy, or crumbly, the moisture has rotted the material behind it.
The Smell: If the room smells earthy or musty even after a deep clean and airing out, there may be mold growing behind the vanity or under the floor.
The Recurrence: If you clean a patch of mold and it returns in the exact same spot within 48 hours, you likely have a leak (plumbing or grout failure) feeding it from behind the wall.
If you notice these signs, stop cleaning and call a remediation specialist. Scrubbing structural mold can release millions of spores into the rest of your home.
Conclusion: Cleaning as Self-Care
It is easy to view cleaning as a punishment—something we "have" to do. But in the philosophy of Pure Bath Bliss, caring for your home is an extension of caring for yourself.
When you spend those 15 minutes scrubbing the grout and scenting the air with eucalyptus, you are not just removing dirt. You are curating your environment. You are ensuring that when you step into that bath later tonight, you aren't breathing in spores or staring at grime. You are breathing clean, processed air in a space that supports your wellness.
So, put on your favorite podcast, grab that vinegar bottle, and reclaim your sanctuary.
Ready to add some life back into your sparkling clean bathroom? Now that the air is fresh, check out our guide to 7 "Unkillable" Plants That Thrive in Your Windowless Bathroom.