Why Your Bathroom Faucet Has Weak Pressure (And the 2-Minute Aerator Fix)
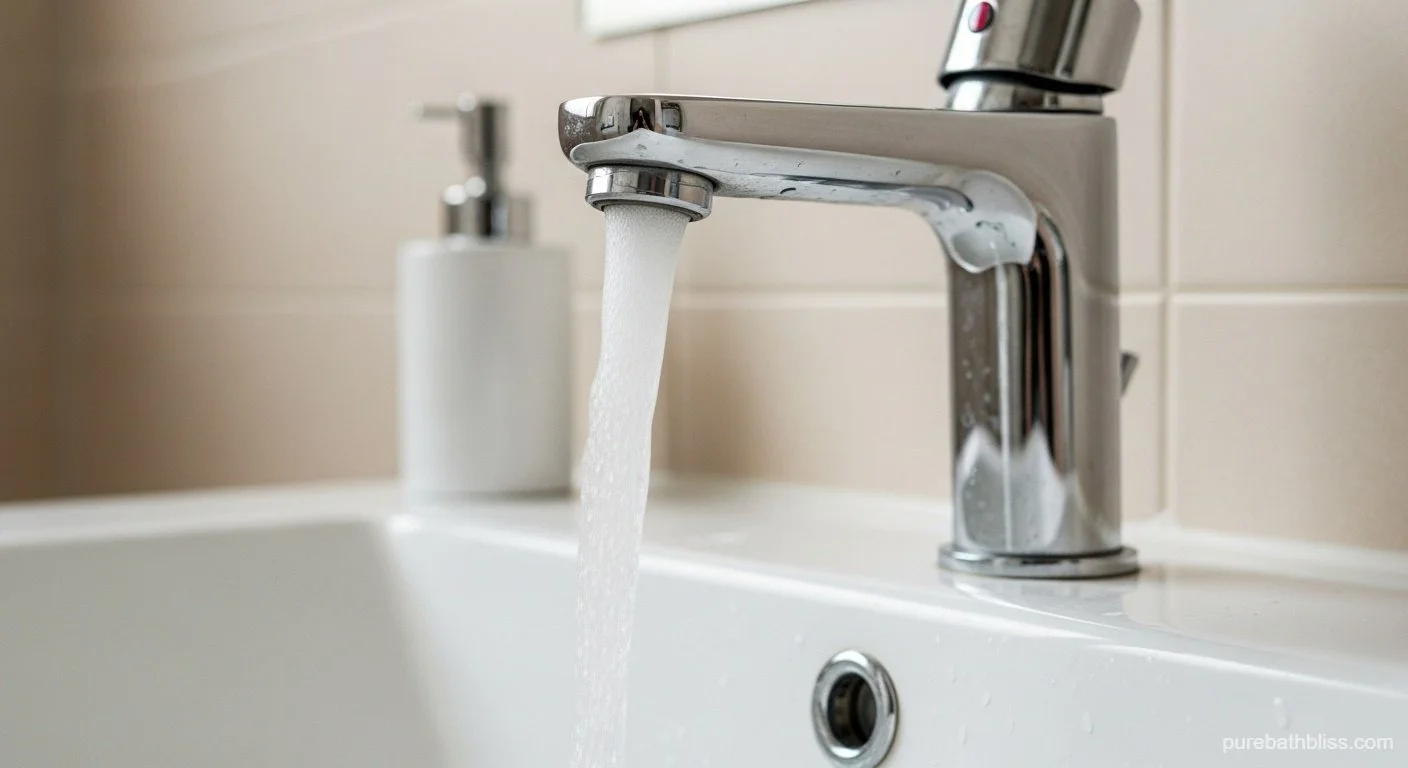
You turn on the bathroom tap to brush your teeth, and instead of a steady stream, you get a sad, splashing drizzle. Or maybe the water shoots sideways, spraying your mirror instead of the sink.
Your first instinct might be to call a plumber or blame the city for "bad water pressure." But before you spend a dime, check the tip of your faucet.
90% of the time, the problem isn't your pipes. It’s your aerator.
This tiny, overlooked component acts as a filter for your water line. Over months and years, it gets clogged with mineral scale, sediment, and debris from your pipes, effectively choking off the flow of water.
The fix? It takes two minutes, costs zero dollars, and is arguably the most satisfying tiny repair you can do in your home. Here is how to unscrew, clean, and restore your faucet to full power.
What is an Aerator (And Why is it Clogged)?
If you stick your finger up into the spout of your faucet, you’ll feel a small mesh screen. That’s the aerator.
Its Job:
Conserve Water: It mixes air into the water stream, reducing the gallons per minute (GPM) without reducing the feeling of pressure.
Prevent Splash: It creates a straight, non-splashing column of water.
Filter: Unintentionally, it acts as a final sediment filter.
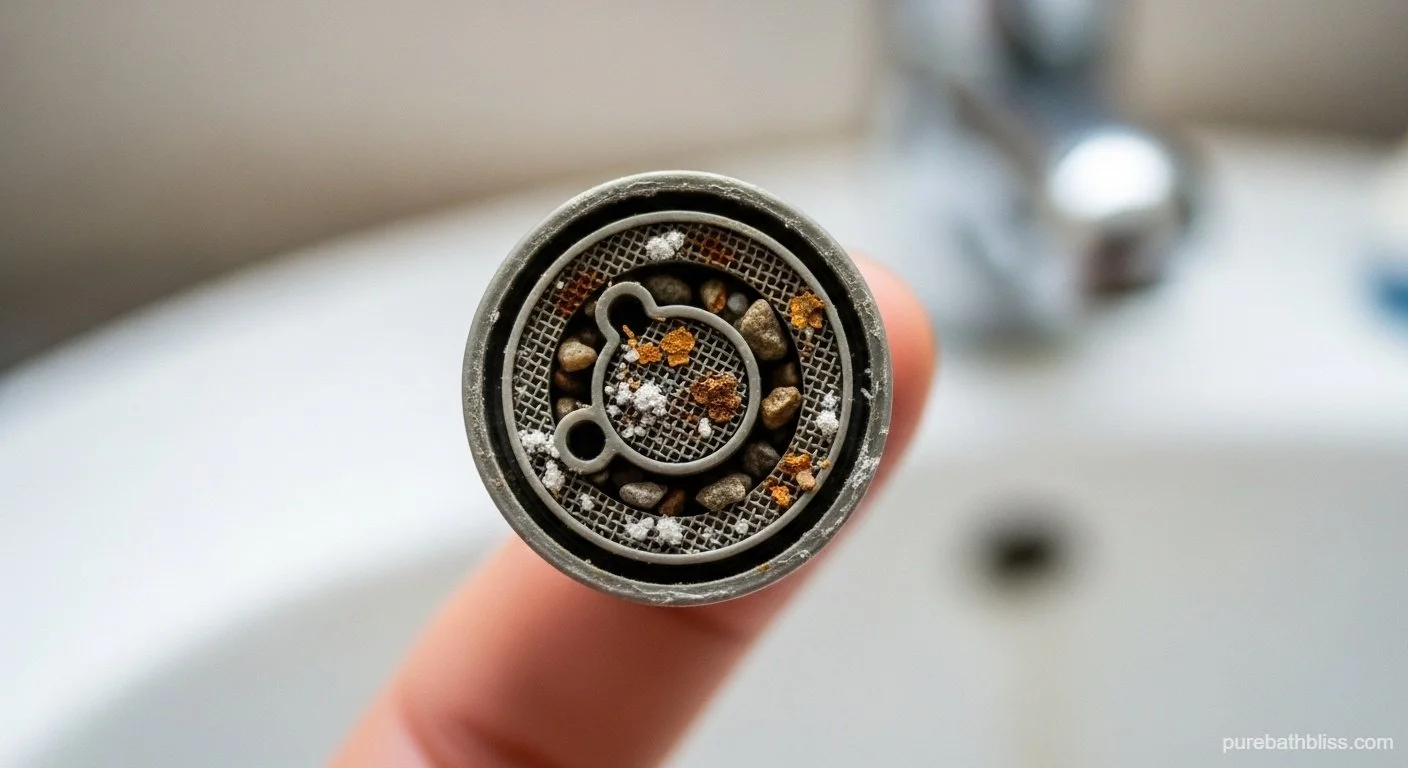
The Clog: If you have hard water, calcium deposits (limescale) build up on the mesh. Additionally, if your city does maintenance on the water main, or if your hot water heater is old, tiny flakes of sediment and rust travel down the pipe and get stuck right at the finish line—the aerator.
Curious if you have hard water? That scale is the number one sign. Check our full guide: The Ultimate Bathroom Water Audit: Save Thousands of Gallons and Hundreds of Dollars Starting Today.
Step-by-Step: The 2-Minute Fix
You likely won't even need tools for this.
Step 1: Removal
Make sure the faucet is turned off.
Hand Tight: Grip the very tip of the faucet spout (the metal ring) with your dry fingers. Twist it counter-clockwise (looking up from the bottom). It should unscrew.
Stuck? If mineral deposits have glued it shut, use a pair of pliers.
Pro Tip: Wrap a rubber band or a thick rag around the metal ring first. Never put pliers directly on chrome, or you will scratch the finish instantly.
Step 2: The "Gross" Reveal
Once the ring drops into your hand, look inside. You will see a stack of parts: a rubber washer, a plastic mixer, and a mesh screen.
The Debris: You will likely find a layer of sand, grit, or white rocky flakes sitting on top of the screen. This is what was blocking your water!
Step 3: The Rinse
Separate the parts (remember the order they go in!).
Flip the mesh screen upside down and run it under a different faucet (or the same one, messily) to blast the grit out backwards.
Use your finger to wipe away any slime or loose debris.
Step 4: The Deep Clean (Optional)
If the mesh is covered in white, crusty scale that won't rinse off, you need an acid soak.
Drop the aerator parts into a small cup of white vinegar for 10–15 minutes. The vinegar will dissolve the calcium.
Note: This is the same principle we use for cleaning showerheads. See our guide: How to Clean Your Showerhead.
Step 5: Reinstall
Stack the parts back together (Mesh -> Mixer -> Washer).
Screw the assembly back onto the faucet spout by hand.
Tighten it finger-tight only. You don’t need to crank it down with a wrench; the rubber washer creates the seal.
Troubleshooting: What If It Still Leaks?
Problem: Water sprays out from the sides of the aerator ring now. Solution: You likely pinched the rubber washer, or it is too old and brittle to seal.
Take it back off. Inspect the black rubber ring. If it’s cracked or flat, take it to the hardware store and buy a replacement (usually roughly $0.50).
Problem: The aerator is "internal" (you can't see a ring to unscrew). Solution: Modern "sleek" faucets often use a hidden aerator (Cache Aerator). These require a special plastic "key" to unscrew, which usually comes with the faucet. If you lost it, you can buy a generic aerator key set online for a few dollars.
Conclusion
You didn't need a plumber, and you didn't need a new faucet. You just needed to take out the trash that was stuck in the filter.
Turn on the handle. Watch that perfect, aerated, strong stream of water hit the sink. That simple satisfaction is what DIY is all about.
Now that your sink flow is restored, tackle the rest of the bathroom. Is your shower curtain looking dingy? Check out our guide: How to Naturally Clean Your Shower Curtain Liner.