How to Make DIY Beeswax Candles for Your Bathroom (Lavender and 4 Other Blends)
Originally published February 2026, Updated July 2026
Transparency Note: We independently select these products based on research and user reviews. If you buy something through our links, we may earn a commission.
For a long time the candles in our bathrooms were the kind you pick up in a gift shop, paraffin wax in a glass jar with a name like "Ocean Mist" or "Spa Retreat" and a fragrance that fills the room within thirty seconds of lighting. They looked nice. They smelled nice. It was only when I started looking at what was actually in them that the bath candle routine began to feel less relaxing.
Paraffin wax is a petroleum byproduct. When it burns it releases toluene and benzene, both classified volatile organic compounds and both genuine concerns in a small enclosed room with an exhaust fan as the only ventilation. The synthetic fragrance compounds in most commercial candles add a further layer of undisclosed chemistry. The word "fragrance" on a candle label can legally conceal hundreds of individual compounds in both Canada and the US. In a bathroom where you spend twenty minutes in a steam environment with a lit candle, that is not a trivial exposure.
Beeswax is the alternative that most candle tutorials recommend but rarely explain well. Here is the complete guide, including the one temperature step that most recipes get wrong and that determines whether your candles smell like lavender or like nothing at all.
Why Beeswax and Not Soy or Paraffin
| Wax Type | Source | Burn Quality | Toxicity | Burn Time | Cost |
|---|---|---|---|---|---|
| Beeswax | Natural, from honeybees | Clean, bright, virtually no soot | Non-toxic, no VOC emissions | Longest, 2 to 3x paraffin | Highest per pound |
| Soy Wax | Plant-based, from soybeans | Clean, slightly softer flame than beeswax | Non-toxic when pure. Check for additives. | Good, longer than paraffin | Moderate |
| Coconut Wax | Plant-based, from coconut oil | Very clean, excellent scent throw | Non-toxic | Good | Moderate to high |
| Paraffin | Petroleum byproduct | Sooty, produces black carbon deposits | Releases toluene and benzene when burned | Shortest | Lowest |
Beeswax has two properties that make it particularly suited to a bathroom candle. First, it burns at a higher temperature than paraffin or soy, which means it burns more slowly and completely. A beeswax candle of the same size as a paraffin candle will typically last two to three times longer. Second, beeswax is reported to emit negative ions when it burns. Negative ions bind to positively charged airborne particles including dust, pollen, mold spores, and some bacteria, causing them to drop out of the air rather than remaining suspended. The evidence for this effect is anecdotal rather than rigorously peer-reviewed, but it is the basis of the "air-cleaning" claim you see on beeswax candle packaging, and the chemistry is plausible.
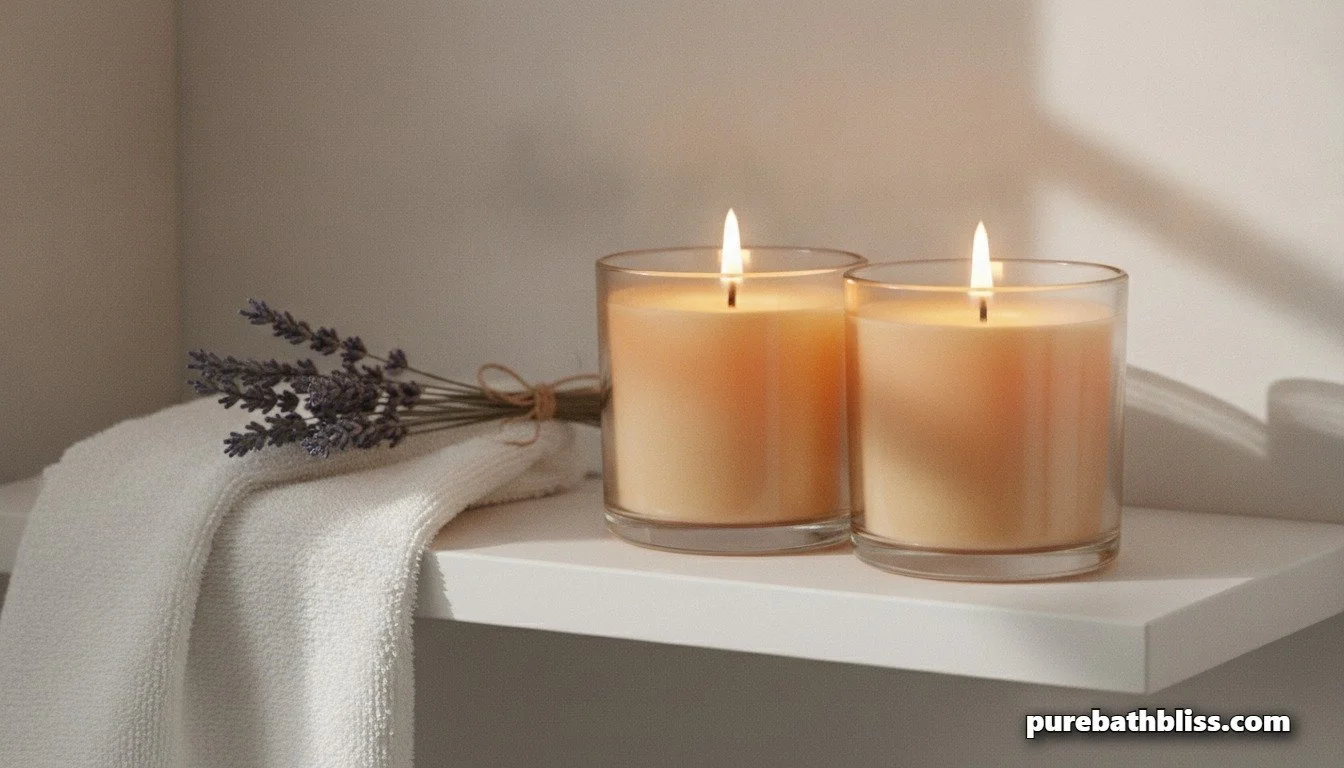
The practical difference you will notice immediately is the burn quality. Beeswax produces a bright, clean, almost white flame rather than the slightly sooty flame of a paraffin candle. In a white-tiled bathroom, that soot accumulates on the walls and ceiling over months of regular use. Beeswax eliminates that entirely.
The Ingredients
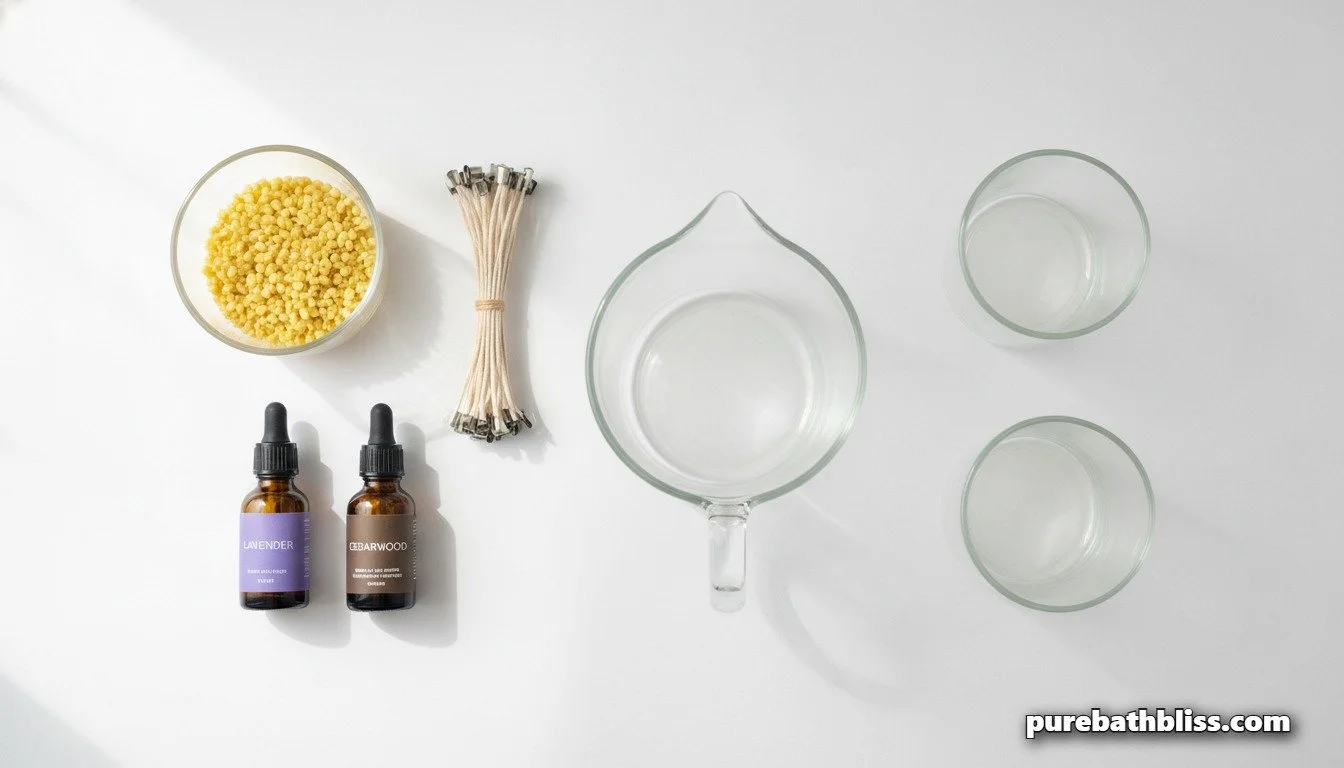
Beeswax pellets: Pure filtered beeswax pellets are easier to measure and melt than blocks. Use pellets rated cosmetic or food grade, which means they have been filtered to remove most impurities. Yellow beeswax has a subtle natural honey scent that works well under lavender and citrus blends. White beeswax has had more of that honey scent removed and produces a more neutral base for stronger essential oil fragrances.
Cotton wicks with sustainers: Pre-tabbed cotton wicks are the only acceptable wick material for a non-toxic candle. Avoid zinc-core or lead-core wicks, which release metal particles when burned. Pre-tabbed means the metal sustainer at the base is already attached, which saves fiddling with small parts when the wax is liquid.
Essential oils: Pure therapeutic-grade essential oils at roughly one ounce (approximately 600 drops) per pound of wax. The specific oils depend on your blend of choice, covered below.
Glass jars: Short wide-mouth glass jars in 4oz or 8oz sizes are ideal for bathroom candles. Shorter and wider is better than tall and narrow because it produces a more even melt pool and reduces the tunnelling effect where the wax melts only in the centre and leaves an unburned ring around the edge.
A pouring jug: A dedicated heat-safe glass or stainless steel pouring jug that you will never use for food again. Beeswax is difficult to fully clean from cookware.
A double boiler or large saucepan: To melt the wax safely using indirect heat. Never melt wax directly on a heat element as it is flammable.
The Recipe: Step by Step
Step 1: Set Up Your Wicks
Place a pre-tabbed cotton wick in the center of each jar and secure it upright. The easiest method is to use a wick centering tool, a small metal or wooden bar that sits across the jar opening and holds the wick in place while the wax sets. If you do not have a centering tool, a pencil rested across the jar opening with the wick looped around it works just as well. The wick should be taut and centered, not leaning to one side. Pour the wax on an angle to one side slightly if the wick drifts, you can recenter it before the wax sets.
Step 2: Melt the Wax
Fill your double boiler or a large saucepan with a few inches of water and bring it to a low simmer. Place your pouring jug in the water and add the beeswax pellets. Stir occasionally as the pellets melt. Beeswax has a melting point of around 145°F (63°C) and you want to bring it to a pouring temperature of 160 to 170°F (71 to 77°C). Use a candle or candy thermometer to monitor the temperature accurately. Guessing the temperature is the primary source of failed candles.
Step 3: Add the Essential Oils — The Critical Temperature Step
This is the step that determines whether your candles smell like lavender or like warm wax. Remove the jug from the heat when the wax reaches 160°F and add your essential oils immediately. Do not add the oils while the wax is still on the heat, and do not wait until the wax cools significantly below 160°F. The reason is the flash point of essential oils. Most pure essential oils have flash points between 120°F and 165°F. If the wax is too hot when you add them, the volatile aromatic compounds in the oils evaporate off before the wax sets, leaving you with a candle that smells faint when cold and like nothing when burning. If the wax is too cool, the oils do not bind evenly to the wax and you get uneven fragrance distribution. 160°F is the temperature at which the oil binds to the wax while retaining its aromatic compounds. Stir for one full minute to ensure even distribution.
Step 4: Pour
Pour the wax slowly and steadily into each prepared jar, leaving about half an inch of space at the top. Pour close to the jar rather than from a height to avoid introducing air bubbles. Work quickly but smoothly, the wax will begin to set faster than you expect once it starts cooling. If you are making multiple jars, keep the pouring jug on a tea towel to retain heat between pours.
Step 5: Let Set Undisturbed
Leave the candles completely undisturbed at room temperature for at least four hours, ideally overnight. Do not move them while the wax is still liquid or semi-solid, as this causes the wax to crack or sink unevenly around the wick. Beeswax sets with a naturally slightly mottled, honeycomb-like surface which is completely normal and is part of its character. If you want a completely smooth top, pour a thin second layer over the set candle once it has fully cooled.
Step 6: Trim the Wick
Trim the wick to approximately 6mm (a quarter inch) before the first burn and before every subsequent burn. A wick that is too long produces a large flickering flame, excessive soot, and burns the wax too quickly. A wick trimmer makes this easy and keeps the trimmed wick from falling into the wax pool. The first burn is the most important: allow the candle to burn until the entire top layer of wax has liquefied to the edges of the jar, which typically takes one to two hours depending on the jar diameter. Extinguishing before a full melt pool has formed on the first burn creates the tunneling problem that is very difficult to correct afterward.
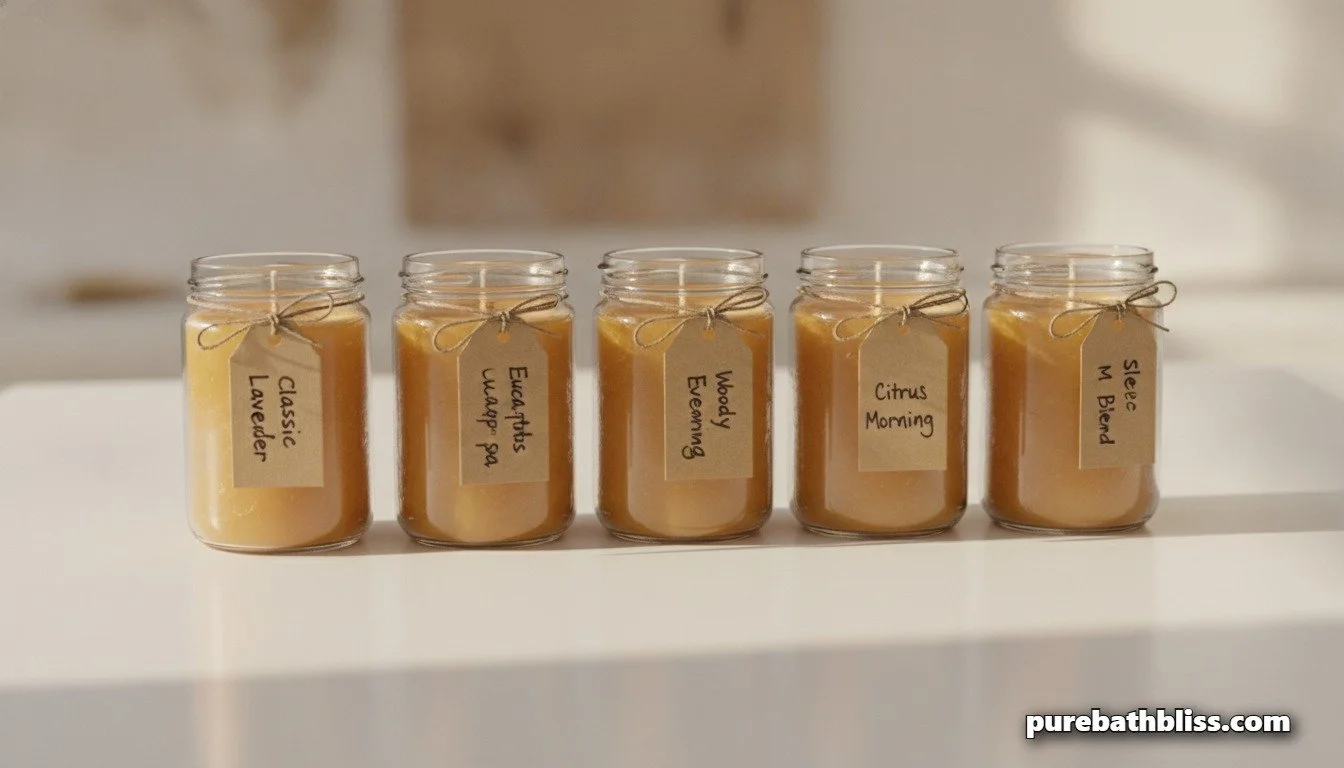
Five Scent Blends for the Bathroom
| Blend Name | Essential Oils (per 1lb wax) | Character | Best For |
|---|---|---|---|
| Classic Lavender | Lavender 100% (1oz total) | Soft, floral, calming. The most universally liked bathroom scent. | Evening bath, general use, guest bathrooms |
| Eucalyptus Spa | Eucalyptus 60%, Peppermint 40% (1oz total) | Sharp, clean, invigorating. Reads as genuinely spa-like. | Morning showers, family bathrooms, cold season |
| Woody Evening | Cedarwood 50%, Lavender 30%, Bergamot 20% (1oz total) | Rich, warm, grounding. The most sophisticated blend. | Primary bathroom, evening use, partner gifting |
| Citrus Morning | Sweet Orange 50%, Lemon 30%, Grapefruit 20% (1oz total) | Bright, energising, naturally deodorising. Add oils at exactly 160°F. | Morning routine, kids bathrooms, summer |
| Sleep Blend | Lavender 50%, Vetiver 30%, Cedarwood 20% (1oz total) | Deep, earthy, profoundly calming. The best pre-sleep candle blend. | Evening bath ritual, before bed, primary bathroom |
A few notes on working with these blends. The citrus oils, lemon, sweet orange, and grapefruit, have lower flash points than most other essential oils, which means they are more vulnerable to evaporating off if the wax is even slightly too hot when you add them. For any citrus-dominant blend, add the oils at exactly 160°F and stir for a full ninety seconds rather than one minute.
The sleep blend is the one we make most often because it pairs naturally with the evening bath routine. Burning it for twenty minutes before getting in the bath means the bathroom already smells extraordinary when the water is ready, and the vetiver and cedarwood ground the lavender in a way that reads as genuinely expensive rather than like a gift shop candle. Our guide to therapeutic bath salts and magnesium flakes covers the full evening bath protocol that this candle pairs with, including the water temperature and timing that maximises the sleep quality benefit.
Wick Sizing: Getting This Right Matters
Wick size is the most overlooked variable in DIY candle making and the most common cause of candles that either tunnel badly or produce too large a flame. The correct wick size depends on the diameter of your jar, not the height.
| Jar Diameter | Recommended Wick Size (for beeswax) | Notes |
|---|---|---|
| Up to 5cm (2 inches) | ECO-2 or CD-8 | Small travel or sample jars. Single wick sufficient. |
| 5 to 7cm (2 to 2.75 inches) | ECO-4 or CD-12 | Standard 4oz jars. Most common bathroom candle size. |
| 7 to 9cm (2.75 to 3.5 inches) | ECO-8 or CD-16, or two ECO-4 wicks | 8oz jars. Two wicks produce a more even melt pool. |
| 9cm and wider (3.5 inches+) | Two ECO-6 or CD-14 wicks minimum | Wide pillar or apothecary jars. Single wick will tunnel regardless of size. |
When in doubt, size down rather than up. A wick that is slightly too small produces a smaller melt pool and a more subtle scent throw, which is correctable by using two wicks in a wider jar. A wick that is too large produces excvaporessive heat, a sooty flame, and burns through the wax much faster than it should. For beeswax specifically, wick manufacturers typically recommend sizing up one size from what you would use for soy or paraffin because beeswax is denser and requires more heat to maintain a full melt pool.
Candle Safety in a Bathroom
A bathroom has specific safety considerations for candles that a living room does not. The two most important ones are ventilation and surface stability.
Always burn a candle in a bathroom with the exhaust fan running or the door open. Even a clean-burning beeswax candle consumes oxygen and produces water vapour when burning. In a fully sealed bathroom this can slightly reduce air quality over a long burn period. The exhaust fan running on low during a candle bath solves this entirely without disrupting the atmosphere.
Never place a candle on the edge of the bathtub or on any surface where it can be knocked by a towel, an arm, or a child walking past. A stable flat shelf, the back of the toilet cistern, or a mounted wall shelf behind the sink are all safe placements. A candle on the tub surround is a fire and burn risk that no amount of atmosphere justifies.
Keep candles away from tissue paper, toilet paper rolls, towels hanging nearby, and any other paper or fabric within thirty centimetres of the flame. Bathroom exhaust fans create air movement that can push a flame sideways toward nearby combustibles in a way that is not obvious until something catches.
Cost and Yield
One pound of beeswax pellets costs approximately $10 to $15 and yields roughly four to six 4oz candles or two to three 8oz candles depending on the jar dimensions. Adding essential oils at roughly one ounce per pound adds $3 to $8 depending on which oils you use. Total cost per batch: $13 to $23 for four to six candles, which works out to $3 to $5 per candle.
A comparable commercial beeswax candle scented with pure essential oils typically sells for $20 to $35 for an 8oz jar. The homemade version at the same size costs under $8 and burns longer because you are not paying for packaging, branding, or retail margin. After the initial supply purchase, subsequent batches cost considerably less since you are replenishing only wax and wicks rather than all the supplies at once.
The Bigger Picture
A beeswax candle is one component of a natural bathroom air quality approach rather than the whole solution. For continuous passive scent between candle burns, a reed diffuser with the same essential oil blend maintains the atmosphere without requiring a flame. For the shower itself, hanging eucalyptus in the shower provides an aromatherapy experience that no candle can match in intensity. Our guide to hanging eucalyptus correctly covers how the two work together in the same bathroom routine without competing. Between the diffuser, the eucalyptus bundle, and a beeswax candle for the evening bath, you have a natural scent approach for every part of the bathroom day using nothing that requires a warning label.