How to Take an Ice Bath at Home in Your Bathtub (The Complete 2026 Guide)
This summer has been relentless. Multiple days above 35 degrees, nights that barely cool down, and a level of physical fatigue that a regular shower does not fully address. A few weeks ago I started doing something I had been meaning to try for about two years but kept putting off because it sounded unpleasant: a ten-minute cold bath in the morning before the day started.
The unpleasant part is real. The first thirty seconds are genuinely difficult. What comes after is harder to describe. An alertness that no amount of coffee produces. A physical reset that carries through the whole morning. And on the days I have done it after a long shift on site, a recovery that feels noticeably faster than what I get from a regular shower or a warm bath.
The ice bath trend on TikTok has made it look like you need a $3,000 dedicated cold plunge tub, a massive bag of ice, and a camera crew to participate. None of that is true. Your bathtub does the same job. Here is everything you need to know to do it correctly, safely, and in a way that actually delivers the benefits the research supports.
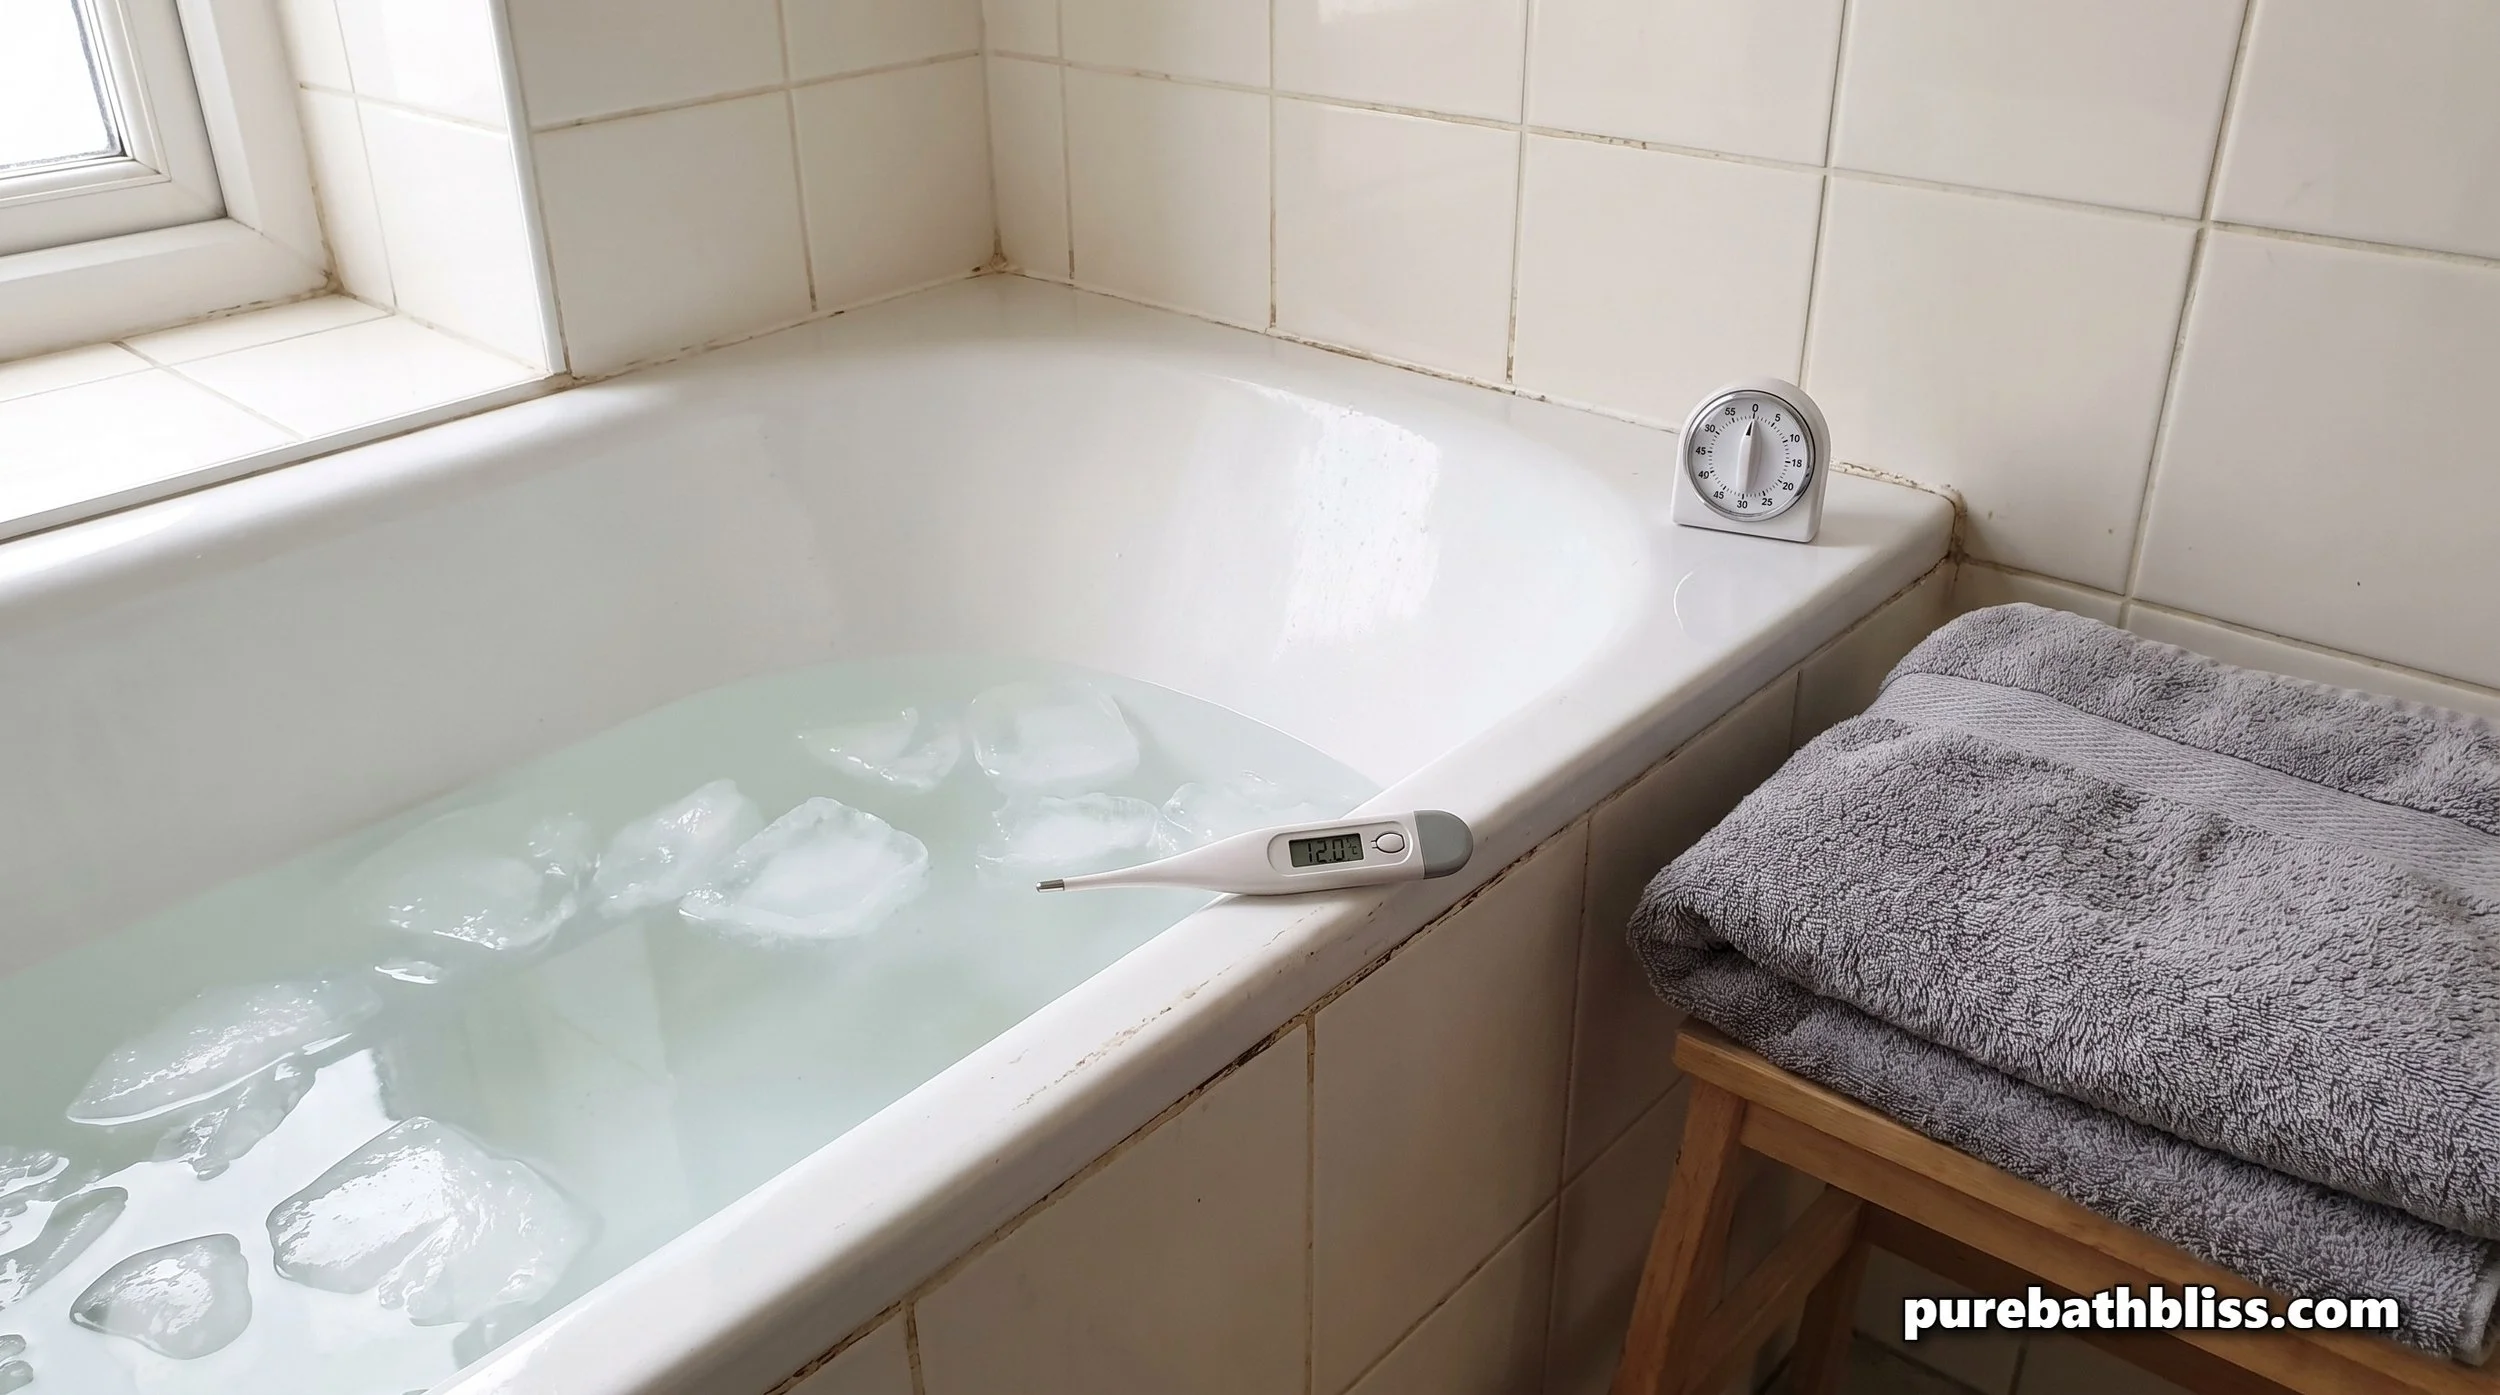
What the Science Actually Says
The research on cold water immersion is genuinely interesting, but it is worth being honest about what it shows and what it does not before you make any decisions about adding this to your routine.
A 2025 analysis published in PLOS One, which reviewed results from 11 studies involving 3,177 people, found that cold water immersion may help reduce stress levels, improve sleep, and increase quality of life. That is a meaningful result from a meaningful sample size. The water temperatures across those studies ranged from 7 to 15 degrees Celsius, and most involved sitting in cold water at chest level rather than just cold showers.
Mood enhancement, improved sleep quality, potential protection from illness, and rapid reduction in body core temperature after exercise are among the benefits reported. Cleveland Clinic sports medicine physician Dr. Dominic King has noted that some people get genuine relief from ice baths for recovery purposes.
The honest caveat is that not every claim stands up equally well. A 2026 independent evidence review by Medizin-transparent.at, a Cochrane-affiliated organisation, noted that immediately after ice bathing, inflammation markers initially rise, and that while stress levels drop after twelve hours, immune effects are not clearly detectable. The review concluded that positive effects on mood and energy levels are well documented but that claims about immune boosting go beyond what the data currently supports.
The bottom line: cold water immersion has solid evidence behind its mood, stress, and recovery benefits. The immune system claims are overstated. The muscle soreness reduction after exercise is the most robustly documented physical benefit. That is a useful, honest starting point.
What Happens to Your Body During an Ice Bath
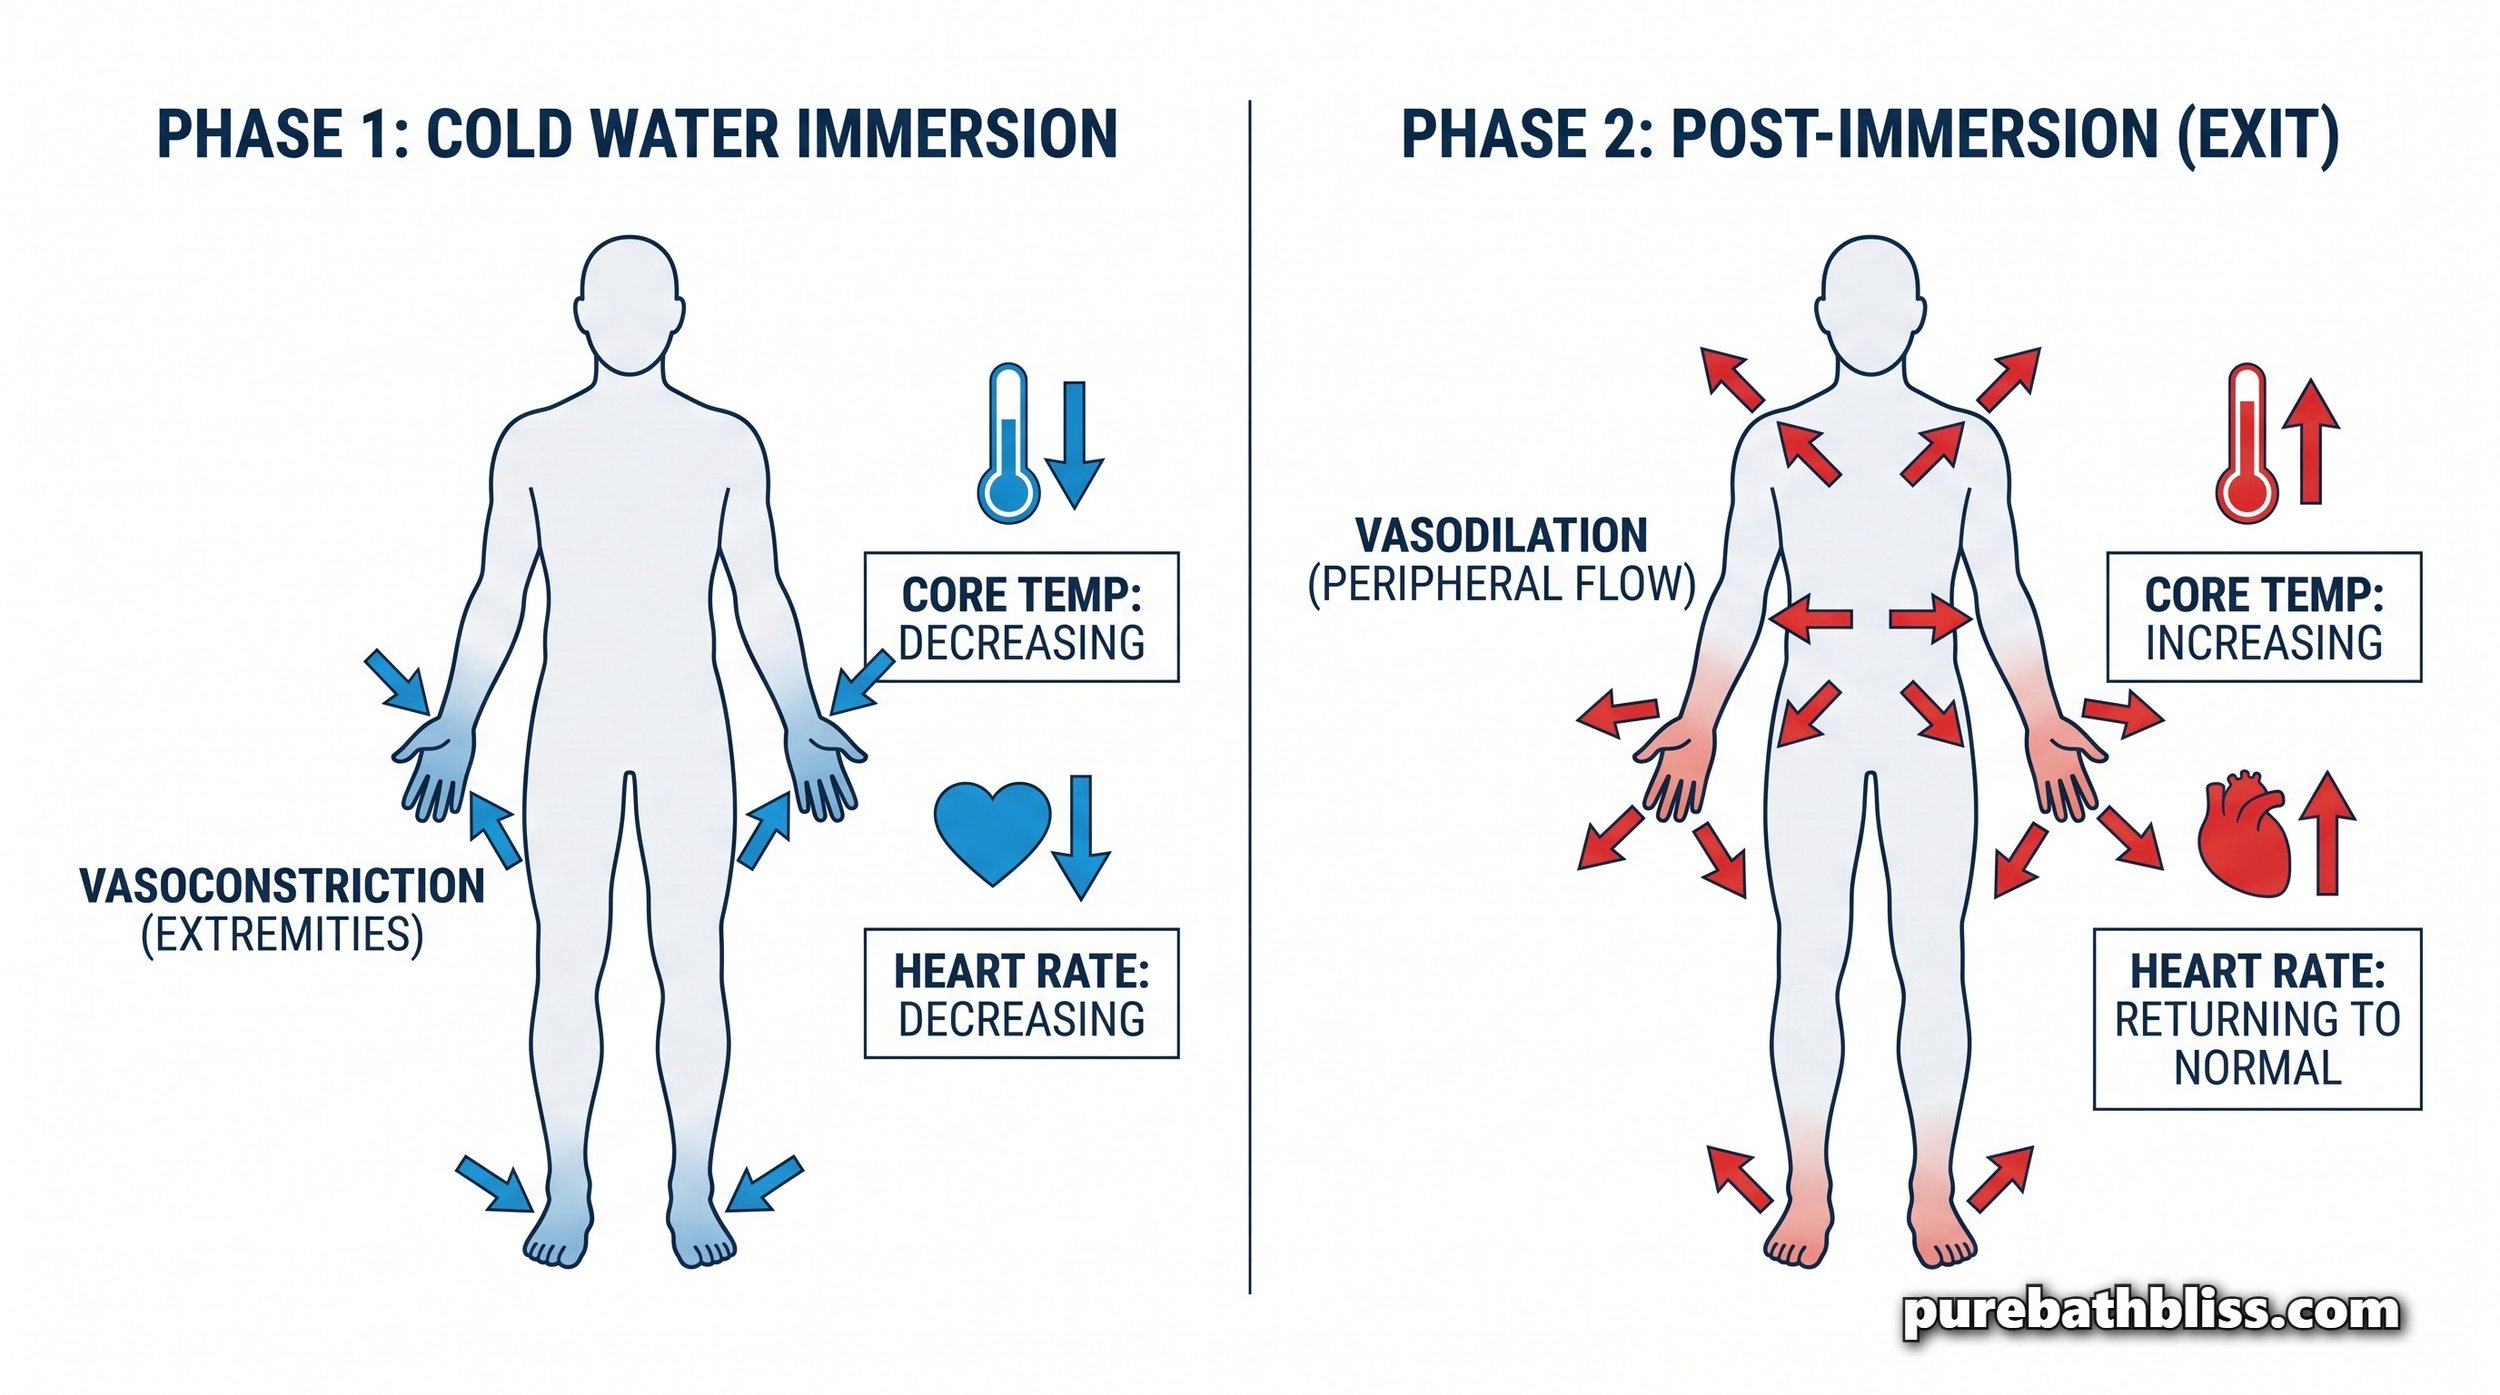
Understanding the physiology makes the experience less alarming and more purposeful. When you enter cold water, your body responds in a predictable sequence.
The cold shock response (0 to 30 seconds). This is the hardest part. Immersion in cold water triggers an involuntary gasp reflex, rapid shallow breathing, and a spike in heart rate and blood pressure. This is the phase where controlled breathing matters most. Slow, deliberate exhales through this window prevent the gasping from escalating into hyperventilation. The cold shock response diminishes significantly after the first thirty seconds and almost completely within the first two minutes.
Vasoconstriction (ongoing). Blood vessels near the skin surface constrict to redirect blood flow away from the extremities and toward the vital organs. This is the mechanism behind the reduced muscle inflammation effect. The constriction reduces blood flow to already-inflamed tissue, which slows the inflammatory cascade and reduces swelling.
Norepinephrine release. Cold exposure triggers a significant release of norepinephrine, a neurotransmitter and hormone associated with alertness, focus, and mood. Research from the University of Copenhagen found that cold water immersion can increase norepinephrine levels by up to 300 percent. This is the neurochemical basis for the feeling of clarity and energy after an ice bath that people consistently report.
The rewarming phase (after exiting). As you exit the cold water, blood vessels dilate rapidly and warm blood rushes back to the extremities. This vasodilation improves circulation and is part of the mechanism behind the post-bath energy boost. The body's heat generation during rewarming also burns additional calories, though the amounts are modest rather than the dramatic fat-burning claims sometimes made on social media.
Who Should Not Do This
Cold water immersion is not appropriate for everyone and the contraindications are worth stating clearly before anything else.
Heart conditions. The cold shock response causes an immediate spike in heart rate and blood pressure. Anyone with a diagnosed heart condition, arrhythmia, or high blood pressure that is not well-controlled should consult their doctor before attempting cold water immersion. This is not a general caution. It is a specific and meaningful risk.
Raynaud's disease. This condition involves extreme sensitivity to cold in the extremities. Cold water immersion can trigger a severe Raynaud's episode and should be avoided entirely.
Pregnancy. Core temperature reduction and the cardiovascular stress of cold shock are not appropriate during pregnancy.
Open wounds or skin conditions. Cold water immersion on broken or significantly irritated skin causes unnecessary pain and potential infection risk.
Never do this alone when starting out. The cold shock response in the first thirty seconds can be more intense than expected on a first session. Have someone nearby or at least within earshot for your first few attempts until you understand how your body responds.
The Temperature Guide
| Temperature Range | Celsius | Fahrenheit | Experience | Best For |
|---|---|---|---|---|
| Beginner | 15 to 20°C | 59 to 68°F | Cool to cold, manageable. Often achievable with tap water alone in summer. | First two weeks. Building cold tolerance and breathing technique. |
| Research Range | 10 to 15°C | 50 to 59°F | Genuinely cold. Strong cold shock in first 30 seconds. Calms quickly with controlled breathing. | Most people after 2 to 3 weeks adaptation. Where research benefits are best documented. |
| Advanced | 5 to 10°C | 41 to 50°F | Very cold. Significant cold shock. Requires established breathing technique. | Experienced practitioners. Athletes post-competition. Not recommended for beginners. |
| Avoid | Below 5°C | Below 41°F | Extreme cold shock risk. Hypothermia risk beyond a few minutes. | Not recommended for home bathtub use. No additional benefit over 10°C. |
The research-backed sweet spot for cold water immersion benefits is between 10 and 15 degrees Celsius (50 to 59°F). Below 10 degrees the risk of cold shock and hypothermia increases without proportional additional benefit. Above 15 degrees, the physiological response is milder but still meaningful, and this is where most beginners should start. A waterproof digital bath thermometer is the most important piece of equipment for doing this safely and is worth buying before your first session.
How to Set Up an Ice Bath in Your Bathtub
What You Need
Your bathtub
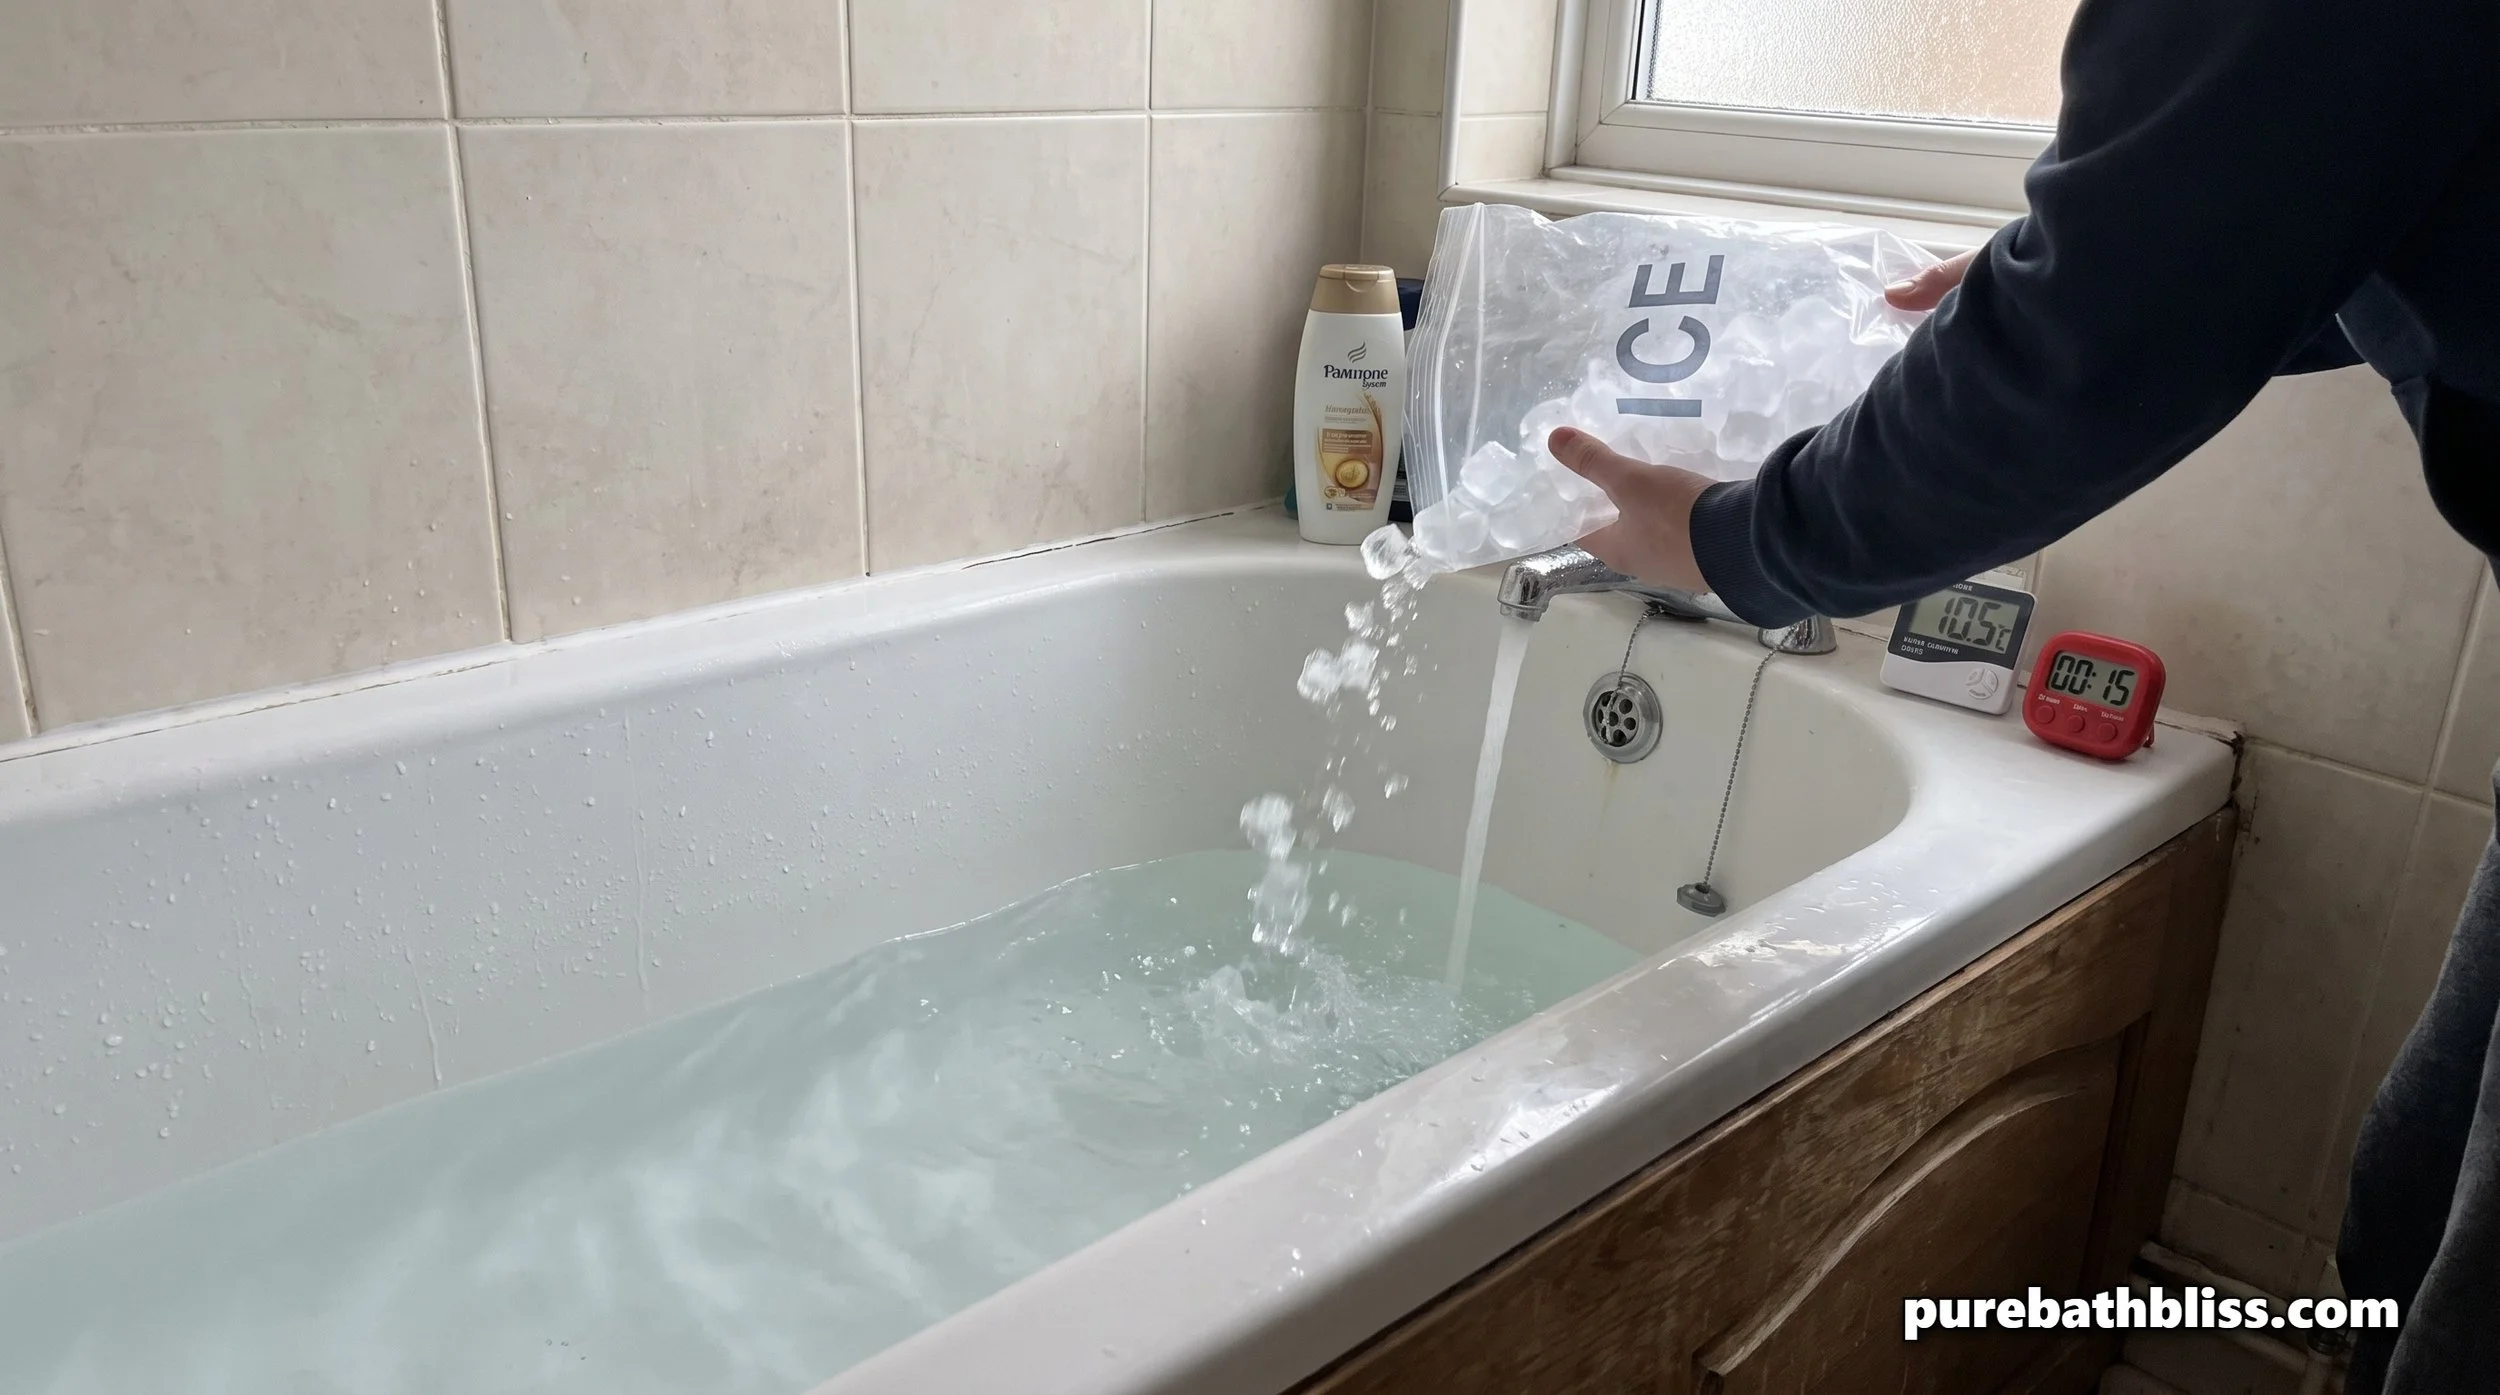
Ice — bags from a petrol station or convenience store work perfectly. In summer, two to four bags of ice (roughly 4 to 8kg) are typically enough to bring a full bathtub to the target temperature range depending on your tap water temperature
A waterproof digital thermometer
A timer — your phone is fine as long as it is out of reach of the water
A large warm towel ready on the rail for when you exit
Warm clothes or a robe nearby for the rewarming phase
Step 1: Fill the tub with cold water first
Run the cold tap only until the tub is at the depth you want, typically enough to cover you to chest height when seated, which is around 25 to 30 centimetres in most standard bathtubs. Check your tap water temperature. In summer, Canadian and most North American tap water runs between 15 and 20 degrees Celsius depending on your municipality and the time of year. In July and August, tap water alone in some areas is already in the upper range of the beginner zone without any ice at all.
Step 2: Add ice gradually and check temperature
Pour ice into the filled tub gradually, checking the temperature after each bag with your thermometer. The goal is to hit your target temperature range before getting in, not to guess. Adding too much ice and overshooting to below 10 degrees is the most common mistake and the most dangerous one. A standard bag of ice (around 2kg) lowers a full bathtub by approximately two to three degrees Celsius. Adjust accordingly.
Step 3: Enter slowly and deliberately
Do not jump in. Sit on the edge of the tub, lower your feet in first, and ease yourself down gradually over thirty to sixty seconds. The cold shock response is significantly reduced when you enter slowly compared to immersing all at once. Once seated, lower yourself until the water is at chest level. Keep your head above water at all times.
Step 4: Control your breathing
This is the most important skill to develop. The involuntary gasp reflex when cold water hits the body is strong in the first thirty seconds. Counter it with slow, deliberate exhales through pursed lips rather than rapid gasping. Count your breaths. In for four counts, out for six. This activates the parasympathetic nervous system and overrides the panic response that cold shock tries to trigger. Within sixty to ninety seconds your breathing will naturally calm even at a challenging temperature.
Step 5: Stay for the right duration
Research consistently shows that the benefits plateau around ten to fifteen minutes for most people. There is no meaningful additional benefit from staying longer than fifteen minutes and the risk of hypothermia increases beyond that point. For beginners, start with two to three minutes and build up by one to two minutes per session over the first few weeks. The goal is gradual adaptation, not endurance.
Step 6: Exit and rewarm actively
Exit the tub carefully, as cold limbs have reduced coordination and the tub surround will be slippery. Wrap in the warm towel immediately and move to a warm space. Do not jump straight into a hot shower to rewarm. Allow the body to rewarm naturally through movement and warm clothing for the first ten to fifteen minutes. The vasoconstriction response and the associated mood and energy effects are most pronounced during the natural rewarming phase. A hot shower immediately after effectively short-circuits this and reduces the benefit of the session.
The Cost Comparison: Bathtub vs Cold Plunge Tub
| Option | Setup Cost | Ongoing Cost Per Session | Temperature Consistency | Best For |
|---|---|---|---|---|
| Standard bathtub with commercial ice | $15 to $20 (thermometer) | $4 to $12 in ice | Drops 2 to 3°C over 10 minutes | Beginners, occasional use, testing the practice |
| Standard bathtub with frozen bottles | $15 to $20 (thermometer) | Electricity cost only (negligible) | Drops 2 to 3°C over 10 minutes | Regular practitioners wanting to reduce ongoing cost |
| Portable cold plunge tub (non-chilled) | $200 to $400 | $4 to $12 in ice or frozen bottles | Better insulation than bathtub | Committed practitioners wanting dedicated equipment |
| Chilled cold plunge unit (electric) | $1,500 to $5,000+ | Electricity cost, approximately $1 to $3 per day | Precise, maintains set temperature indefinitely | Daily use over years. Athletes. High-frequency practitioners. |
The main practical advantage of a dedicated cold plunge tub is temperature maintenance. A standard bathtub loses temperature as you sit in it, meaning a session that starts at 12 degrees may be at 15 to 16 degrees by minute ten. A chilled plunge tub maintains temperature consistently. For most people starting out, the bathtub is the right starting point. If you find yourself doing this five or more times a week consistently for several months, a dedicated unit starts to make economic sense. Portable cold plunge tubs that fit in a bathroom or garage start at around $200 to $300 and are worth considering at that point. The ice cost for regular bathtub sessions adds up faster than most people expect.
How to Reduce Ice Costs
At $2 to $4 per bag and two to four bags per session, daily ice baths add up to $20 to $30 per week in ice alone. A few strategies significantly reduce this.
Time your sessions for early morning in summer. Tap water in Canadian and northern US homes in July and August is naturally cooler in the early morning before the day's heat warms the supply lines. In some areas, early morning tap water alone is cold enough for a beginner session without any ice at all.
Freeze water bottles instead of buying bags. Fill large plastic bottles with water and freeze them. They chill the bath water, are reusable indefinitely, and do not melt and dilute the water the way loose ice does. Six to eight 2-litre bottles in the freezer gives you a consistent, free ice source for daily sessions once you have built up your stock.
Buy a chest freezer if you are committed. A small chest freezer dedicated to making ice bottles costs $150 to $250 and pays for itself within a few months compared to buying commercial ice daily.
Contrast Therapy: Combining Cold and Warm
Contrast therapy, alternating between hot and cold water immersion, is increasingly popular in sports medicine and wellness contexts and has a stronger evidence base for muscle recovery than cold immersion alone. The protocol is simple: a hot bath or shower for five to ten minutes, followed immediately by the cold immersion for two to five minutes, repeated two to three times.
The alternating vasoconstriction and vasodilation creates a pumping effect on the circulatory and lymphatic systems that flushes metabolic waste from muscle tissue more effectively than either temperature alone. For recovery after physical work or exercise, this is the more effective protocol. For mood and stress benefits specifically, cold immersion alone produces the norepinephrine response that is the neurochemical basis of the alertness effect.
The warm bath side of contrast therapy connects naturally to the therapeutic bath protocols we cover in our Epsom salt vs magnesium flakes guide, including the specific mineral additions that enhance the warm immersion phase for muscle recovery. And if you want to understand how to optimise the warm bath itself for maximum therapeutic benefit, our guide to therapeutic bathing and the soak and seal method covers the natural ingredients that work best in the water.
What TikTok Gets Wrong
The TikTok ice bath content is largely valuable for normalising cold water immersion and showing people that the first session is survivable. Where it diverges from the science is in the claims and the aesthetics.
The duration claims are overstated. Content showing people sitting in ice baths for thirty to forty-five minutes is not producing additional benefit. It is producing hypothermia risk. Ten to fifteen minutes is the evidence-backed range. Longer is not better.
The temperature claims are often extreme. Ice baths at 4 to 5 degrees Celsius are at the border of what is safe for non-elite athletes without supervision. The 10 to 15 degree range produces the same mood and recovery benefits with significantly lower risk.
The equipment is not necessary. The $3,000 to $10,000 cold plunge units look impressive on camera. They produce the same water temperature as your bathtub with ice. The experience is identical. The benefits are identical.
The immediate hot shower recommendation is wrong. Multiple TikTok videos recommend jumping straight into a hot shower after the cold bath to warm up quickly. This reverses the vasoconstriction response before it has completed its work and significantly reduces the post-bath alertness and mood benefits. Rewarm naturally with movement and warm clothes for at least ten to fifteen minutes.
The Four Week Progression Plan
| Week | Target Temperature | Duration | Focus |
|---|---|---|---|
| Week 1 | 18 to 20°C (64 to 68°F) | 2 to 3 minutes | Learn to control breathing. Understand your cold shock response. Tap water only — no ice needed in summer. |
| Week 2 | 15 to 18°C (59 to 64°F) | 4 to 6 minutes | Build duration. Introduce one small bag of ice. Practice staying calm through the initial shock. |
| Week 3 | 12 to 15°C (54 to 59°F) | 6 to 10 minutes | Entering the research range. Two bags of ice. Breathing should feel manageable. Notice the post-bath energy effect. |
| Week 4 and beyond | 10 to 15°C (50 to 59°F) | 10 to 15 minutes maximum | Full research range. Consistent practice. Do not chase colder or longer — this is the sweet spot. |
The progression matters because cold adaptation is a real physiological process. The same temperature that feels shocking in week one feels manageable by week four as your body adapts. Trying to start at the research temperature range of 10 to 15 degrees without any adaptation often leads people to abandon the practice after one or two sessions simply because the experience is too overwhelming before the technique is established. Build into it over four weeks and the practice becomes genuinely sustainable.
The Honest Verdict
Three weeks into doing this consistently, the honest assessment is that the mood and alertness effects are real and noticeable in a way that surprised me. The muscle recovery benefit after physical work is also real. Whether it is doing anything for my immune system or any of the other claims I have seen on social media, I genuinely cannot tell. What I can tell is that ten minutes in cold water in the morning produces a quality of alertness and a physical freshness that carries through the first half of the day in a way that no other morning routine element does for me. The discomfort is real. So is the result. Your bathtub is all you need to find out for yourself.