How to Make Your Own Beeswax Soap Dish (Zero Waste, 10-Year Lifespan)
Plastic soap dishes are a triple threat of annoyance: they pool water, they crack easily, and they eventually end up in a landfill leaching microplastics. But if you’ve switched to organic bar soap to reduce waste, you know you need something to keep that expensive bar from turning into a slimy puddle.
The solution? Coat scrap wood in beeswax.
This simple DIY project transforms a humble piece of reclaimed cedar or pine into a waterproof, rot-resistant heirloom that keeps your soap dry 3x longer. It costs pennies to make, smells amazing, and can last over a decade with simple maintenance.
This project is the ultimate custom touch for the shower organization system we outlined in: The Shampoo Graveyard: How to Organize a Plastic-Free Shower.
Why Beeswax Beats Plastic
The Store-Bought Problem: Most soap dishes are made of cheap, brittle plastic. They trap bacteria-laden water at the bottom, turning your organic soap into mush. When they crack, they go straight to the trash.
The DIY Beeswax Solution: By sealing wood with beeswax, you create a natural, hydrophobic barrier. The water beads up and rolls off, just like on a duck's back.
Cost: $1–$2 total (using scrap wood).
Lifespan: 10+ years (with annual re-waxing).
Eco Win: One DIY dish = 10 plastic dishes saved from the landfill.
Materials & Tools
You likely have most of this in your garage or kitchen already.
The Materials:
Scrap Wood: A piece approx. 6" x 4" x ¾". Cedar, bamboo, or reclaimed oak are best, but pine works well if sealed thoroughly.
Beeswax Pellets: 2 tablespoons (support local beekeepers if you can!).
Coconut Oil: 1 teaspoon (this acts as a conditioner to prevent the wax from cracking).
The Tools:
Sandpaper: 120-grit (rough) and 220-grit (fine).
Double Boiler: Or a glass bowl sitting over a pot of simmering water.
Paintbrush: One you don't mind getting waxy!
Drill or Spoon Gouge: To create drainage grooves.
Step-by-Step: 20 Minutes to Waterproof Wood
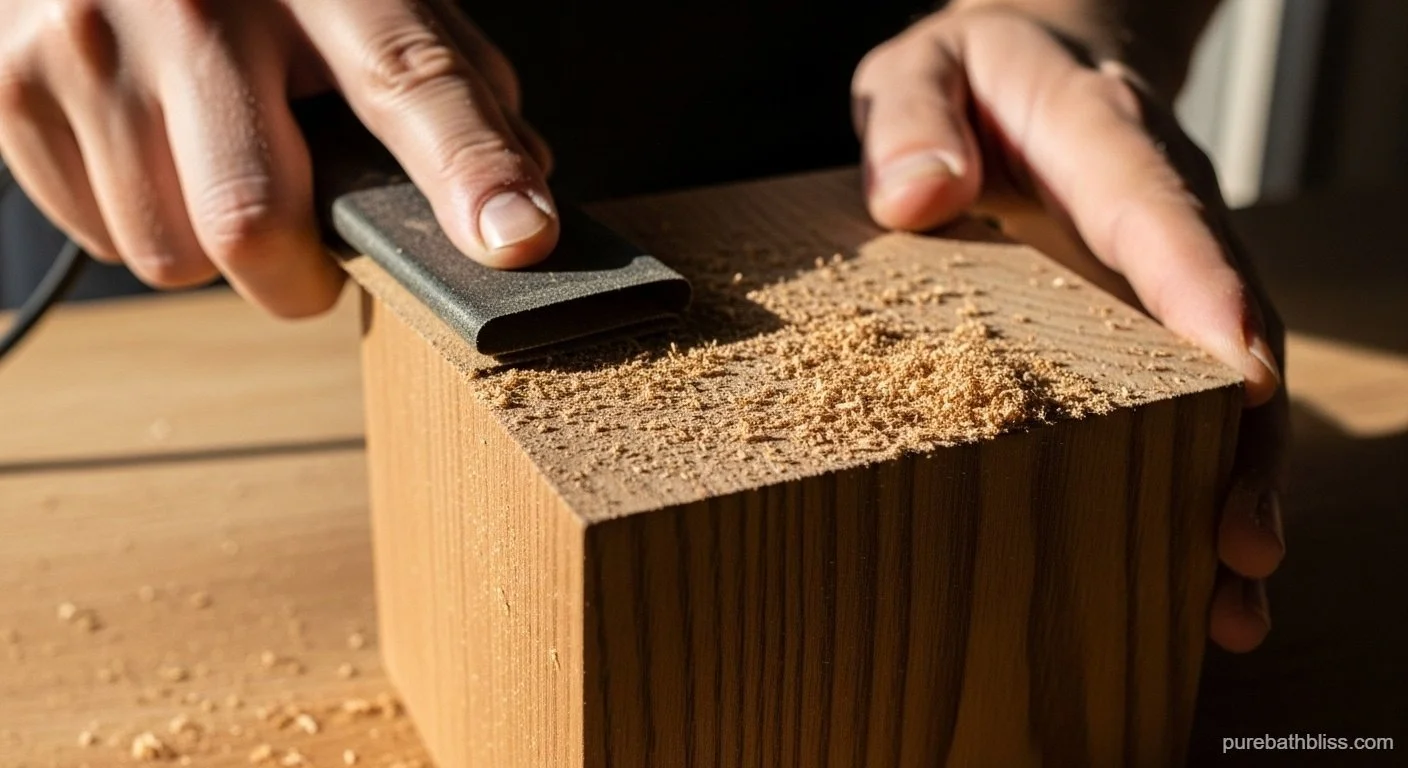
Step 1: Prep the Wood (5 min)
Cut your scrap wood to your desired size (standard soap size is about 4x3 inches, but feel free to go larger for a "spa" look). The crucial step: Sand all surfaces thoroughly. Start with 120-grit to remove splinters, then finish with 220-grit. The smoother the wood, the better the wax will seal.
Step 2: Carve Drainage (5 min)
Standing water is the enemy. You need channels for the water to escape.
Option A (The Gouge): Use a wood carving tool or spoon gouge to carve 3–4 shallow grooves across the width of the board.
Option B (The Drill): Drill a few holes straight through the wood if you plan to use it on a wire rack where water can drip through.
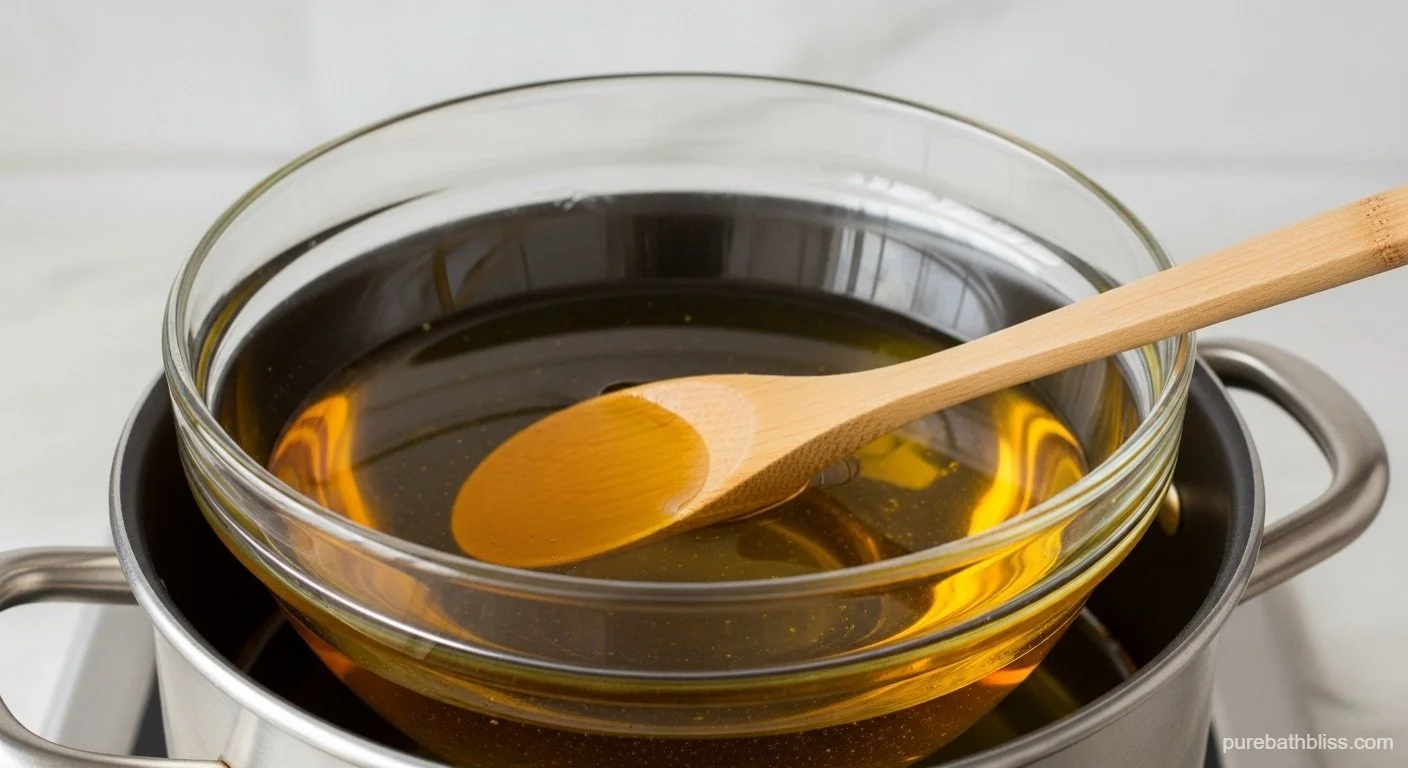
Step 3: Melt the "Varnish" (3 min)
In your double boiler, combine the beeswax pellets and coconut oil over low heat. Stir gently until it looks like liquid gold.
Caution: Wax is flammable. Never melt it directly on a burner; always use the double boiler method.
Step 4: The Hot Wax Application (5 min)
Work quickly! Brush the hot wax onto the wood.
Saturate it: Don't just paint the surface; try to let the wax soak into the grain.
Focus points: Pay extra attention to the end grain (the rough ends of the board) and inside the grooves you just carved, as these are the thirstiest parts of the wood.
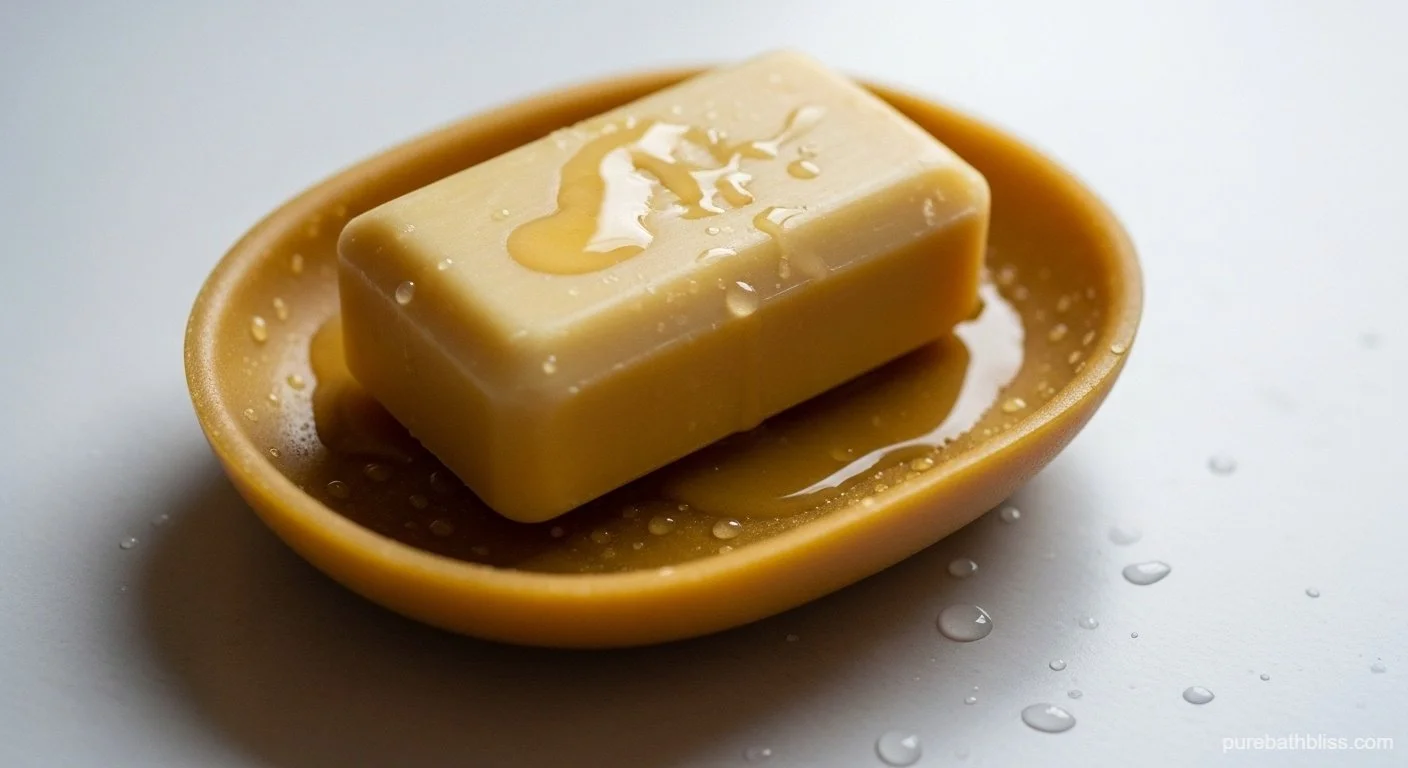
Step 5: Cure & Buff (1 hour)
Let the dish sit for at least an hour until the wax is hard and cool.
The Finish: Take a clean, lint-free cloth and buff the dish vigorously. The friction heats the wax slightly, creating a gorgeous, satin-matte waterproof sheen.
Storage & Care: The "Buy It For Life" Routine
This isn't a disposable item; it's a piece of furniture for your soap.
Weekly: Give it a quick rinse to remove soap scum.
Yearly: If you notice water stopping to bead up, simply melt a little more wax and apply a fresh coat. This "reset" takes 5 minutes and makes the dish practically immortal.
Troubleshooting:
Wax pooling in grooves? You applied too much. Scrape the excess out with a spoon while it's still warm.
Soap sticking? Your grooves might be too shallow. Carve them a bit deeper next time.