How to Clean Your Electric Toothbrush: The Ultimate Eco-Friendly Guide
Transparency Note: We independently select these products based on research and user reviews. If you buy something through our links, we may earn a commission.
We spend a lot of time thinking about what we put into our mouths: organic food, fluoride free toothpaste, and plastic-free floss. But how often do you look at the tool delivering those goods?
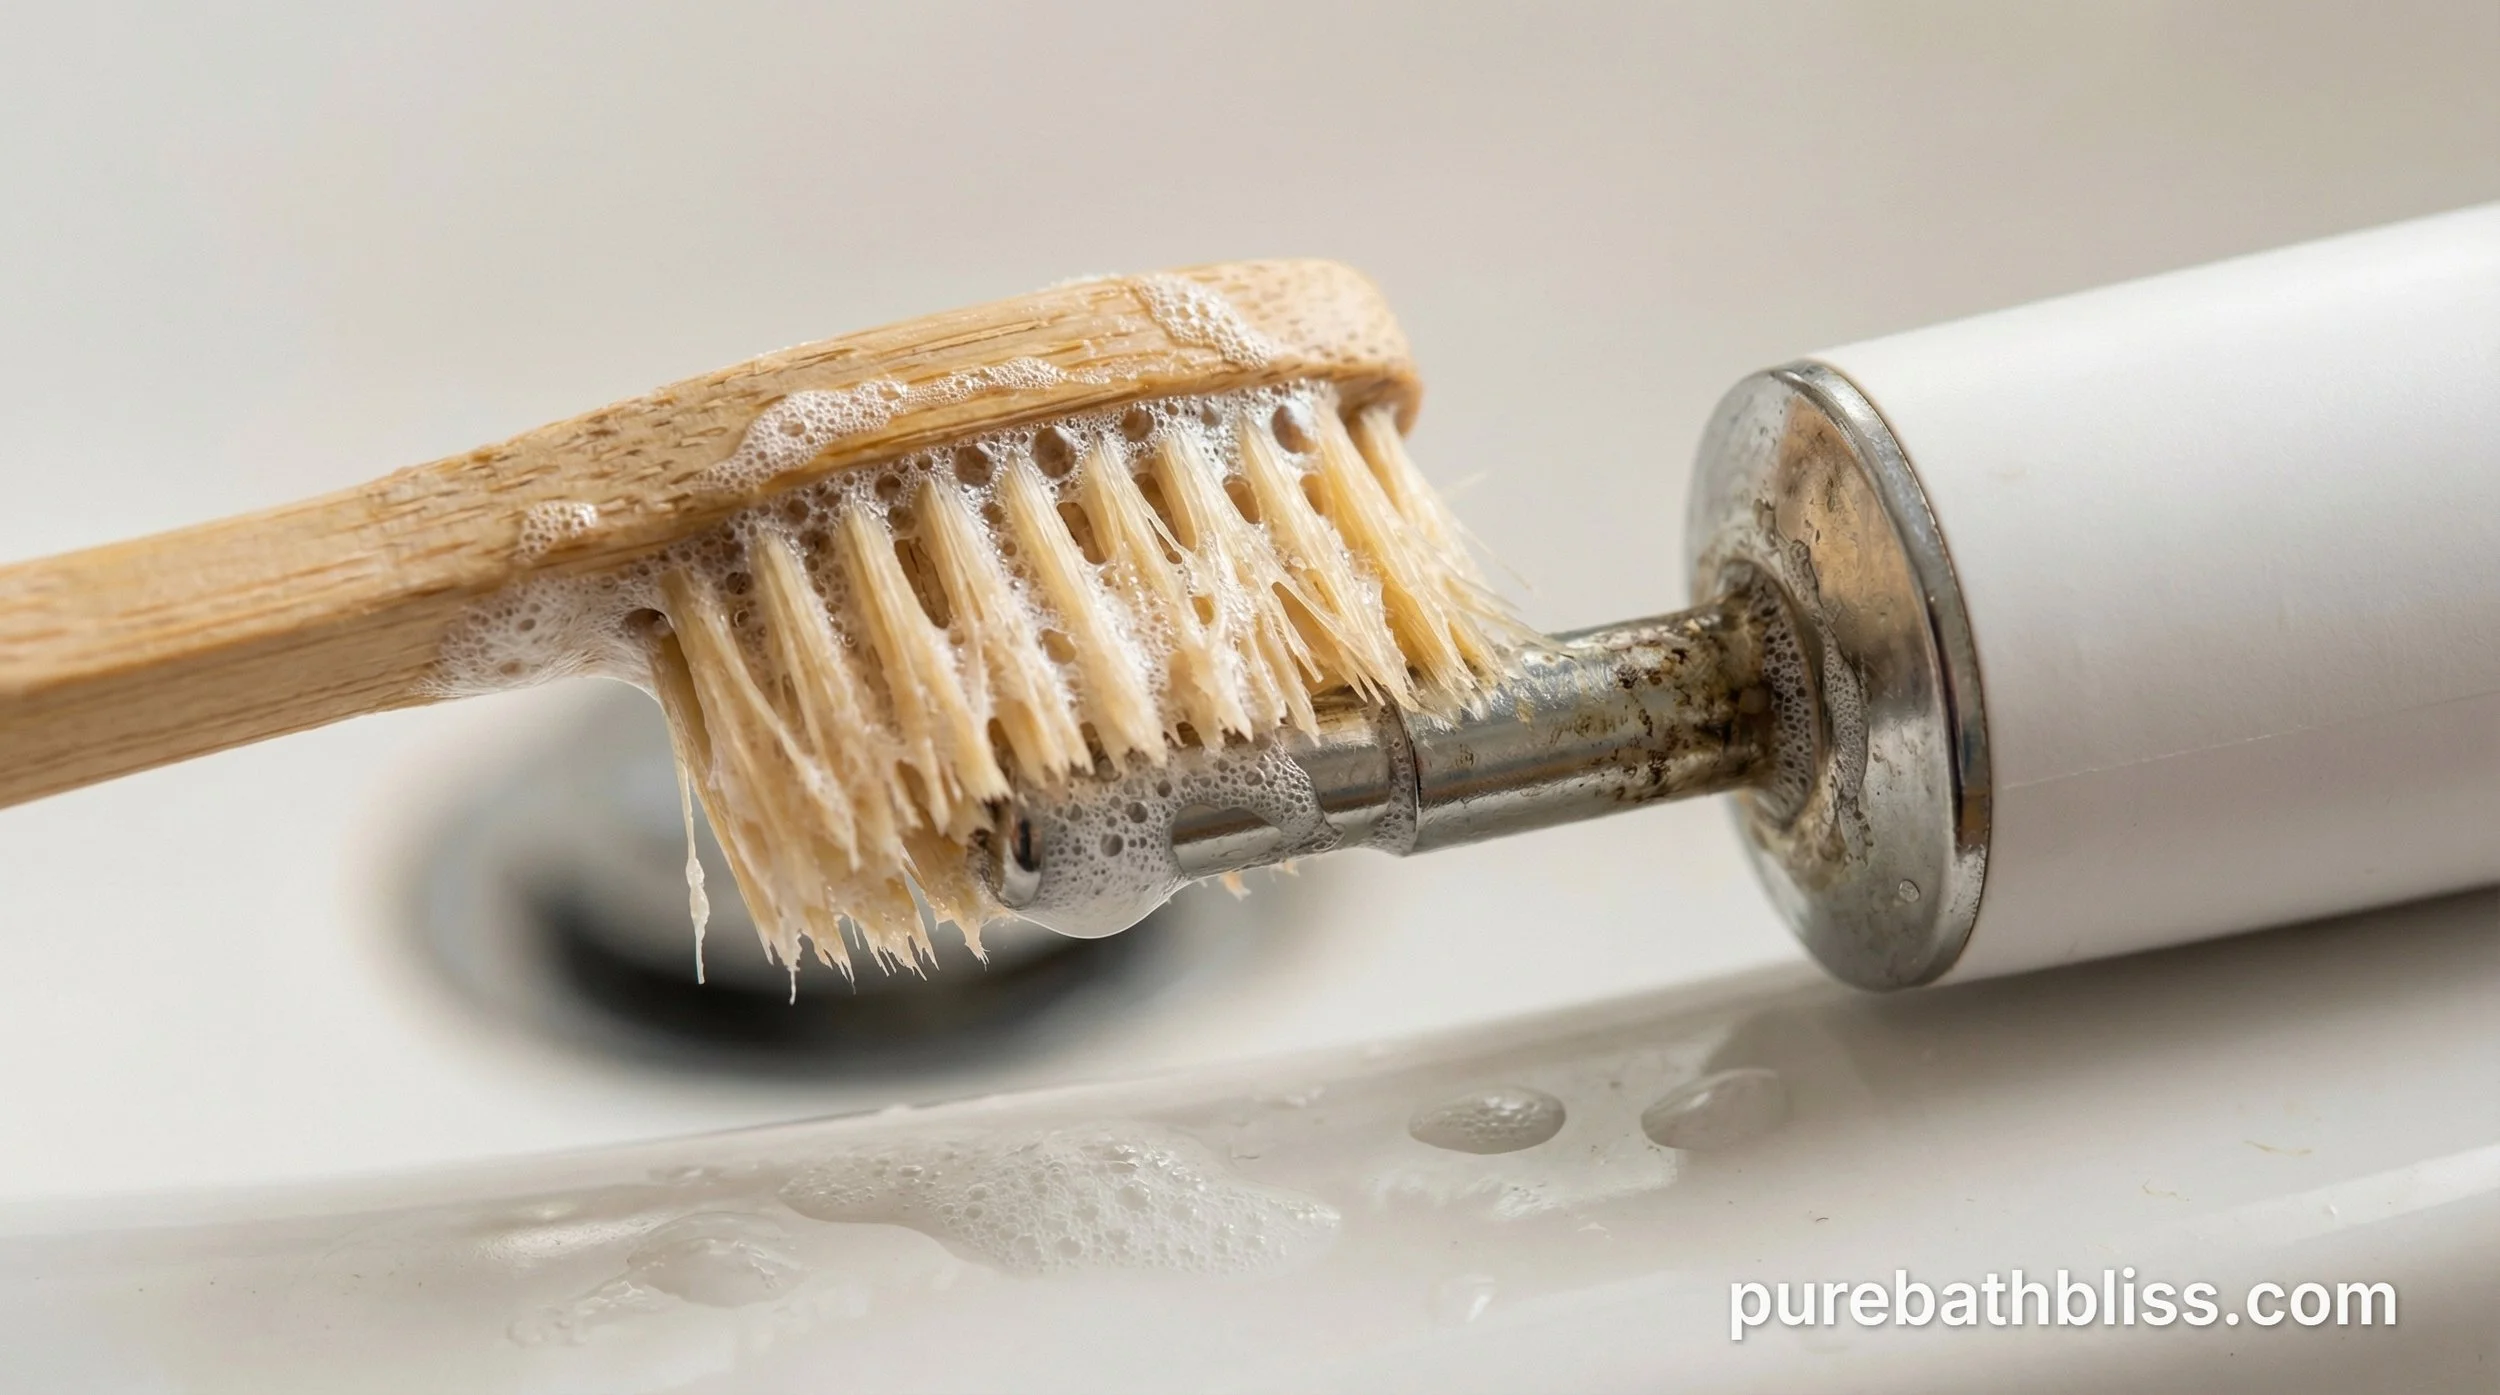
If you use an electric toothbrush, take a close look at the area where the head meets the handle. If you see a crusty white residue or, worse, a dark, slimy buildup, you aren’t alone. This "toothbrush gunk" is a mixture of dried toothpaste, hard water minerals, and bacteria.
In a high-humidity environment (like the one we discussed in our BathroomFan Placement Guide), this area becomes a breeding ground for mold. Today, we’re going to master the 15-minute eco-friendly deep clean that will extend the life of your brush and keep your morning routine truly hygienic.
Part 1: Why Does My Toothbrush Get So Gross?
It seems counterintuitive: how can a tool designed for cleaning become so dirty?
The design of most electric toothbrushes (like Oral-B or Sonicare) includes a small hollow space in the brush head that fits over a metal shaft on the handle. Every time you brush, water and toothpaste slurry seep into this crevice. If you simply rinse the bristles and put the brush back on the charger, that liquid sits in the dark, tight space perfect conditions for a biofilm to form.
The Eco-Problem with "Gunk"
When buildup becomes severe, it can actually interfere with the vibration of the motor or cause the battery to fail prematurely. In a zero-waste lifestyle, the goal is longevity. Replacing a $100 electronic device because of avoidable limescale buildup is the opposite of sustainable living.
Part 2: The 15-Minute Natural Deep Clean
You don't need harsh chemical sprays or bleach to sanitize your toothbrush. In fact, since this tool goes in your mouth, you shouldn't use them.
What You’ll Need:
Distilled White Vinegar: A natural descaler and mild disinfectant.
Baking Soda: For scrubbing away stubborn toothpaste "crust."
Lemon Essential Oil: For its antibacterial properties and fresh scent.
An Old Bamboo Toothbrush: (Your "retired" manual brush) for scrubbing tight corners.
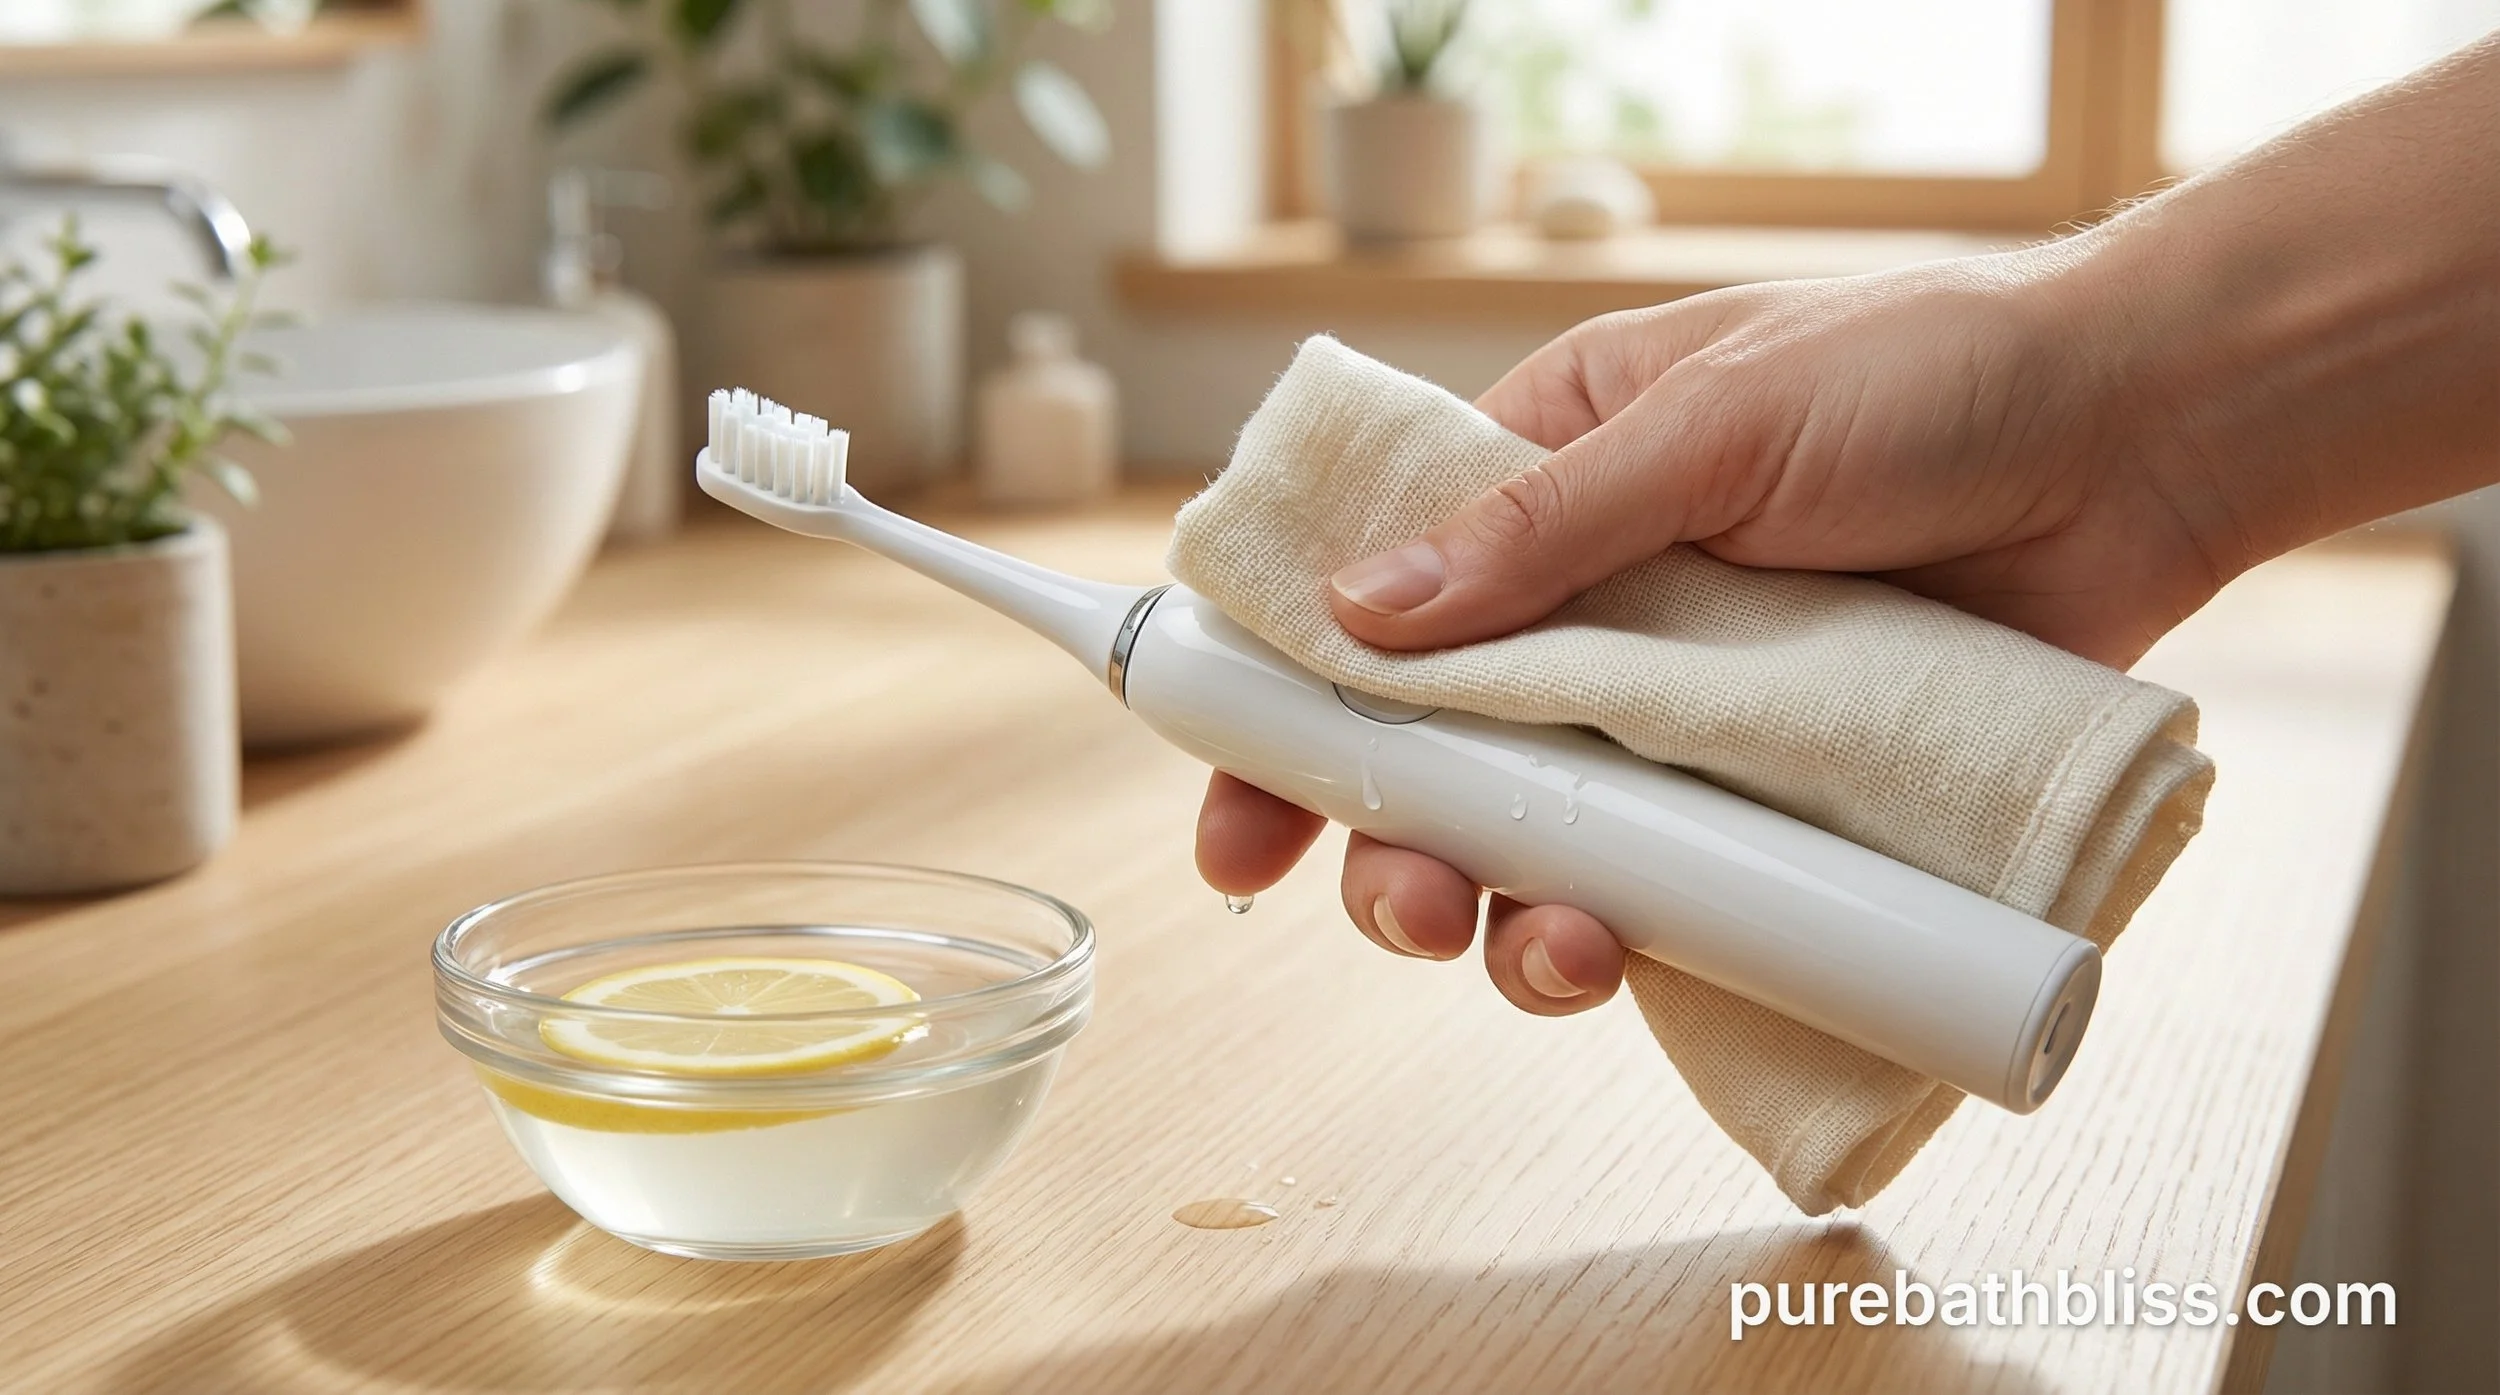
Step 1: The Vinegar Soak (For the Head)
Detach the brush head. Fill a small glass with one part vinegar and two parts warm water. Submerge the brush head (bristles down) and let it sit for 15–30 minutes. The vinegar will break down the calcium deposits and kill most common bathroom bacteria.
Step 2: The Handle Scrub
While the head is soaking, look at the metal shaft on the handle. Dip your "retired" bamboo brush into a paste of baking soda and water. Scrub around the metal peg and the rubber seal. This is usually where the "black gunk" lives.
Pro Tip: Use a cotton swab dipped in vinegar to get into the tiny grooves where the handle meets the power button.
Step 3: The Charging Base
Safety First: Unplug the charger before cleaning!
Wipe the base with a damp cloth dipped in a mix of vinegar and lemon oil. Toothpaste often drips down the handle and pools at the base, creating a sticky ring. Drying this area is crucial to prevent the plastic from degrading or "yellowing."
Part 3: Daily Habits for a Gunk-Free Brush
Deep cleaning is great, but prevention is the ultimate zero-waste win. Add these three steps to your 2-minute brushing routine:
The Separate Rinse: After brushing, remove the head from the handle. Rinse both pieces separately under warm water. This stops the "slurry" from being trapped in the connection point.
The "Shake and Pat": Shake the water out of the brush head and pat the handle dry with your towel. Mold cannot grow without moisture.
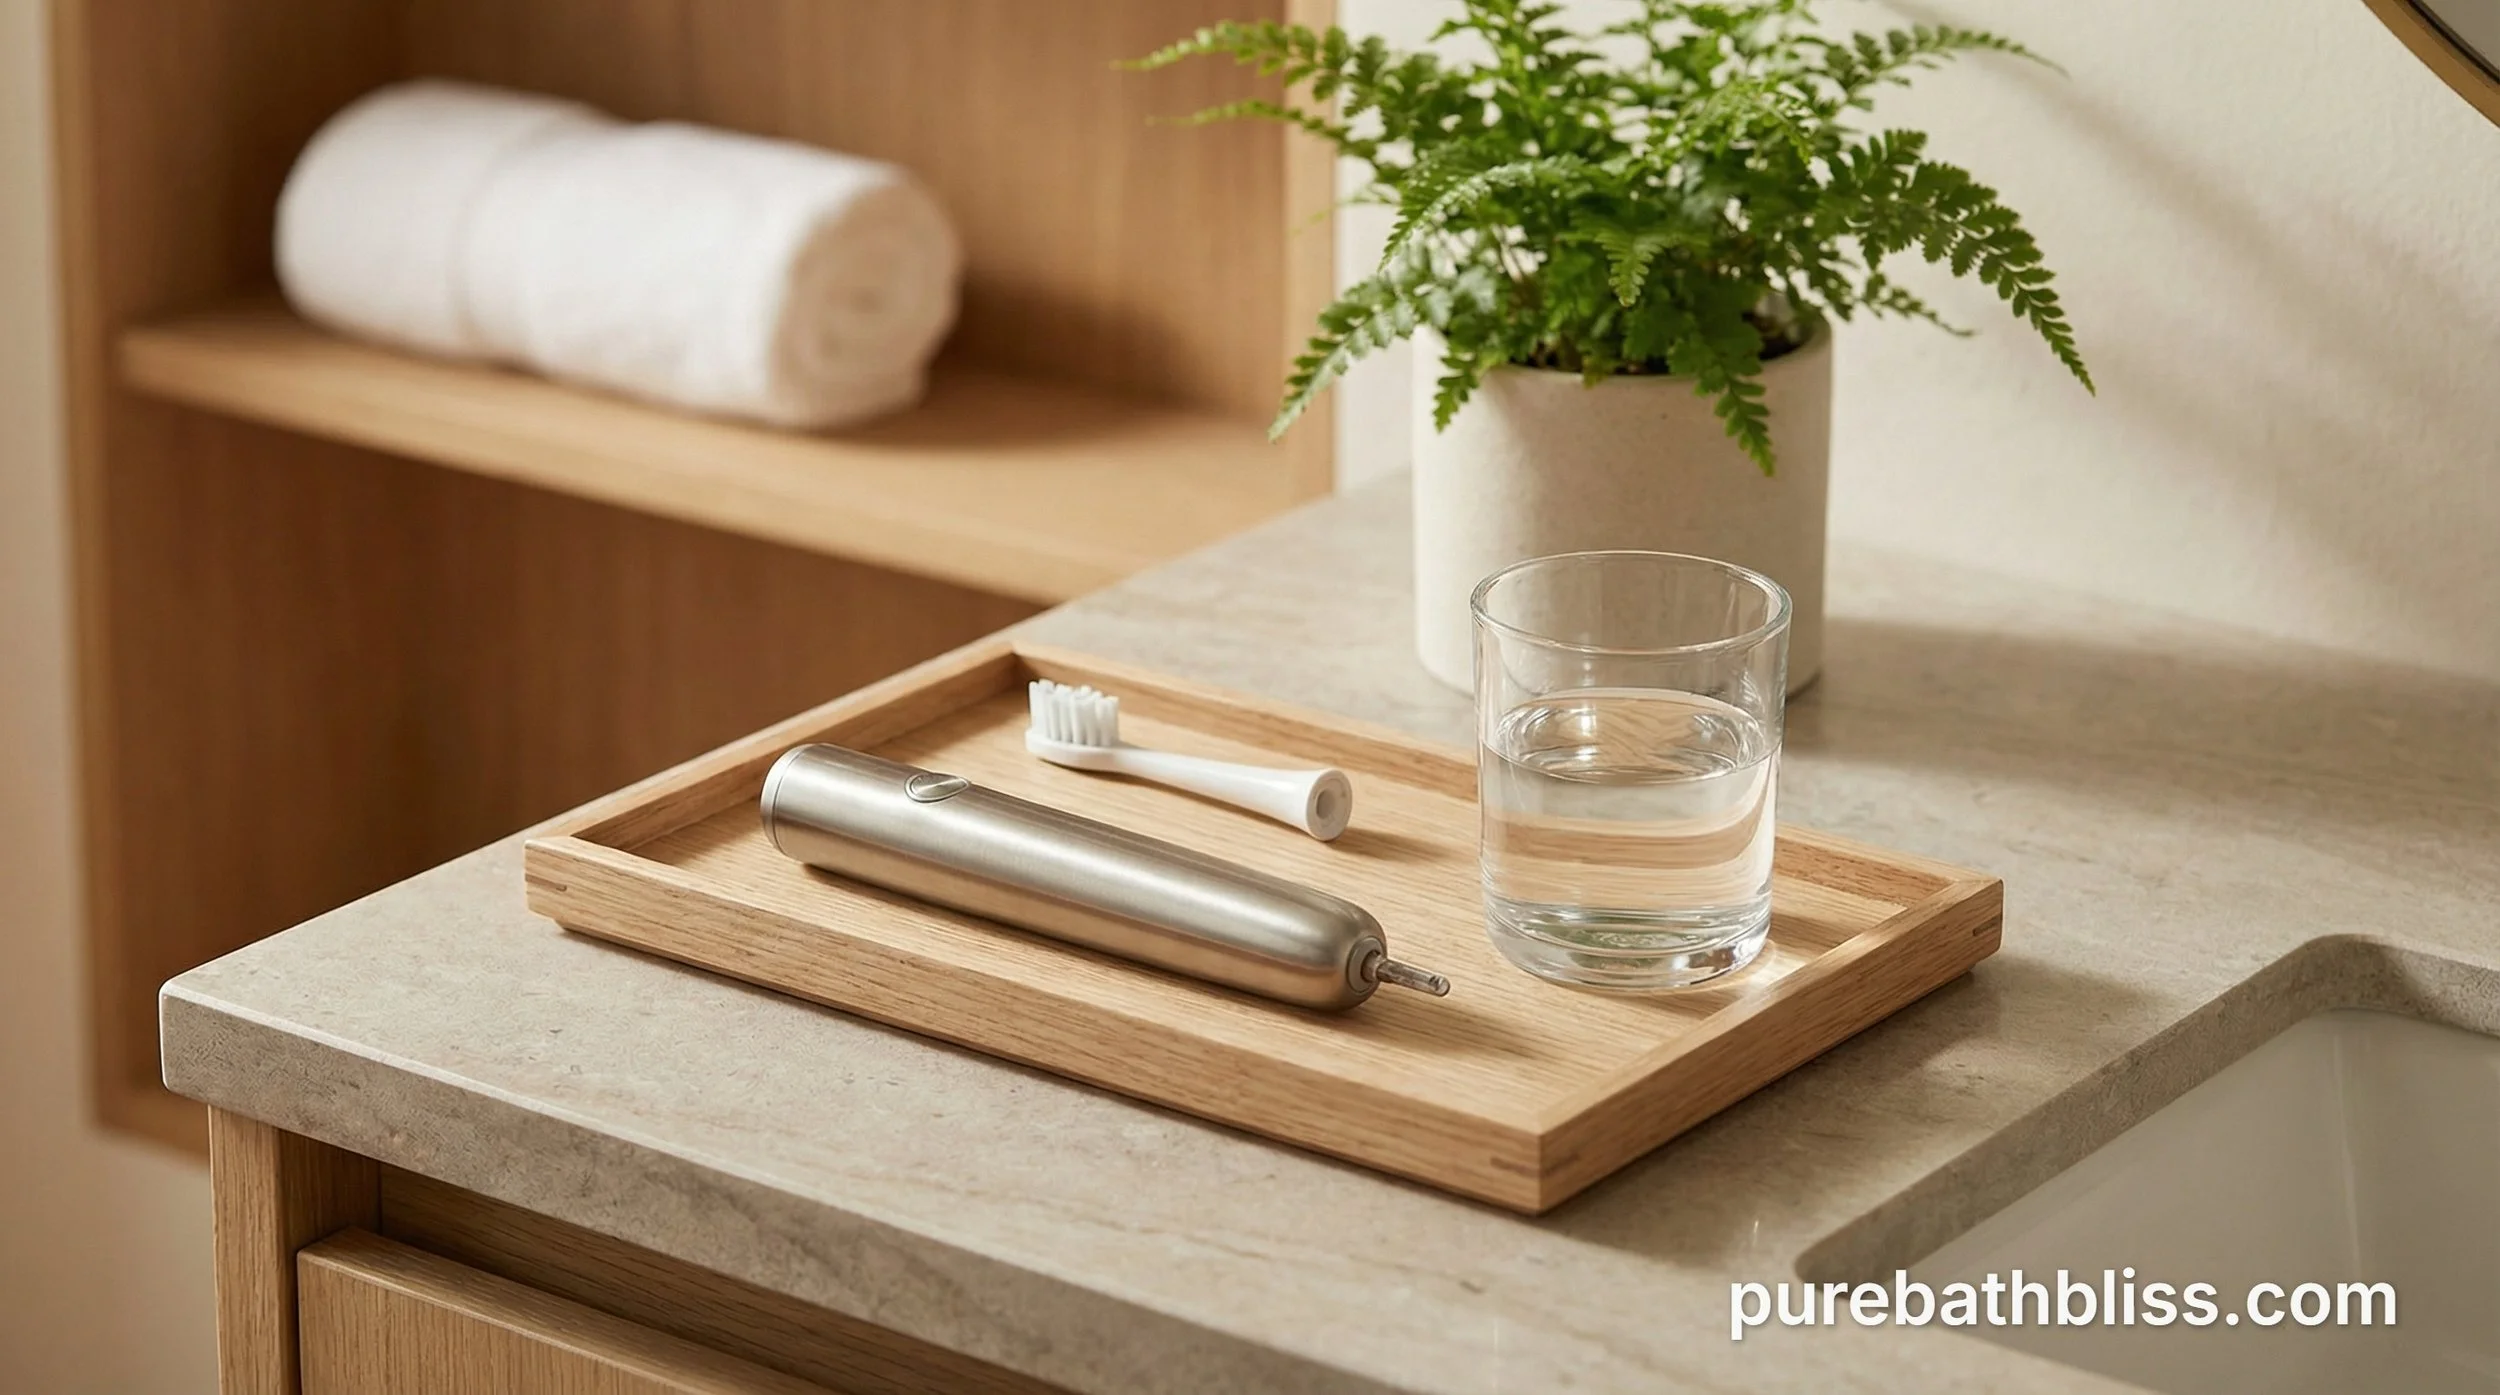
Horizontal or Vertical? While most people store their brush vertically on the charger, this allows water to gravity-drain into the base. If you have the space, store the head and handle separately and horizontally on a breathable wooden tray to ensure total airflow.
Part 4: When to Repair vs. Replace
As a medium-sized site focused on sustainability, we advocate for repair over replacement.
The Battery: If your brush isn't holding a charge, don't toss the whole unit. Many brands now have replaceable batteries, or you can find DIY repair guides on sites like iFixit.
The Seal: If the rubber seal at the top of the handle is cracked, water will get into the motor. A tiny dab of food-grade silicone grease can sometimes extend the life of a drying seal.
The Head: Dentists recommend replacing the head every 3 months. To stay zero-waste, look for recyclable brush head programs (like those offered by TerraCycle) or bamboo-based replacement heads that fit your electric model.
Part 5: Eco-Friendly Disinfection (If You've Been Sick)
If you’ve recently had a cold or the flu, you’ll want a stronger disinfection than just vinegar.
The Hydrogen Peroxide Soak
Hydrogen peroxide (3%) is a powerful oxidizer that kills viruses and bacteria but breaks down into simple water and oxygen—making it much more eco-friendly than bleach.
Method: Soak your brush head in a 50/50 mix of hydrogen peroxide and water for 10 minutes. Rinse thoroughly. This is a "clean" way to ensure you aren't re-infecting yourself the next morning.
🛍️ Shop the Cleaning Kit
The Scrubber: Sustainable Bamboo Toothbrushes (Great for your teeth, even better for cleaning your gear later).
The Solvent: Gallon Distilled White Vinegar (The ultimate eco-cleaning staple).
The Disinfectant: 3% Hydrogen Peroxide (Essential for the flu season).
The Storage: Bamboo Bathroom Vanity Tray (Keeps your brush dry and off the damp counter).
Conclusion
Cleaning your electric toothbrush isn't just about aesthetics; it's about protecting your health and making your high-quality tools last as long as possible. By incorporating a simple vinegar soak and a daily "dry down," you keep your Zero-Waste Sanctuary running smoothly and your smile genuinely clean.