Four Warning Signs Your Toilet Is Wasting Water (And How to Fix Each One)
Originally published October 2025, Updated July 2026
Transparency Note: We independently select these products based on research and user reviews. If you buy something through our links, we may earn a commission.
About two years ago our water bill jumped by about forty dollars in a single month. No extra laundry, no guests, same household of six people doing the same things. I went through the usual suspects, checked the garden hose fittings, and looked under the sink for drips, but found nothing obvious. Then I dropped some food coloring into the toilet tank in our main bathroom, waited fifteen minutes, and came back to find the bowl water clearly tinted blue. The flapper was leaking, completely silently, and had probably been doing so for months.
The fix was a $6 flapper from the hardware store and about eight minutes of work. The next water bill was back to normal.
According to the EPA's WaterSense program, ten percent of homes have leaks wasting 90 gallons or more per day, and a minor toilet flapper leak can waste between 30 and 250 gallons daily without making any sound you would notice. A medium leak at 250 gallons per day adds roughly $3 per day to your water bill, which over three months is nearly $300 in water you paid for and never used. Here are the four signs that tell you something is wrong, the test that confirms it, and the fix for each cause.
How a Toilet Is Supposed to Work
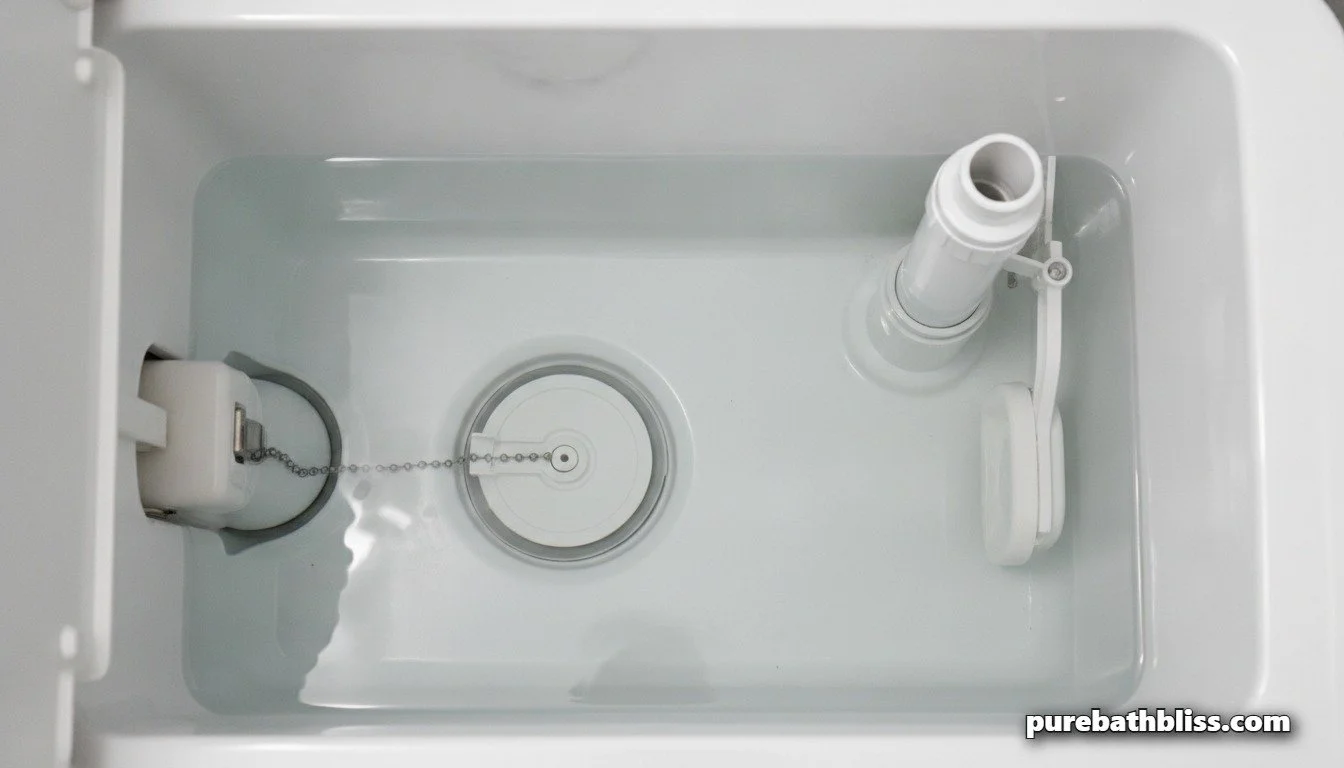
Understanding the three components that cause most leaks makes diagnosing them considerably easier. A toilet tank has three moving parts: the flapper, the fill valve, and the float.
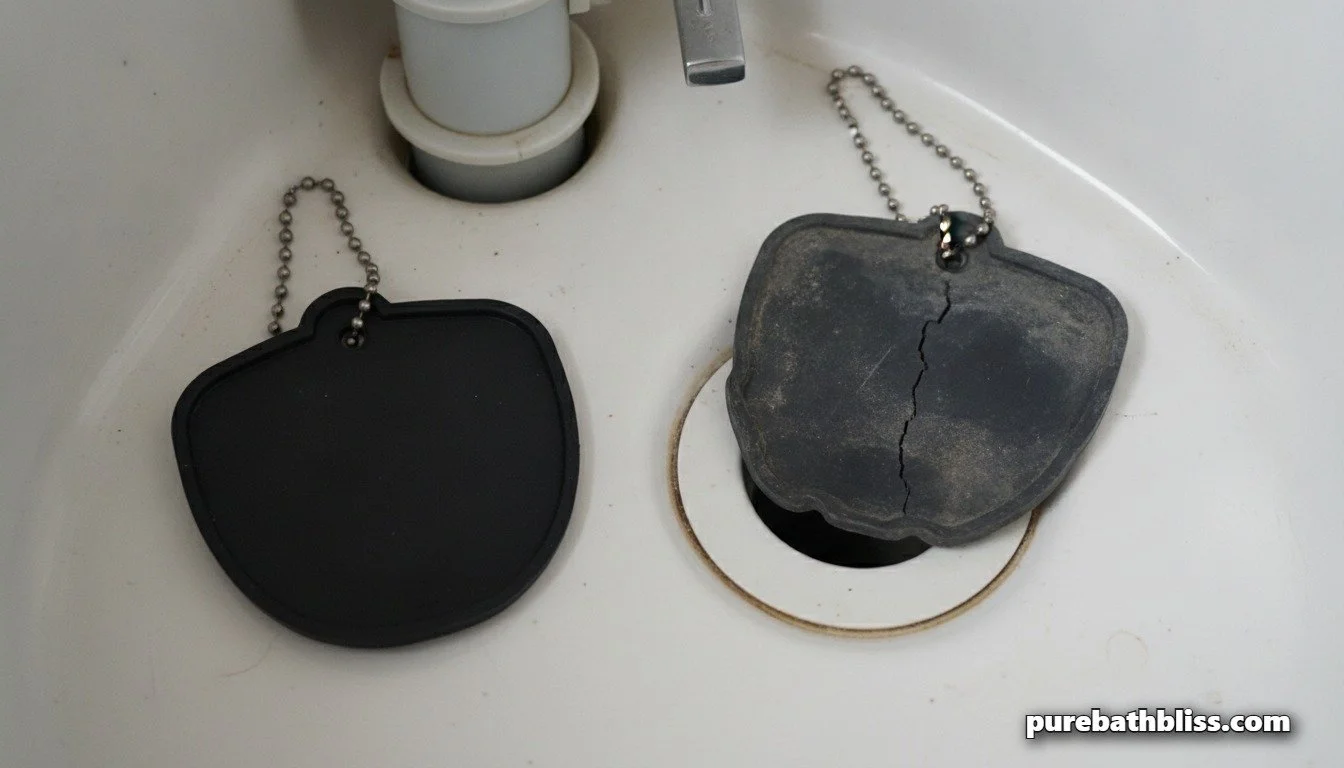
The flapper is a rubber seal at the bottom of the tank that lifts when you flush, allowing water to rush into the bowl, then seals again so the tank can refill. When it wears out, the rubber warps or cracks and no longer seals tightly. Water seeps continuously from the tank into the bowl, the tank level drops, the fill valve activates to top it up, and the cycle repeats silently all day and all night.
The fill valve is the mechanism that brings fresh water into the tank after a flush. It is controlled by the float, which rises with the water level and shuts the valve off when the water reaches the correct height. If the float is set too high, or the fill valve itself is faulty, water runs continuously down the overflow tube and into the bowl.
The wax ring is not inside the tank but underneath the toilet base, sealing the connection between the toilet and the drain pipe in the floor. Unlike flapper and fill valve leaks which send water down the drain invisibly, a failed wax ring leaks water onto the floor, which makes it more obvious but also more damaging if ignored.
Warning Sign 1: A Persistent Hiss or Trickle After Flushing
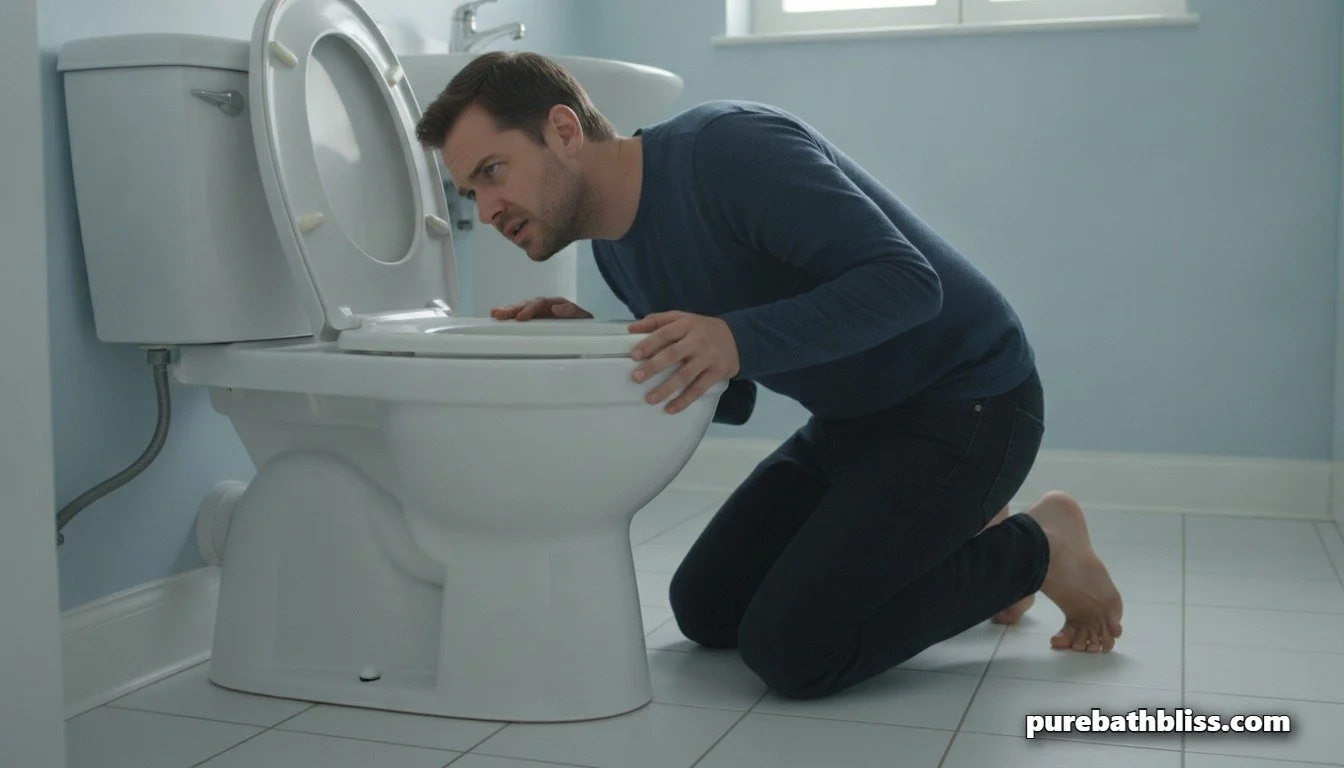
After you flush, the tank refills over about thirty to sixty seconds and then goes completely silent. If you hear a persistent hiss, sizzle, or very faint trickling sound that continues after the fill cycle should be complete, water is still moving somewhere it should not be.
The most common cause is the flapper not sealing fully after the flush. Water seeps from the tank into the bowl at a rate too slow to create an obvious sound but fast enough to keep the tank level dropping, which triggers the fill valve repeatedly. In a quiet bathroom at night this sometimes sounds like a faint, intermittent hiss. During the day it is often completely inaudible.
A second cause is the fill valve running continuously because the float is set too high, allowing water to drain down the overflow tube rather than shutting off. Remove the tank lid and look at the water level. It should sit about one inch below the top of the overflow tube, which is the vertical plastic pipe that stands up from the bottom of the tank. If the water is level with or flowing over the top of that tube, the float needs to be adjusted downward.
Quick check: Lift the tank lid and press down gently on the flapper with your finger. If the hissing stops immediately, the flapper is the problem and needs replacing.
Warning Sign 2: Dampness or Staining Around the Toilet Base
Water on the floor around the base of the toilet has two possible sources and they require different responses. The first is condensation. In a warm, humid bathroom, cold water entering the tank can cause moisture to form on the outside of the tank and drip to the floor. This is more common in summer, feels cold to the touch, and appears fairly uniformly around the tank rather than specifically at the base of the bowl.
The second is a failing wax ring, which is the scenario that requires immediate attention. The wax ring sits between the toilet base and the drain flange in the floor, creating a watertight seal. When it fails, sewer water and gas can seep out at the base with every flush. The signs of a wax ring failure are a stain that is yellowish or brownish rather than clear, a foul smell at floor level even after cleaning, a toilet that rocks or wobbles slightly when you sit on it, or soft or discoloured flooring around the base.
Run a dry piece of toilet paper or a dry cloth around the base of the toilet and along the floor. If it comes away damp or discoloured, you have an external leak. Press gently on the toilet base from side to side. Any movement at all means the toilet has shifted off the wax ring and the seal has likely failed.
A failed wax ring is a job worth getting right rather than rushing. If water has been seeping under the base for weeks, the subfloor beneath the tile may already have moisture damage that needs to be assessed before the toilet is reinstalled. This is one of those cases where the visible symptom is a sign of a potentially larger problem underneath. Do not ignore a damp toilet base.
Warning Sign 3: A Weak or Sluggish Flush
A toilet that used to flush reliably with good force but has gradually become sluggish, requires multiple flushes, or sounds different during the flush cycle is telling you something has changed in the tank. When a flapper leaks slowly and continuously, the water level in the tank never fully recovers between uses. You flush before the tank has reached its normal fill level, and the reduced volume of water produces a weaker flush that may not clear the bowl effectively.
Mineral buildup in the rim jets, the small holes under the toilet rim that direct water into the bowl during the flush, can cause the same symptom. Hard water deposits gradually restrict the jet openings, reducing the flow rate and weakening the flush. This is a separate issue from the flapper but produces an identical symptom. The distinction is that mineral-blocked rim jets respond to a vinegar treatment poured into the overflow tube, while a flapper leak requires replacing the flapper.
A fill valve that is slow or partially failing can also cause a weak flush by failing to deliver the tank to full capacity before you flush again. Listen to how long the tank takes to refill after a flush. It should reach full in thirty to sixty seconds. If it takes significantly longer, or cycles on and off repeatedly before settling, the fill valve is struggling and may need replacement.
Warning Sign 4: An Unexplained Spike in Your Water Bill
This is often the first sign that catches people's attention, and it is the one that motivated me to actually investigate two years ago. A water bill that increases significantly month over month without any obvious explanation in household behaviour is almost always a leak somewhere, and the toilet is the most common source.
Pull up your water bills for the last six months and look at the pattern. A legitimate increase in usage from summer garden watering, houseguests, or a new baby tends to be gradual and predictable. A sudden jump in a single billing cycle, or a slow creep that started several months ago and has not reversed, is the pattern of an undetected leak rather than a change in behaviour.
The meter test is the most reliable way to confirm a leak in the house before you start looking for the source. Shut off every water-using appliance and fixture in the house, including the washing machine, dishwasher, and every tap. Find your main water meter and photograph or write down the reading. Wait exactly two hours without using any water. Check the meter again. If the reading has changed at all, water is flowing somewhere in the house and the toilet is the first place to check.
A family of four using more than 12,000 gallons per month in winter is the EPA's threshold for suspecting a serious household leak. In summer the figure is higher due to legitimate outdoor use, but a sudden jump beyond your normal summer baseline is still worth investigating.
The Dye Test: The Definitive Confirmation
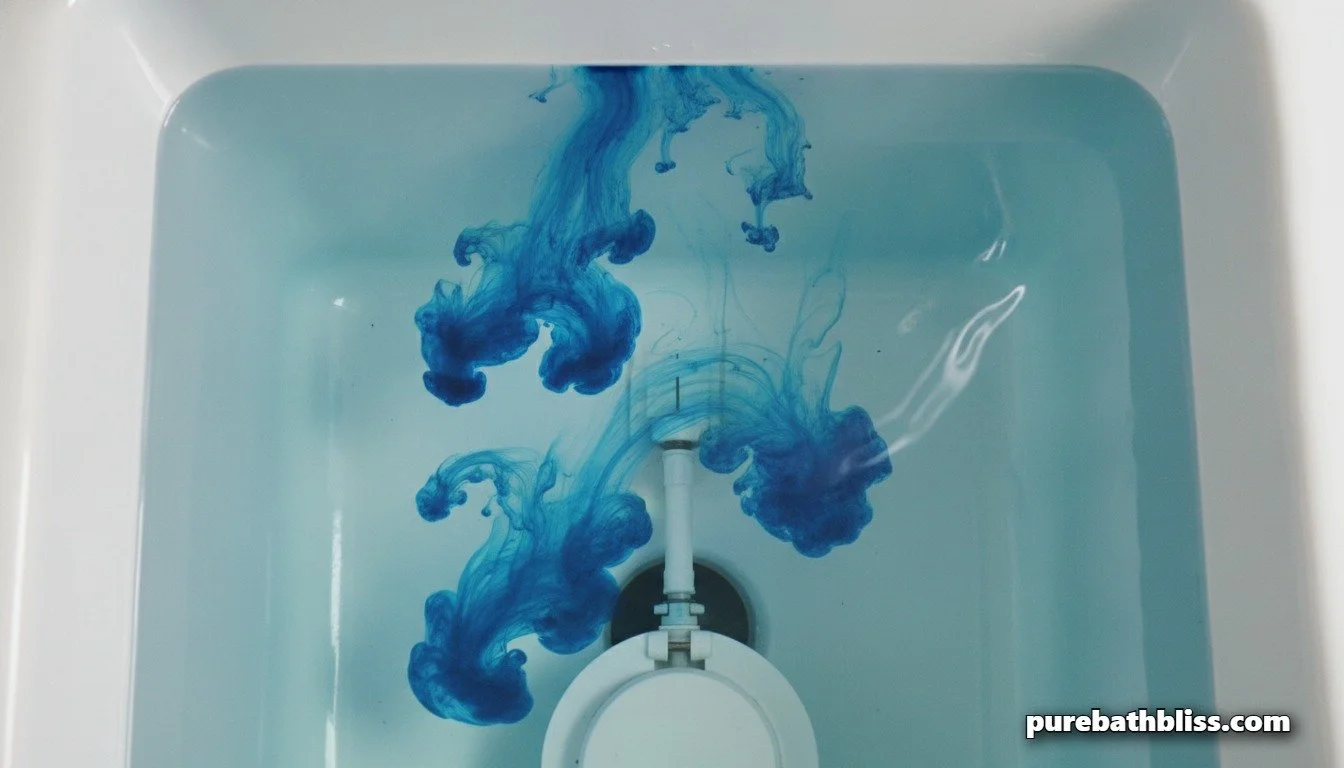
If you have any suspicion of a silent flapper leak but no obvious audible sign, the dye test confirms or eliminates it in fifteen minutes with no tools and no cost. Remove the tank lid and add five to six drops of food coloring; blue or green works best for visibility, or drop in a dye test tablet designed for this exact purpose. Do not flush. Wait fifteen minutes. Lift the toilet seat and look at the bowl's water. If you see any color in the bowl, the flapper is leaking, and water has passed from the tank into the bowl without a flush.
This test works because the flapper is the only connection between the tank and the bowl. If colored water appears in the bowl without flushing, it came through the flapper seal. There is no other explanation. The dye test eliminates any ambiguity and tells you definitively that a flapper replacement will solve the problem.
The Fixes
| Symptom | Most Likely Cause | Quick Confirmation | Fix | DIY or Plumber? |
|---|---|---|---|---|
| Persistent hiss or trickle after flush | Worn flapper not sealing | Press flapper down — hiss stops immediately | Replace flapper ($5 to $10, 8 minutes) | DIY |
| Continuous running sound | Float set too high, water running over overflow tube | Water level at or above overflow tube top | Adjust float downward so water sits 1 inch below overflow tube | DIY |
| Dye test shows colour in bowl | Flapper leaking silently | Dye test is the confirmation | Replace flapper | DIY |
| Weak or sluggish flush | Flapper leak preventing full tank fill, or blocked rim jets | Time the refill — if longer than 60 seconds, fill valve or flapper issue | Replace flapper, or vinegar treatment for rim jets | DIY |
| Fill valve noisy or won't shut off | Faulty fill valve | Float adjustment does not resolve it | Replace fill valve ($10 to $15, 20 minutes) | DIY |
| Dampness or staining at toilet base | Failed wax ring or condensation | Dry cloth test, check for toilet wobble, smell for sewer odour | Replace wax ring if confirmed. Assess subfloor first. | DIY or plumber depending on subfloor damage |
| Unexplained water bill spike | Silent flapper leak, possibly undetected for months | Meter test, then dye test every toilet | Dye test to identify which toilet, then replace flapper | DIY |
| Cracked bowl or tank | Physical damage to porcelain | Visible crack, often at waterline or around bolt holes | Full toilet replacement required | Plumber recommended |
Replacing the Flapper
This is the most common fix and one of the most satisfying DIY plumbing tasks because it is genuinely simple and the result is immediate. Turn off the water supply valve at the wall behind the toilet by turning it clockwise until it stops. Flush the toilet to empty the tank. Unhook the old flapper from the two pegs on either side of the flush valve seat and detach the chain from the flush handle arm. Take the old flapper to the hardware store to match the size, or take a photo of the toilet brand name inside the tank. Most modern toilets use a standard 2-inch flapper but some use 3-inch. A universal flapper works on most toilets if you cannot find an exact match.
Snap the new flapper onto the pegs, reconnect the chain to the handle arm leaving about half an inch of slack, turn the water back on, and do the dye test again after fifteen minutes to confirm the seal. Total time: five to eight minutes. A quality replacement flapper costs $5 to $10 and the EPA recommends replacing yours every five years regardless of whether you have detected a leak, since rubber degrades gradually before showing obvious failure.
Adjusting the Float
If the water level in the tank is too high and running over the overflow tube, the float needs to be adjusted downward. On a ball float, bend the float arm down slightly so the ball sits lower in the water and shuts the fill valve off earlier. On a modern cup float, turn the adjustment screw on the fill valve counterclockwise to lower the water level, or pinch the clip on the float cup and slide it down the fill valve shaft. The target water level is one inch below the top of the overflow tube.
Replacing the Fill Valve
A fill valve that is noisy, slow, or will not shut off even after float adjustment is worth replacing rather than repeatedly adjusting. A universal fill valve replacement costs $10 to $15, takes about twenty minutes to install, and comes with clear instructions. The main steps are shutting off the water supply, emptying the tank, disconnecting the water supply line from the bottom of the tank, unscrewing the old fill valve lock nut, dropping in the new valve, and reconnecting. The Fluidmaster 400A is the industry standard and fits the vast majority of toilets made in the last thirty years.
Wax Ring Replacement
A failed wax ring requires removing the toilet entirely, which is a more involved project but still manageable for a confident DIYer. The toilet needs to be emptied, disconnected from the water supply, unbolted from the floor, lifted clear, the old wax ring removed and the flange cleaned, and a new wax ring seated before the toilet is reinstalled. If the subfloor beneath is soft or shows water damage, assess and repair that before reinstalling the toilet. Our recaulking guide covers the sealing step around the toilet base after reinstallation, which is the finishing detail that most DIY guides skip and that prevents future base leaks from going unnoticed.
When to Call a Plumber
Most toilet leaks are DIY repairs. The situations that genuinely warrant a plumber are a cracked toilet bowl or tank, which requires full fixture replacement; significant subfloor damage from a long-standing wax ring failure; a persistent leak that continues after you have replaced both the flapper and the fill valve, which suggests a problem deeper in the trap or the drain system; and multiple fixtures draining slowly or gurgling simultaneously, which indicates a main sewer line issue rather than a toilet-specific problem.
For the vast majority of running toilets, the flapper is the cause, the dye test confirms it, and a $6 repair resolves it. The same water efficiency mindset that applies to the toilet applies to every other fixture in the bathroom. If you are interested in the broader picture of where water is being wasted in your bathroom, our faucet aerator guide covers the other two-minute fix that most people never do and that saves hundreds of gallons per year from a single tap.
The Maintenance Schedule
Building a simple annual toilet check into your home maintenance routine prevents the months of wasted water that happen when a flapper fails gradually and nobody investigates. Once a year, do the dye test on every toilet in the house, check the water level in every tank relative to the overflow tube, press down on every flapper to confirm it still seals when pressure is applied, and check the base of every toilet with a dry cloth for any sign of moisture. It takes ten minutes for the whole house and catches problems before they show up as a surprise on the water bill. The EPA recommends replacing flappers proactively every five years, which costs less than two dollars per toilet per year and eliminates the most common cause of silent water waste entirely.